How Often Should You Replace Air Ducts? (Denver HVAC Expert)
Written by Lance Fredrickson — ICC Certified HVAC Specialist | EPA 608 Universal

20+ years serving the Denver metro • Blue Collar Heating & Air, Northglenn CO

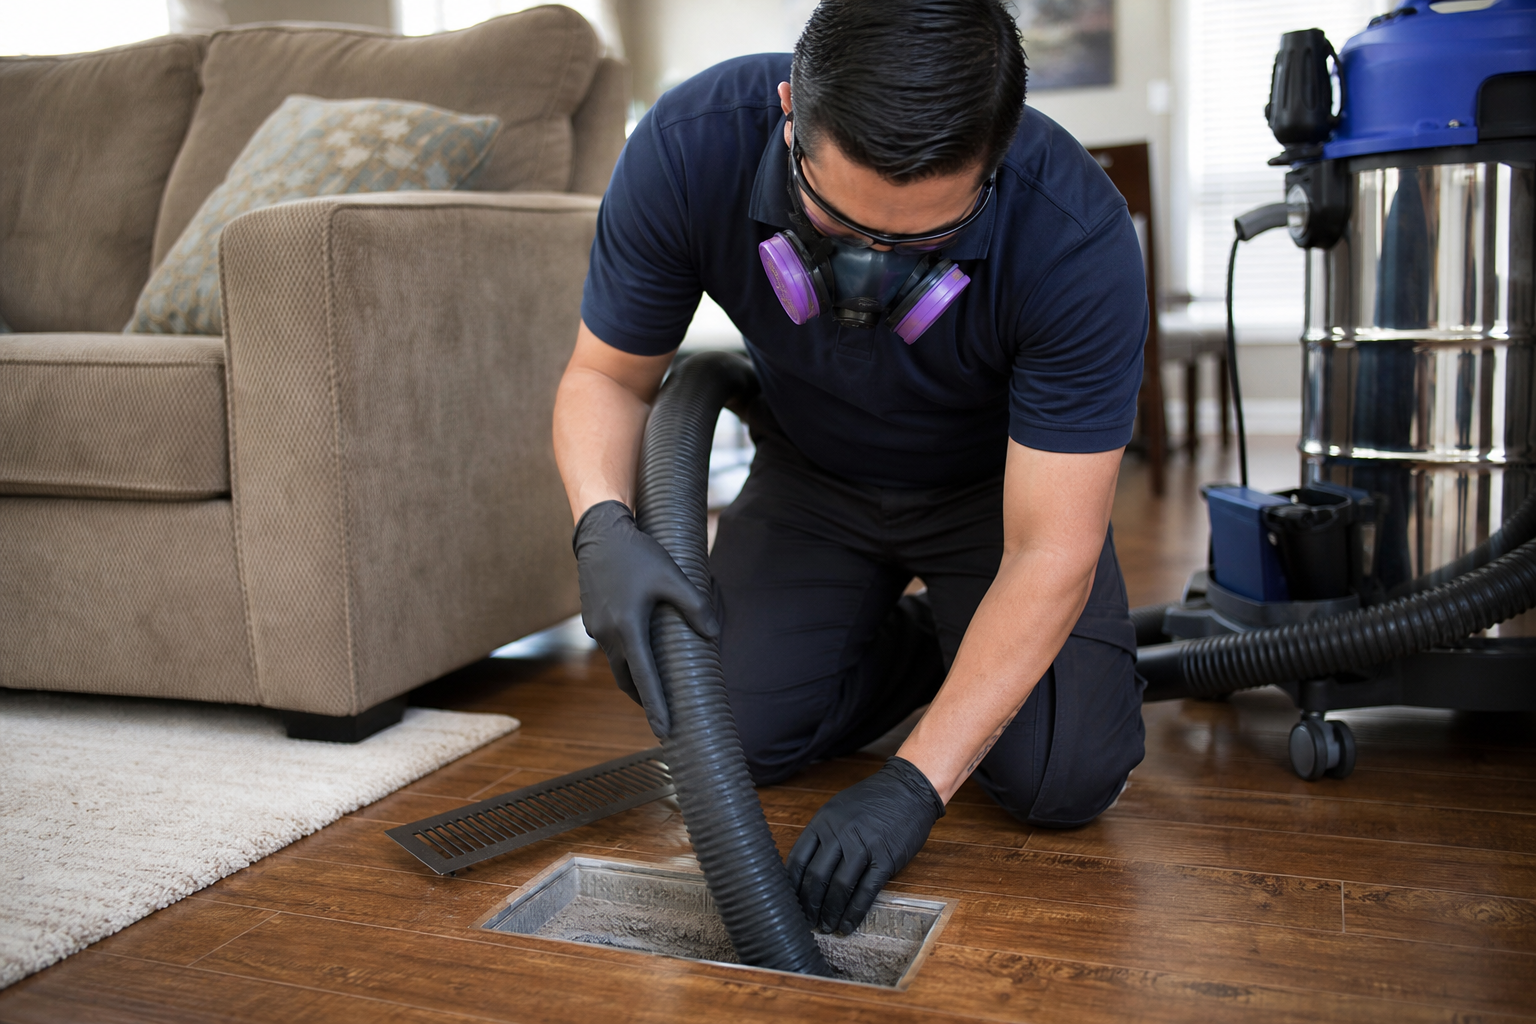
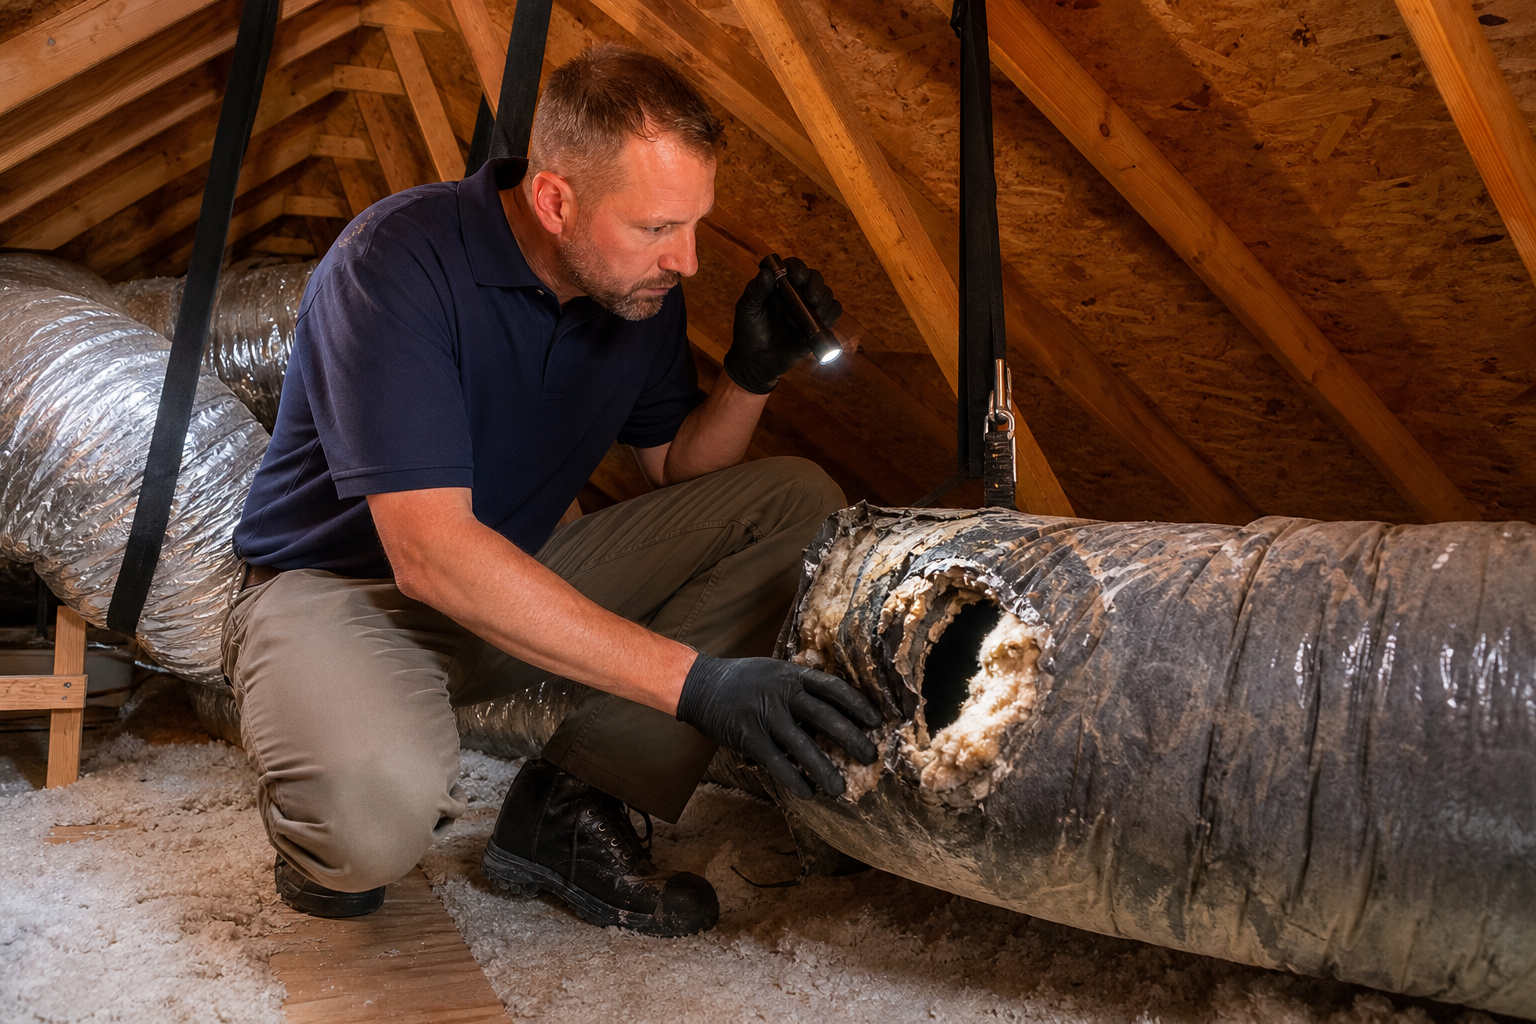
HVAC inspection checklist for duct assessment in Denver home
Duct inspection should be part of every major HVAC service — Denver’s dry climate and wildfire smoke accelerate duct degradation compared to sea-level homes.

Air ducts are the invisible infrastructure of your home’s HVAC system — and they rarely get attention until something goes noticeably wrong. The national average duct lifespan is cited at 15–25 years, but in Denver’s dry climate, that range is compressed. I’ve inspected 15-year-old flex duct systems that were falling apart and 30-year-old sheet metal systems that were still in good shape. Age alone isn’t the answer.

At 5,280 ft, Denver’s low humidity (average 40–50% relative humidity, dropping below 20% in winter) is the primary accelerant of duct degradation. The mastic sealant and foil tape used at duct joints dries and cracks faster. Flexible duct’s inner liner becomes brittle with years of thermal cycling in dry air. And years of wildfire smoke exposure coat interior surfaces with fine particles that carry acids and VOCs.

⚡ Quick Answer: Denver Duct Lifespan & Replacement

Sheet metal ducts (galvanized steel)25–50 years
Flexible duct (fiberglass or polyester core)15–25 years (less in Denver)
Duct board (fiberglass board ducts)15–20 years
Denver dry climate reduction factor3–5 years shorter
Full duct replacement cost (average home)$3,500–$7,000
Partial repair / Aeroseal sealing$1,000–$3,000

Duct Lifespan by Material Type

Sheet Metal (Galvanized Steel)

Sheet metal ductwork is the most durable type. Properly installed and maintained, galvanized steel ducts can last 50+ years. The main failure points are not the metal itself but the sealant at joints — mastic compound or foil tape that dries and cracks over time, creating air leaks at seams and connections. In Denver’s dry climate, joint sealants fail faster than in humid climates where the moisture keeps them somewhat pliable.

Flexible Duct

Flexible duct — the corrugated tubes of fiberglass or polyester core with foil or vinyl outer jacket — is the most common duct type in Denver homes built after the 1980s. It’s cheaper to install than sheet metal and flexible enough to navigate around obstacles in attics and crawlspaces. It’s also the most susceptible to Denver’s climate. The inner plastic liner becomes brittle in dry conditions, developing cracks and holes. UV exposure in attics accelerates outer jacket deterioration. We see flex duct in Denver failing at 12–15 years, compared to 20–25 years in more humid markets.

Duct Board

Duct board — rigid fiberglass panels cut and formed into duct shapes — offers good insulation but is susceptible to moisture damage (not usually a Denver problem) and physical damage from improper installation or attic traffic. It also accumulates fiberglass particles internally over time, which can affect air quality. Lifespan is 15–20 years in Denver conditions.

Signs Your Ducts Are Failing

  • Rooms that were comfortable before now don’t heat or cool properly: Gradual air loss from duct leaks means less conditioned air reaches distant rooms
  • Noticeably higher energy bills over 2–3 years without usage change: Duct leakage of 20–30% (common in older systems) means your HVAC works that much harder for the same result
  • Visible duct damage: Disconnected sections, visibly crushed or collapsed flex duct sections, holes or gaps at joints
  • Dust accumulation at supply registers despite regular filter changes: Suggests duct leaks are pulling unconditioned, unfiltered air from attic or crawlspace
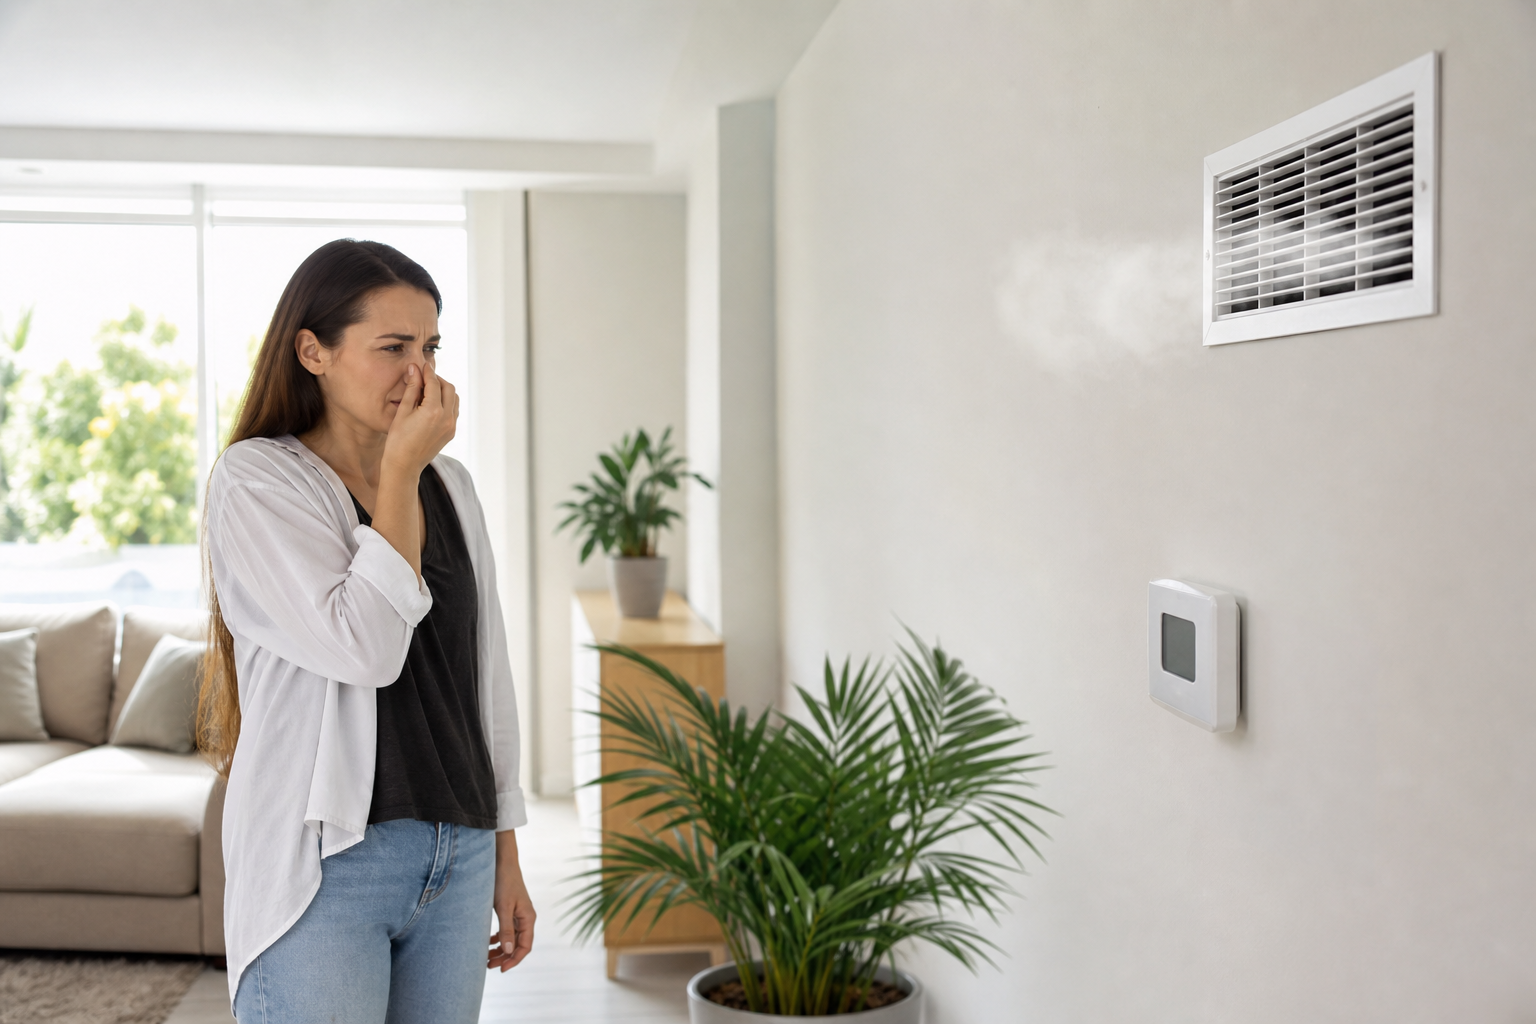
  • Musty or dusty smell from vents: Can indicate duct sections in dirty or moldy areas (crawlspaces, attics) have developed leaks, pulling that air into the living space
  • Visible insulation deterioration on flex duct: Cracked, torn, or missing outer insulation jacket on flex duct means the thermal efficiency is severely compromised — and the inner liner is next
  • Age: Flex duct over 15 years old in Denver, sheet metal with suspect joint sealing over 25 years old
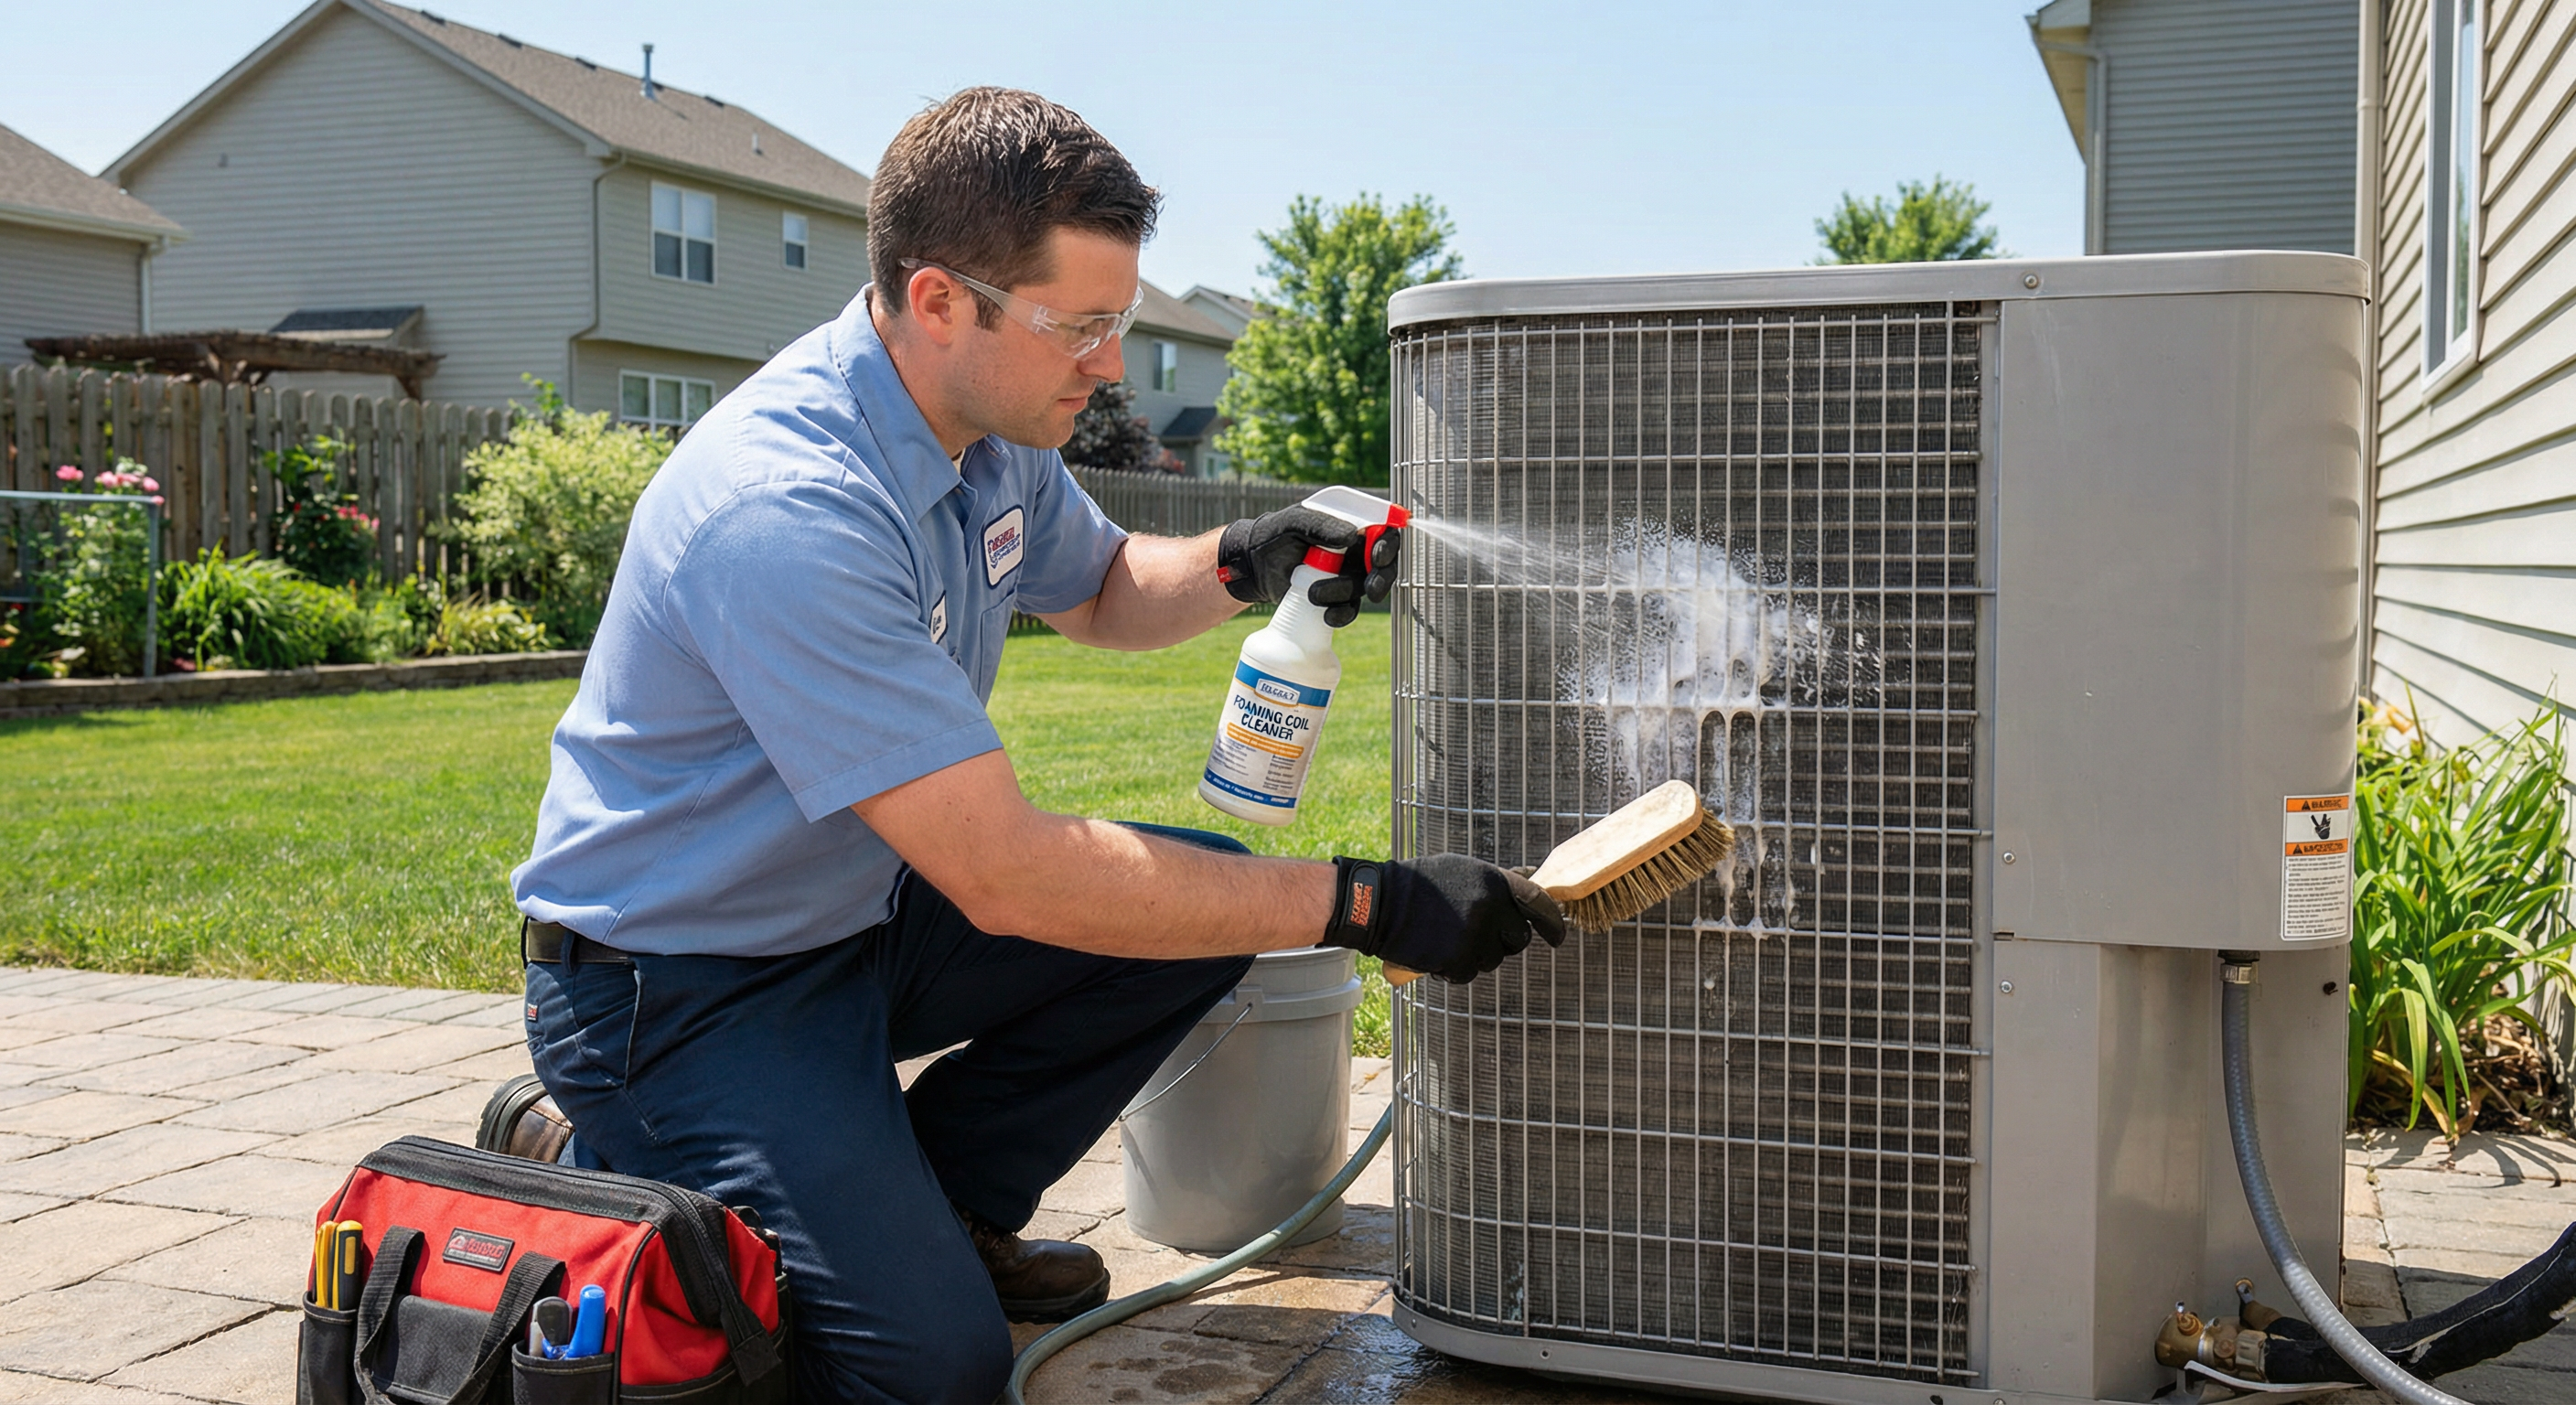
Annual HVAC maintenance including duct inspection in Denver home
Annual HVAC maintenance should include a visual duct inspection — early signs of deterioration caught before complete failure save thousands in energy waste and emergency repairs.

How Denver’s Dry Climate Affects Duct Seals

The most common duct failure mode in Denver isn’t the duct material itself — it’s the sealing at joints and connections. Every duct system has dozens or hundreds of joints, connections, and transitions where sections connect. These are sealed during installation with either mastic compound (a flexible gray paste that cures to a rubber-like consistency) or foil tape.

Both sealant types are designed to remain flexible through thermal cycling — the ducts expand and contract as they heat and cool. In humid climates, they maintain flexibility because ambient moisture keeps the sealant pliable. In Denver’s dry climate (indoor humidity often drops below 20% in winter), the sealants dry out and become brittle much faster. Mastic that lasts 25 years in Atlanta may start cracking at 12–15 years in Denver.

The result: air leakage develops at joints progressively. Initial leakage is minor and unnoticeable. Over years, the cracks widen, more joints fail, and total duct leakage increases to the point where 20–30% of your conditioned air never reaches the rooms it’s intended to condition.

Denver Duct Leakage Reality

20–30%

of conditioned air lost through duct leaks in older Denver homes

A duct system leaking 25% of conditioned air means your furnace or AC must produce 33% more output to deliver the same heating or cooling. For a home spending $200/month on HVAC energy, that’s $50–$67/month wasted — and the problem worsens every year as more joints fail. Denver’s dry climate accelerates sealant failure, making this issue more prevalent here than in humid markets.

The Real Cost of Leaky Ducts

Duct leakage is the largest single source of HVAC energy waste in most older homes. Here’s what the numbers actually look like for a typical Denver household:

  • A home spending $2,400/year on HVAC energy with 25% duct leakage is wasting roughly $600/year in heating and cooling air that never reaches conditioned spaces
  • Ducts that leak into an unconditioned attic are particularly wasteful — in summer, that air is being dumped into a 130–160°F attic. In winter, it’s dumping heated air into a freezing attic
  • Duct leakage also causes pressure imbalances that draw outdoor air in through building envelope gaps — in Denver, this means drawing in extremely dry winter air that depletes humidity and forces your humidifier to work much harder
  • Ducts leaking in crawlspaces draw crawlspace air — often containing mold spores, soil gases, and pests — into your living space through the return air path

Repair vs. Replace: How to Decide

Not every duct system needs full replacement. The decision depends on age, material, extent of deterioration, and accessible location:

When to Repair or Seal

  • Sheet metal duct system in good overall condition with failing joint seals — Aeroseal or mastic resealing is cost-effective
  • Isolated damaged sections that can be accessed and replaced individually
  • System is under 15 years old with no signs of systemic deterioration
  • Duct leakage test shows 15% or less total leakage (repairable range)

When to Replace

  • Flex duct system over 15–18 years old with multiple visible failures
  • Fiberglass duct board with signs of delamination or moisture damage
  • Duct leakage test shows 25%+ leakage (economically better to replace)
  • Major HVAC system replacement — new equipment paired with failing ductwork underperforms significantly
  • Asbestos-wrapped ducts in older homes (pre-1980) — requires professional abatement before any work
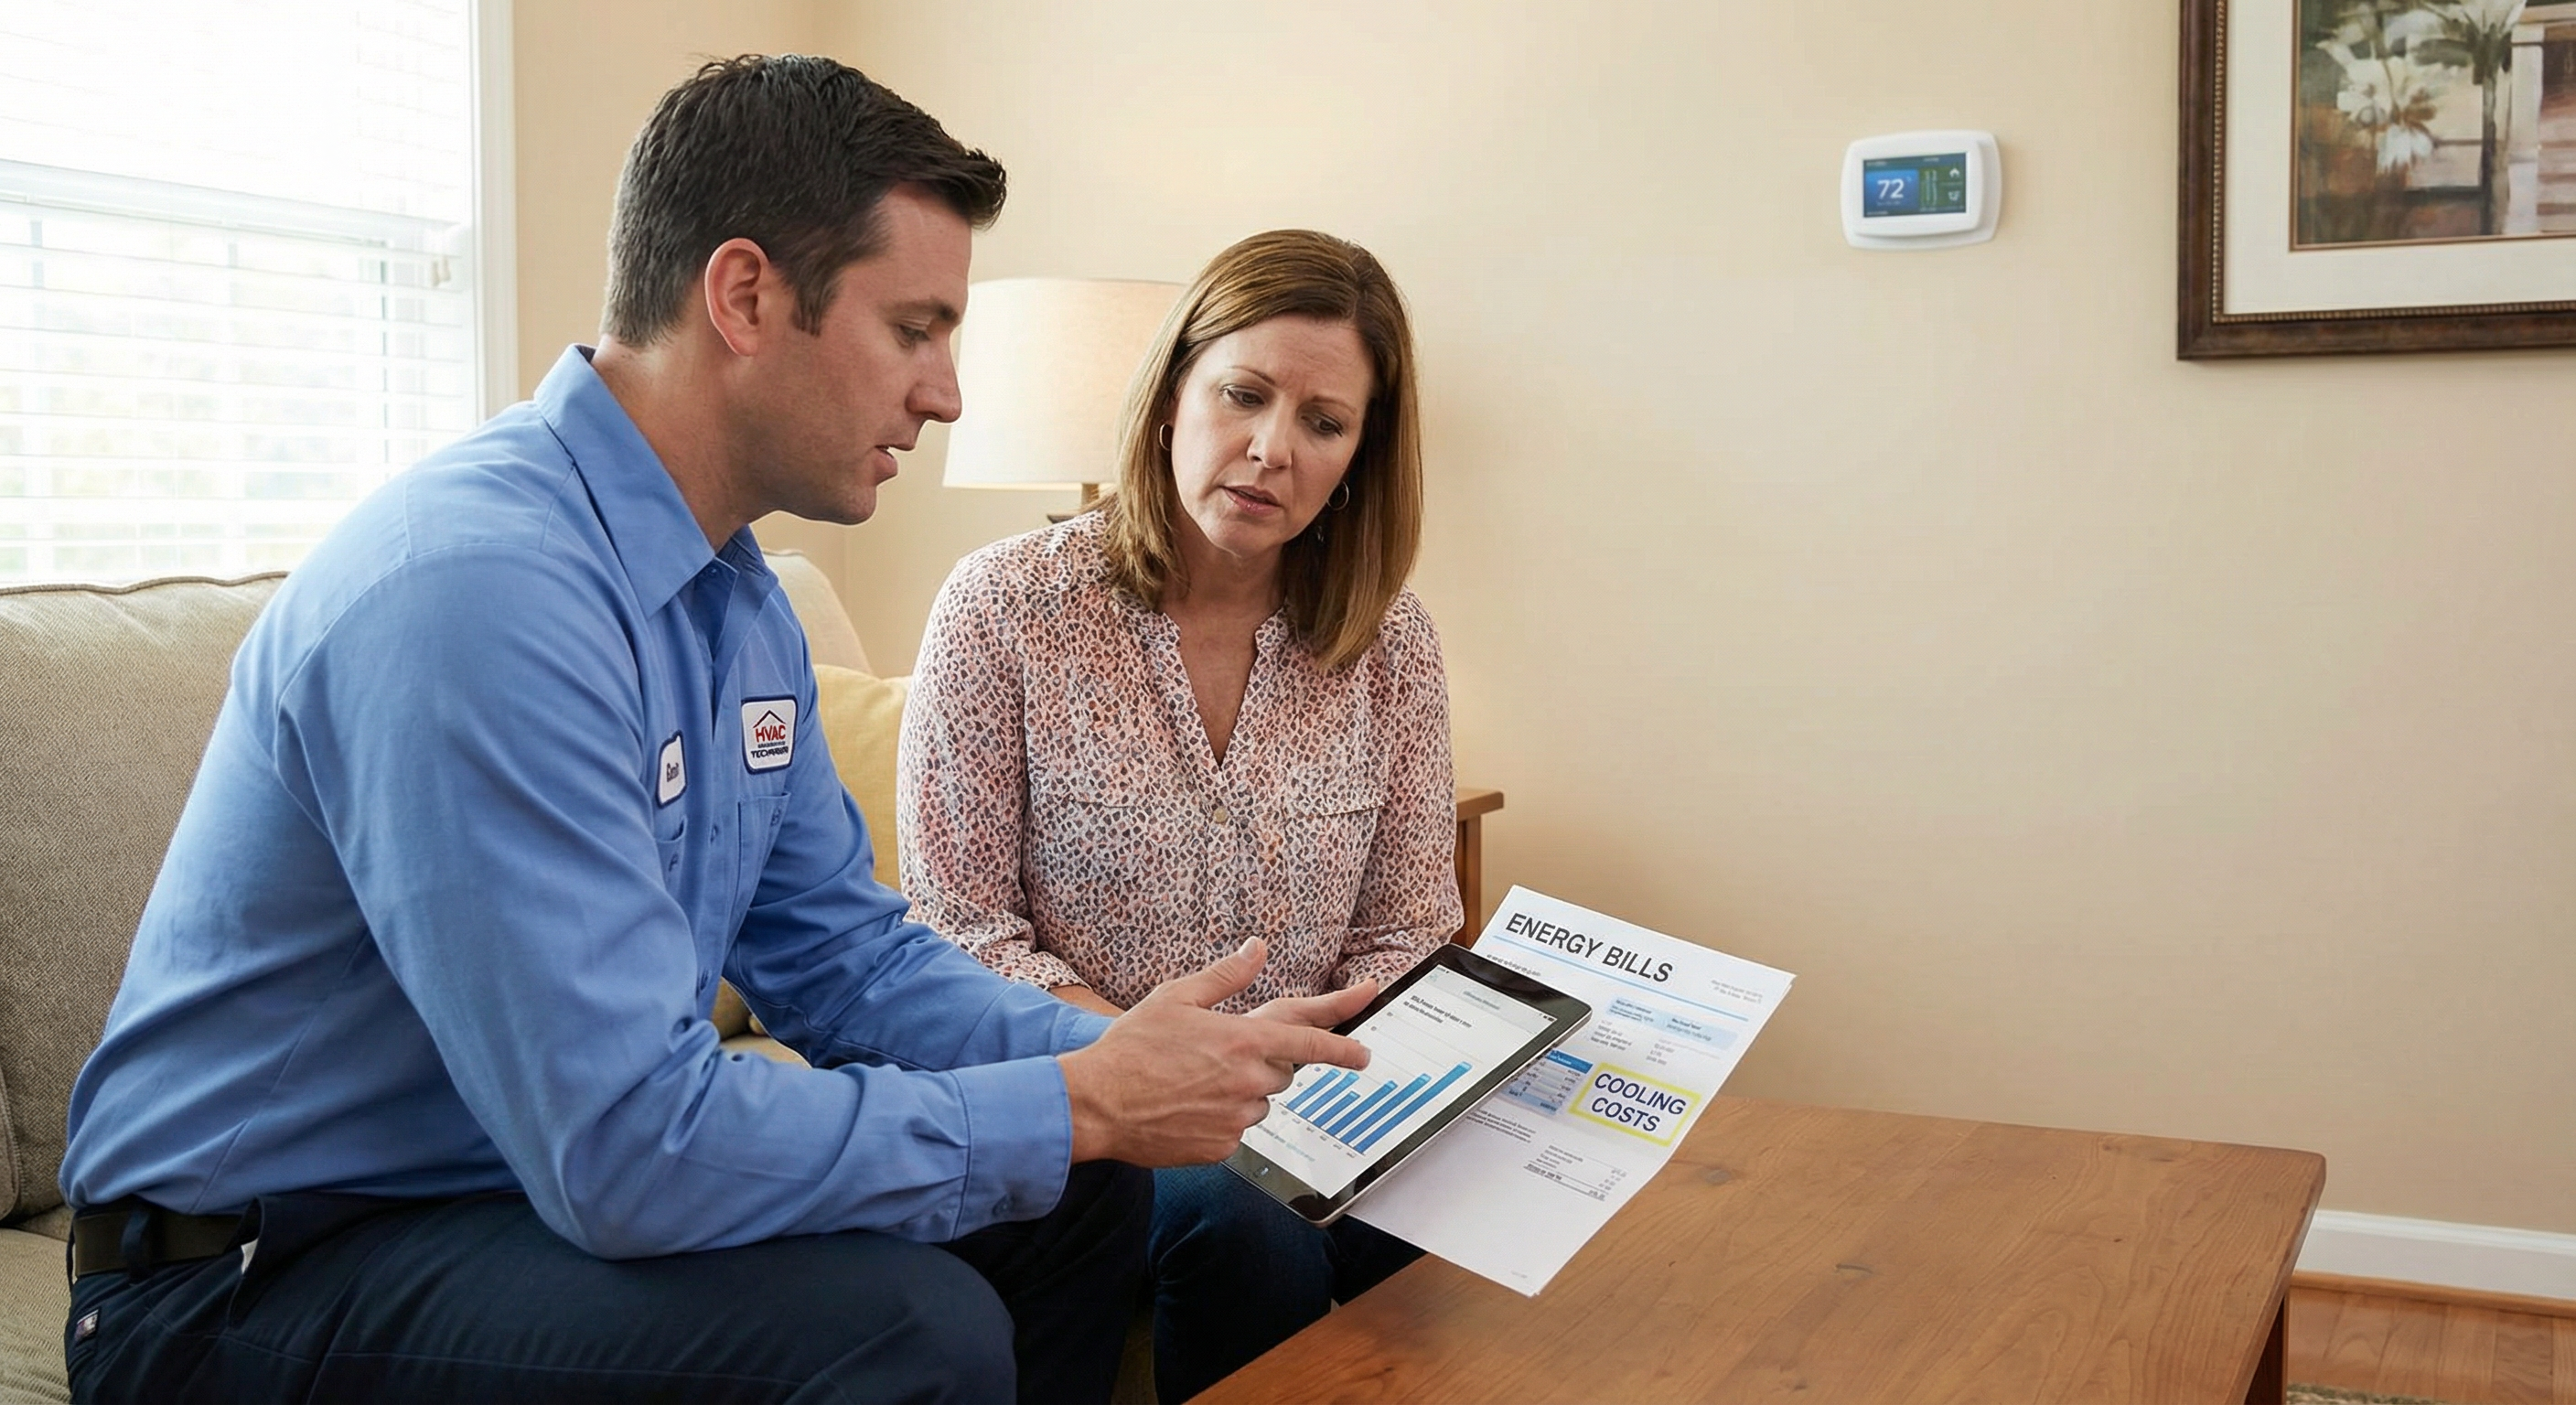
Increasing energy bills from leaky ducts in Denver home — duct replacement consideration
Steadily rising energy bills without increased usage often signal growing duct leakage — Denver homes see this earlier than sea-level markets due to faster sealant deterioration.

Duct Replacement Cost in Denver (2026)

Duct replacement cost varies significantly based on home size, duct location, material selected, and complexity of the job:

Duct leakage test (blower door + duct pressurization)$250–$400
Aeroseal duct sealing (seal leaks from inside)$1,500–$3,000
Mastic resealing accessible joints$500–$1,500
Partial flex duct replacement (select runs)$800–$2,000
Full duct replacement — flex duct, average home$3,500–$6,000
Full duct replacement — sheet metal, average home$5,000–$9,000
Crawlspace duct replacement (add for difficulty)+$500–$1,500

The most cost-effective approach for most Denver homeowners with failing but not collapsed ductwork is Aeroseal — a proprietary process that injects polymer particles into the pressurized duct system that adhere to and seal leak points from the inside. It can reduce duct leakage from 25–30% down to 5% or less without tearing open ceilings and walls, and comes with a 10-year warranty on the sealant.

Real Job: Westminster, 2025

A Westminster homeowner was baffled — their new 16 SEER2 AC system wasn’t performing noticeably better than the 10 SEER unit it replaced. Energy bills barely changed. When we ran a duct leakage test, we found 31% total leakage — nearly a third of all conditioned air was escaping before it reached living spaces. The home had original flex duct from 1998. We recommended full replacement at a quoted $5,200. After duct replacement, the new system performed as rated: energy bills dropped by approximately $85/month compared to the year before. The duct replacement paid for itself in under 5 years on energy savings alone.

Free Estimate

Frequently Asked Questions

How do I know if my ducts need replacing?

The most reliable method is a duct leakage test — a blower door test combined with duct pressurization that measures exactly how much air is escaping. Signs that suggest leakage without testing include: rooms that are consistently harder to heat or cool than they used to be, dust at registers despite regular filter changes, and noticeably increasing energy bills over several years. A visual inspection of accessible duct sections (usually accessible in attic, crawlspace, or basement mechanical room) can reveal collapsed, torn, or disconnected duct sections.

Does Denver’s altitude affect duct system performance?

Yes, in two ways. First, reduced air density at 5,280 ft means HVAC systems move less mass of air per CFM — this is already accounted for in Manual J sizing, but undersized duct systems are even more affected at altitude. Second, the dry climate accelerates sealant deterioration at joints. Denver duct systems develop leakage faster than comparable systems in more humid markets. A duct system in Denver that’s 15 years old is likely in a similar state to a 20-year-old system in Atlanta or Houston.

How long does duct replacement take?

A full duct replacement for an average Denver home typically takes 1–3 days depending on home size, duct location, and material type. Attic installations are generally faster than crawlspace work. The HVAC system is non-operational during the installation, so timing the job for mild weather (fall or spring) avoids comfort issues during the 1–2 day downtime.

Can I replace ducts myself?

Simple repairs — resealing accessible joints with mastic or metal foil tape, or replacing a short damaged flex duct section — are DIY-capable. Full replacement is not a DIY project. Proper duct sizing (Manual D), layout, and sealing requires specific knowledge, and improper installation creates pressure imbalances that can backflow combustion gases from gas appliances into the home (a carbon monoxide risk). Always have full duct replacement done by a licensed HVAC contractor who will pull the required permit.

Is it worth replacing ducts when getting a new AC?

In most cases, yes — if the ducts are over 15–18 years old or show significant deterioration. A high-efficiency AC system (16+ SEER2) paired with leaky ducts delivers the efficiency of a mediocre system. Think of it this way: if 25% of conditioned air is escaping through duct leaks, even a 20 SEER system is effectively delivering 15 SEER performance. Replacing ducts simultaneously with the AC system also saves mobilization costs (contractors are already there and working on the same system). Most whole-system quotes should include a duct assessment.

Schedule Online

$89 flat diagnostic fee • Credited toward repair • Licensed & Insured
Call (303) 351-1667

Why Does My AC Smell Like Chemicals? (Denver HVAC Safety Guide)

Written by Lance Fredrickson — ICC Certified HVAC Specialist | EPA 608 Universal

20+ years serving the Denver metro • Blue Collar Heating & Air, Northglenn CO

HVAC technician investigating chemical smell from AC system in Denver home
Chemical smells from your AC range from minor (post-service residue) to serious (refrigerant leak). Identifying the type of smell determines whether it’s a safety issue.

A chemical smell coming from your AC vents is unsettling — and for good reason. Some chemical odors are harmless and resolve on their own. Others indicate a refrigerant leak that requires immediate action, especially at Denver’s altitude where lower oxygen levels make chemical exposure more dangerous.

The key is identifying what type of chemical smell you’re dealing with. A sweet, ether-like smell is very different from a formaldehyde odor or a cleaning solution scent. This guide walks through each type, the urgency level, and exactly what to do.

⚡ Quick Answer: AC Chemical Smell Identification

Sweet, ether-like, faintly fruity smellRefrigerant — Urgent
Sharp, acrid, formaldehyde-like smellNew Materials — Ventilate
Chemical/solvent smell after recent HVAC serviceService Residue — Normal
Burning plastic or chemical burning smellElectrical — Turn Off
Musty chemical smellMold + Chemical — Service
Strong ammonia smellRefrigerant (R-22/older) — Urgent

Types of Chemical Smells from AC Systems

Chemical smells from HVAC systems break into three categories: refrigerant-related (potentially serious), material off-gassing (temporary, usually harmless), and residue from cleaning or maintenance (brief and benign). Each has a distinct character and different response required.

Sweet or Ether-Like Smell: Refrigerant Leak

⚠ Potentially Urgent

Sweet, Slightly Fruity, Ether-Like Chemical Smell

R-410A — the refrigerant in most modern residential AC systems — has a faint sweet, ether-like smell. If you smell this coming from your vents or near your indoor air handler, outdoor unit, or refrigerant lines, you likely have a refrigerant leak.

R-410A is not acutely toxic in small amounts, but concentrated exposure in enclosed spaces (basements, mechanical rooms, attics) can cause dizziness, headaches, and at high concentrations, unconsciousness due to oxygen displacement. The refrigerant is heavier than air and tends to concentrate near the floor.

Older R-22 systems (pre-2010 equipment) have a slightly different smell — sharper, more ammonia-like. R-22 is more acutely irritating at lower concentrations than R-410A.

If you smell refrigerant and feel dizzy or lightheaded: Leave the space immediately. Get fresh air. Call 911 if symptoms are severe. Do not re-enter until the space has been ventilated. Call us to locate and repair the leak — EPA 608 Universal certified refrigerant handling required.

What to do:

  • Turn off the AC system at the thermostat
  • Open windows and doors to ventilate
  • Do not use open flames near the area
  • Call a certified HVAC technician for leak detection and repair
  • Do not run the system until the leak is repaired — you’re losing expensive refrigerant and the system is losing cooling capacity

Formaldehyde-Like Smell: New Ductwork and Building Materials

⚠ Ventilate — Usually Temporary

Sharp, Acrid, Chemical Smell After New Installation or Renovation

New flex ductwork, fiberglass duct liner, adhesives used in duct installation, and many new building materials off-gas volatile organic compounds (VOCs) including formaldehyde when first installed. This produces a sharp, acrid chemical smell — distinct from refrigerant’s sweet character.

In Denver, this is amplified because the dry air at altitude accelerates off-gassing of volatile compounds. New ductwork installed in attic spaces (common in Denver ranch-style homes) can off-gas intensely in summer when attic temperatures reach 130–160°F.

This smell typically dissipates within 1–4 weeks as the VOCs off-gas and the materials cure. It’s unpleasant and can cause eye and throat irritation, but it’s not a system malfunction — it’s a building material issue.

What to do:

  • Increase ventilation — open windows when weather permits
  • Run the HVAC system to circulate and filter air, with MERV 11+ filter installed
  • Consider an air purifier with activated carbon filter to adsorb VOCs
  • The smell should reduce significantly within 2–4 weeks
  • If it persists beyond 4 weeks or is intensifying, have the ductwork inspected for improper adhesive application or damaged materials

Cleaning Product Smell: Post-Service Residue

✓ Normal — Temporary

Chemical or Solvent Smell After HVAC Service

HVAC technicians use various chemical products during routine service: coil cleaning foam (alkaline-based), UV dye for leak detection, antimicrobial treatments, and drain line cleaners. These chemicals can leave a residual smell in the ductwork that dissipates within a few hours to a day as the system runs.

If you just had your AC serviced and notice a chemical smell, this is normal. Run the system for a few hours and the smell should clear. If you had coil cleaning performed, the foam cleaner rinse may leave a mild chemical scent for up to 24 hours.

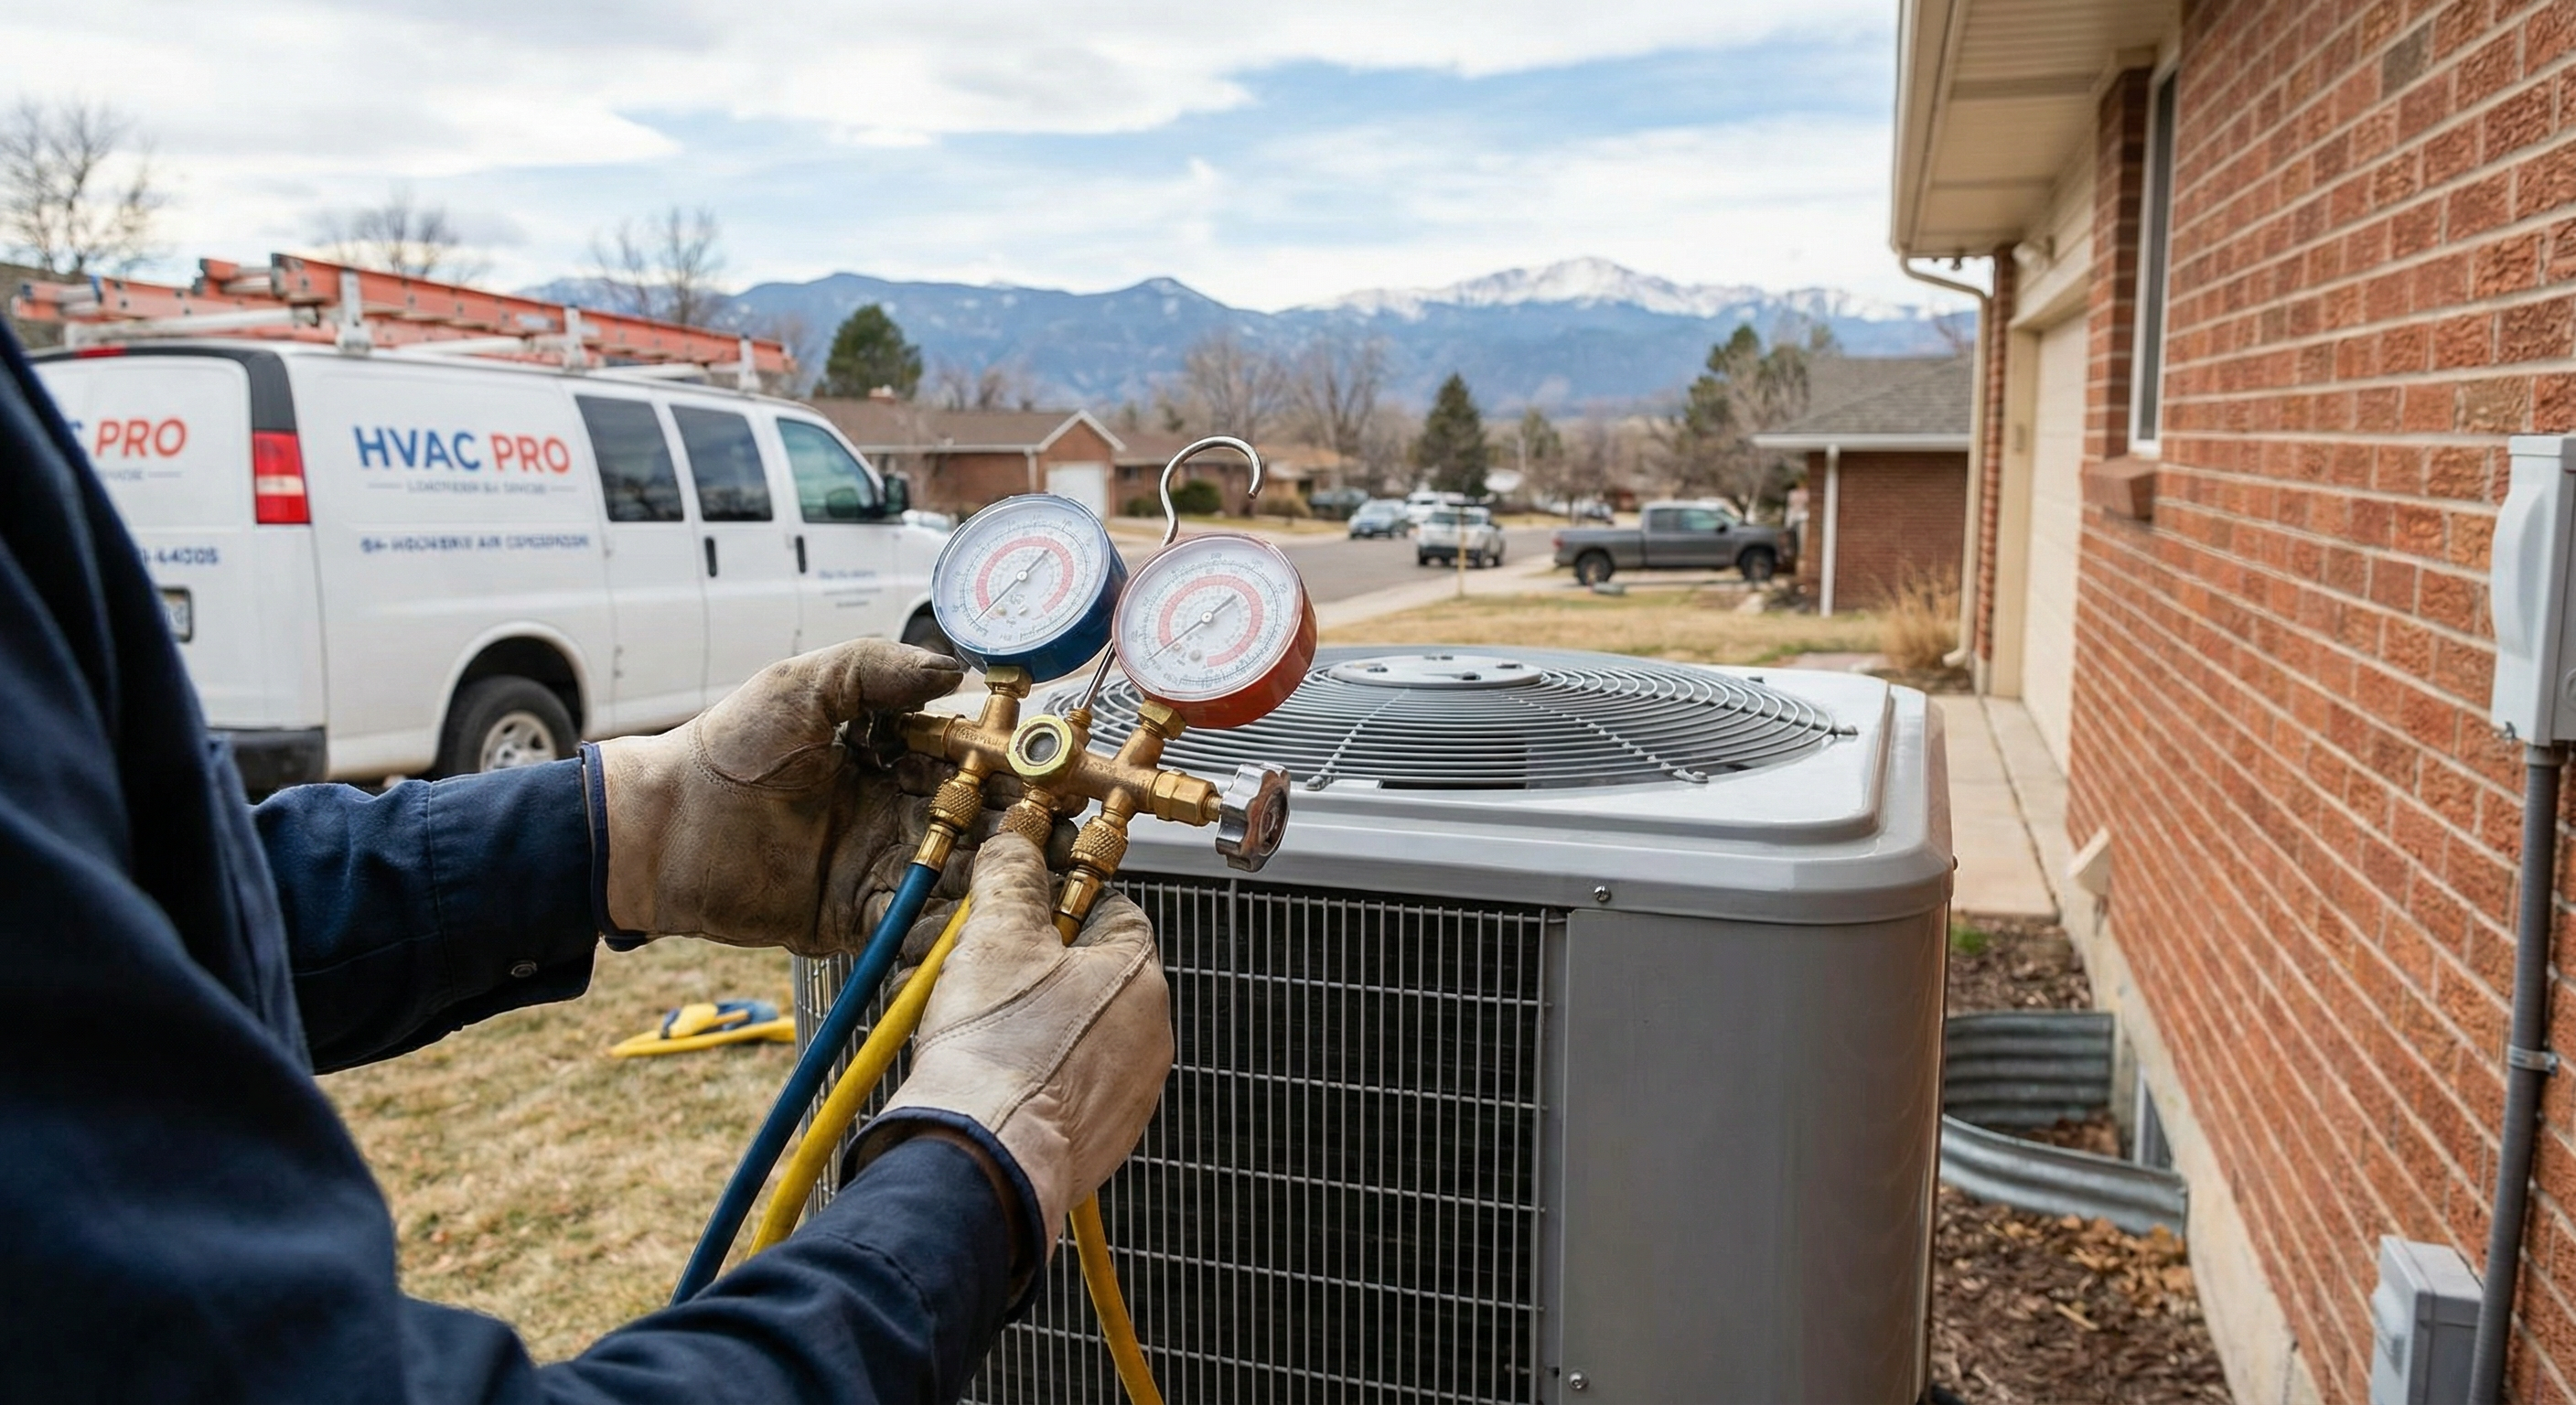
Refrigerant handling equipment - refrigerant leaks produce sweet chemical smell in Denver homes
R-410A refrigerant has a faint sweet, ether-like smell. A refrigerant leak requires certified technicians for detection and repair — never attempt to handle refrigerant yourself.

When to Evacuate Your Home

Not every chemical smell from your AC is an emergency. But these specific situations warrant immediate evacuation and a 911 call:

Evacuate Immediately If:

  • You smell a chemical odor AND feel dizzy, lightheaded, nauseous, or have difficulty breathing
  • The chemical smell is accompanied by a burning plastic or electrical burning odor
  • You see sparks, smoke, or discoloration near the indoor or outdoor unit
  • Multiple occupants (including pets) are showing symptoms simultaneously
  • The smell is extremely intense and rapidly worsening
  • You have a natural gas furnace and smell any gas odor along with the chemical smell — this could be two separate issues occurring simultaneously

Turn off the HVAC system at the thermostat if you can do so safely without entering the affected area. Do not turn on light switches or create sparks in areas with a strong chemical smell. Exit the home and call 911 or the fire department — they have equipment to test for hazardous concentrations of refrigerant, CO, and other gases.

Denver Altitude and Refrigerant Exposure: Higher Risk

Denver’s elevation creates an important safety consideration that doesn’t apply in lower-altitude cities. At 5,280 ft, ambient oxygen levels are already about 17% lower than at sea level. Denver residents are generally acclimated to this, but it means there is less reserve oxygen buffer when exposed to a chemical that displaces or competes with oxygen.

Refrigerant gases (R-410A, R-22, R-32) are heavier than air and don’t directly bind with hemoglobin — they cause harm primarily by displacing oxygen in enclosed spaces. At sea level, a significant concentration of refrigerant is needed to cause dizziness because there’s substantial baseline oxygen. At Denver’s altitude, the threshold for experiencing oxygen-displacement effects is lower.

Denver Altitude & Chemical Exposure Risk

17%

lower oxygen availability at Denver’s 5,280 ft elevation vs. sea level

Denver residents are acclimated to the altitude, but the reduced oxygen buffer means refrigerant and other oxygen-displacing gases reach concerning concentrations at lower amounts than at sea level. If you smell refrigerant and feel any symptoms, leave the space immediately — don’t wait to see if it gets worse.

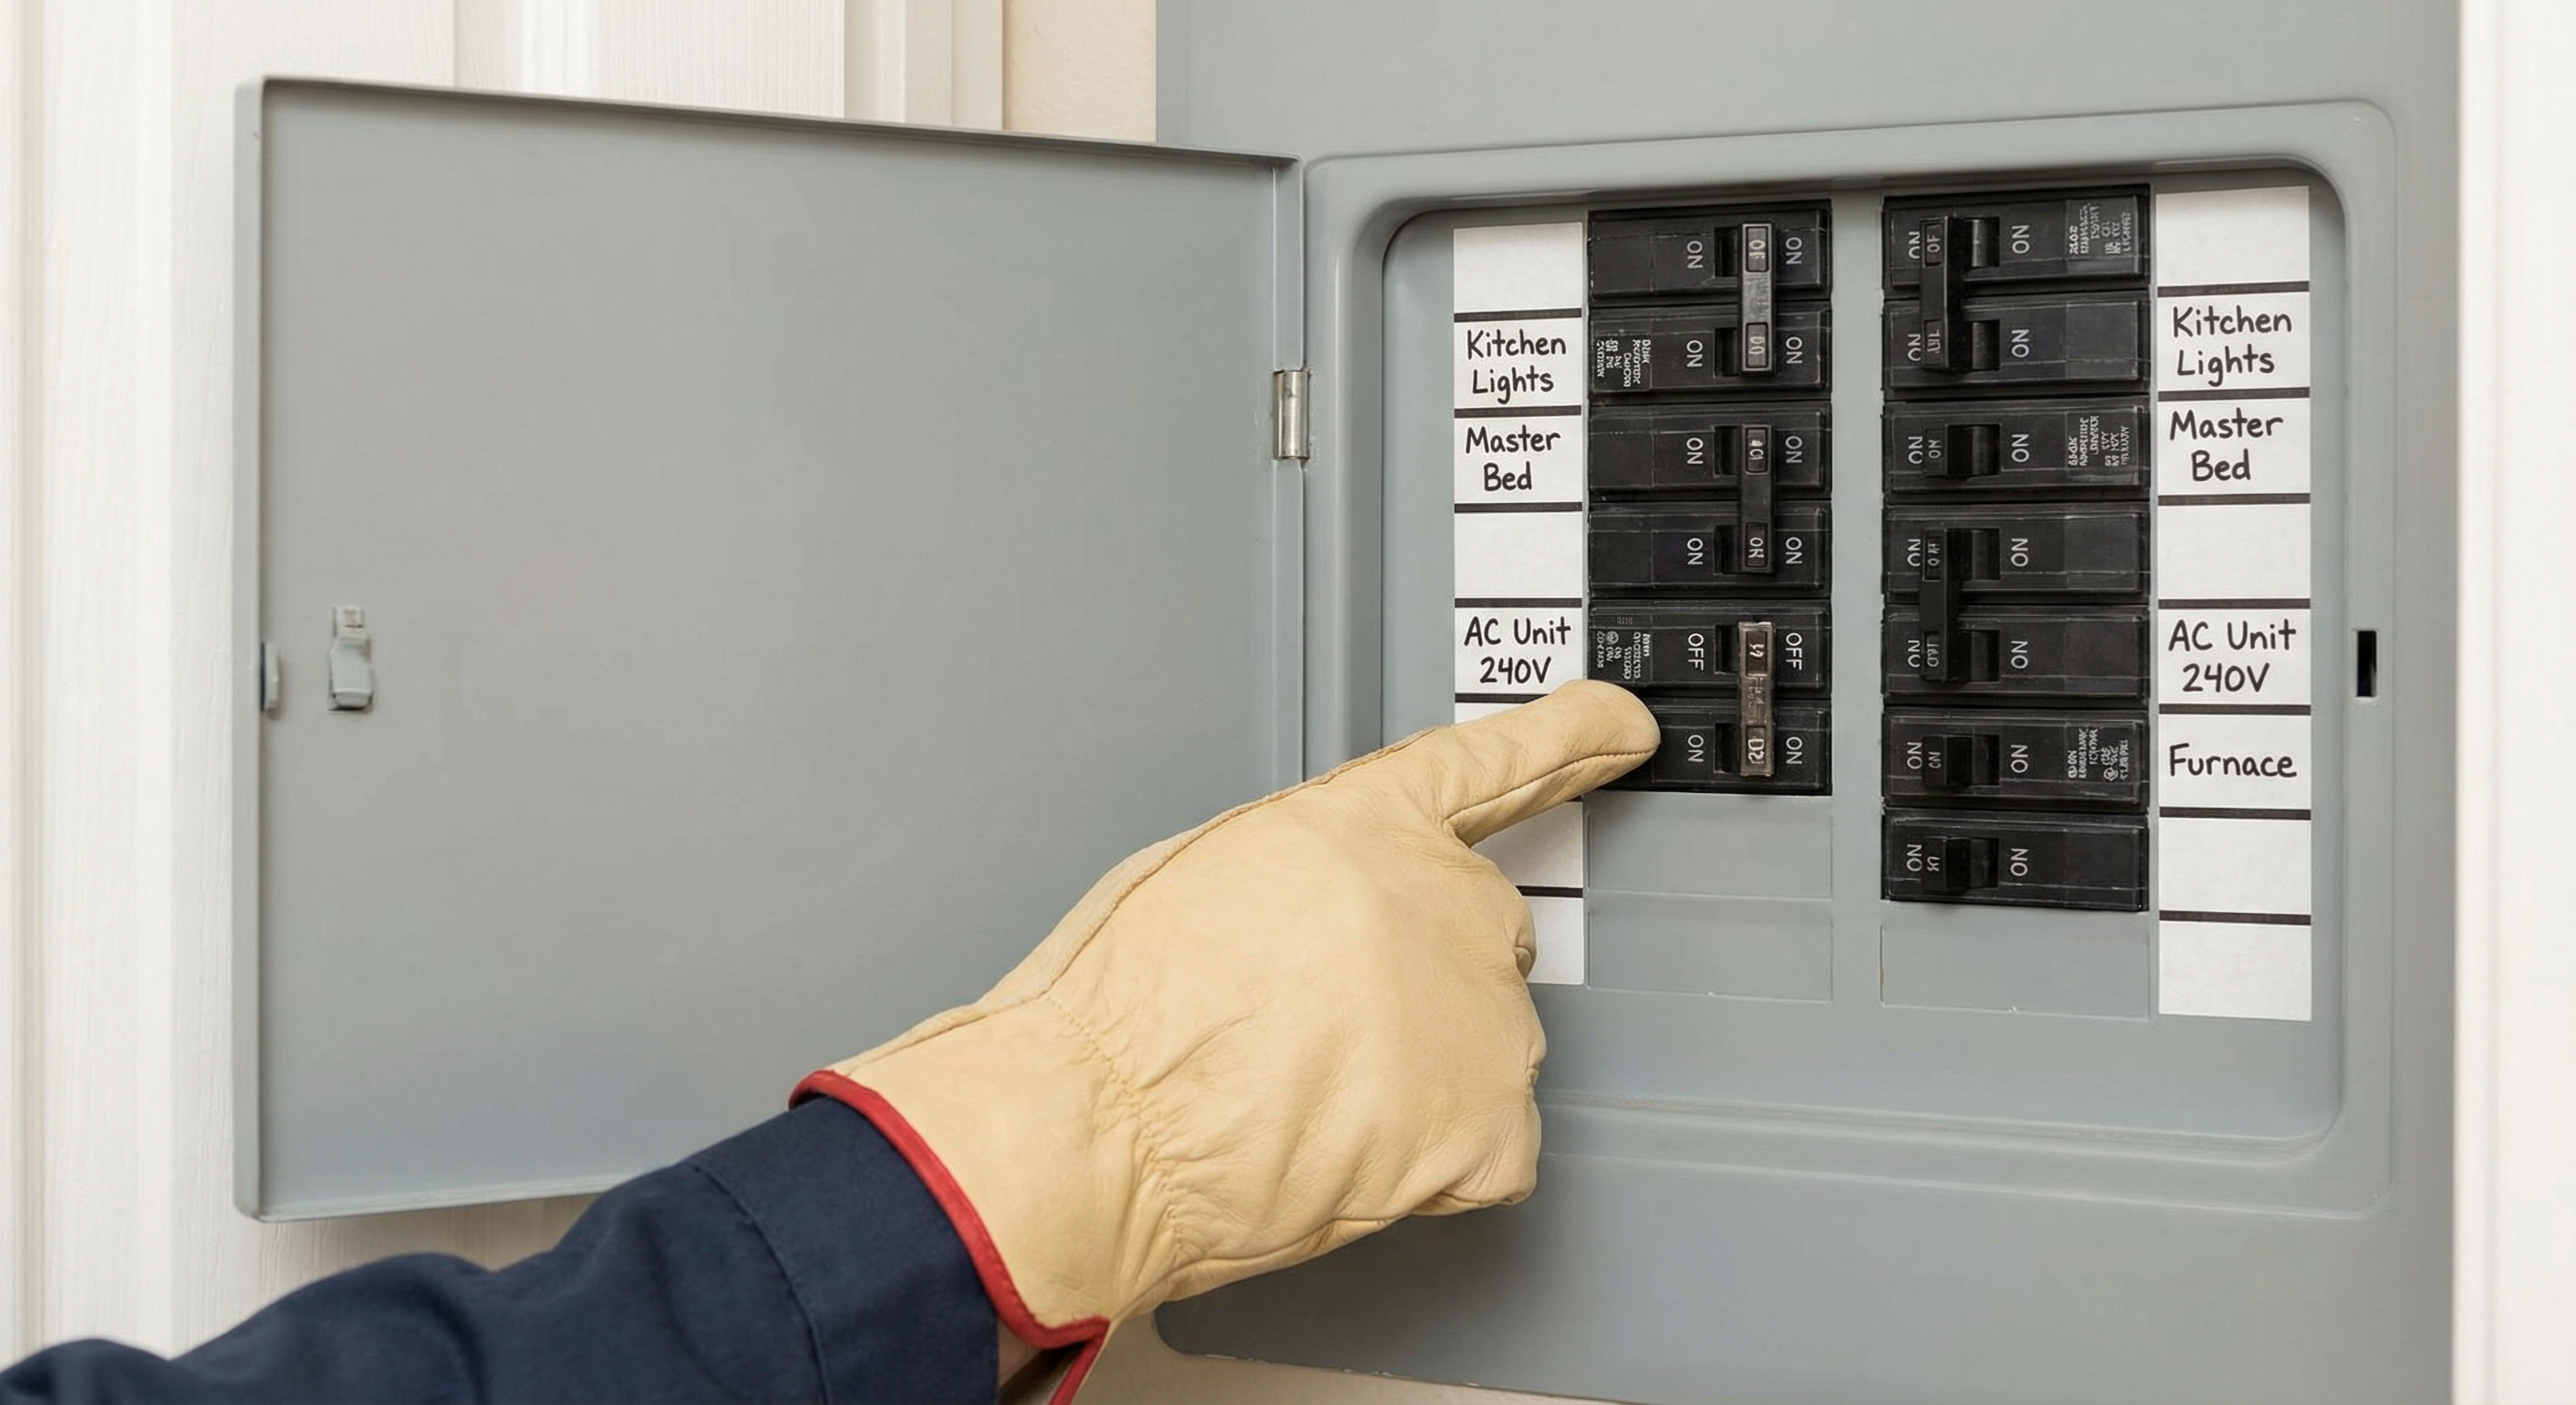
Electrical panel check for AC chemical smell caused by burning components
A burning chemical smell from your AC can also indicate an electrical issue — check the breaker panel for tripped breakers and call a technician if you smell burning plastic or electrical components.

Schedule Online

Frequently Asked Questions

Is R-410A refrigerant toxic?

R-410A is not acutely toxic in the sense of being directly poisonous — it doesn’t cause systemic chemical injury at low concentrations. However, it is an asphyxiant (oxygen displacer) at high concentrations in enclosed spaces. Symptoms of overexposure include dizziness, confusion, and headache. R-410A is also non-flammable, so fire hazard from a leak is minimal. However, refrigerant vapors should never be inhaled deliberately, and enclosed spaces with significant refrigerant presence should be ventilated immediately. At Denver’s altitude, the risk threshold is lower due to reduced baseline oxygen.

Why does my AC smell like chemicals when I first turn it on each summer?

This is usually one of three things: (1) dust that accumulated on the heat exchanger during winter months burning off during first use — this produces a brief, temporary smell and is harmless; (2) the coil cleaning foam from last year’s service that re-volatilizes when the system first heats up; or (3) organic matter (mold, mildew) on the evaporator coil that produces an off smell when first activated. If the smell clears within 30–60 minutes of operation, it’s typically harmless. If it persists or is specifically sweet/ether-like, suspect refrigerant.

Can a refrigerant leak make me sick?

Yes, at sufficient concentrations. Refrigerant (R-410A) causes symptoms through oxygen displacement — dizziness, headache, nausea, loss of consciousness. Symptoms resolve with fresh air in most cases. However, in poorly ventilated spaces (mechanical closets, tight basements) with a significant leak, concentrations can become dangerous quickly. In Denver, the lower baseline oxygen at altitude means symptoms can appear at lower refrigerant concentrations than at sea level. If you feel any of these symptoms near the HVAC equipment, leave immediately and ventilate before re-entering.

Does R-454B (new refrigerant) smell different than R-410A?

R-454B has a similar faint sweet smell to R-410A, though some technicians describe it as slightly more pungent. The key difference: R-454B is classified as mildly flammable (A2L classification) — unlike R-410A which is non-flammable. While the flammability risk of R-454B is very low (requires specific conditions to ignite), it’s an additional reason to ventilate and avoid ignition sources near any refrigerant smell from newer R-454B systems (2025+ installations).

How do I know if the chemical smell is from the AC or something else?

Turn the AC off at the thermostat and see if the smell diminishes within 15–20 minutes. If it does, the smell is being distributed by the HVAC system (which doesn’t necessarily mean the HVAC system is the source — it could be distributing a smell from elsewhere). Turn it back on and check if the smell is strongest near supply registers (coming from the system) or if it seems to come from a specific area of the home regardless of AC operation. A refrigerant leak smell is typically strongest near the indoor air handler or the refrigerant lines — it’s localized to that area, not uniform throughout the house.

Schedule Online

$89 flat diagnostic fee • Credited toward repair • Licensed & Insured
Call (303) 351-1667

What Is a Manual J Load Calculation? (Why It Matters in Denver)

Written by Lance Fredrickson — ICC Certified HVAC Specialist | EPA 608 Universal

20+ years serving the Denver metro • Blue Collar Heating & Air, Northglenn CO

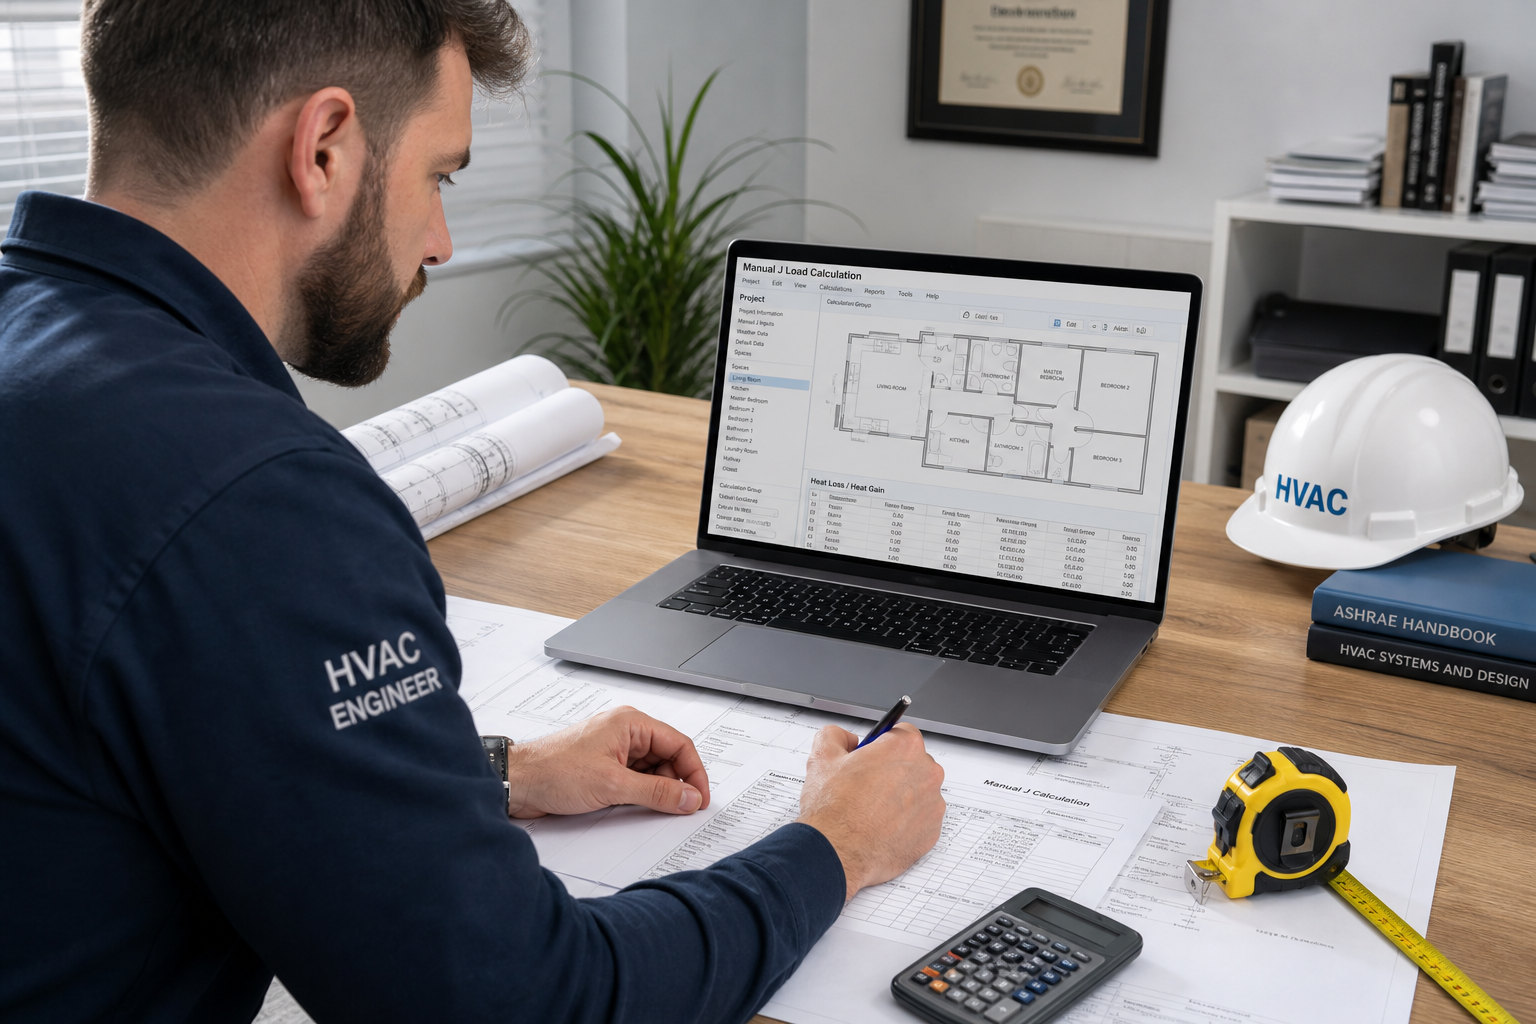
HVAC contractor performing Manual J sizing assessment for Denver home
A proper Manual J assessment takes 1–2 hours and considers dozens of variables. At Denver’s altitude, sea-level sizing charts produce equipment that’s consistently wrong.

When you get a quote for a new AC system, the contractor should be doing a Manual J load calculation before recommending a size. Most don’t. Instead, they use a “rule of thumb” — typically 400–500 square feet per ton of cooling capacity — and size your new system the same as your old one.

In Denver, this approach is particularly problematic. At 5,280 ft elevation, the reduced air density means your AC moves less heat per unit of airflow than an identical unit at sea level. Using standard sea-level sizing charts results in equipment that’s typically 10–15% oversized for Denver conditions. Oversized AC is just as bad as undersized — it short cycles, doesn’t dehumidify properly, and wears components faster.

⚡ Quick Answer: Manual J in Denver

  • What it is: A calculation using ACCA Manual J methodology to determine exact BTU cooling/heating loads
  • Why it matters in Denver: Altitude reduces air density — standard charts are 10–15% over for Denver
  • What it accounts for: Square footage, ceilings, insulation, windows, orientation, occupants, altitude
  • Cost: $0–$300 (some contractors include it, some charge separately)
  • Required by: Colorado mechanical code for new installations

What Manual J Is

Manual J is a published calculation methodology developed by the Air Conditioning Contractors of America (ACCA). The full name is “Manual J Residential Load Calculation,” and it’s been the industry standard for sizing residential HVAC equipment since the 1980s — though the current version (Manual J 8th Edition) incorporates modern building science and climate data.

The calculation produces two numbers: cooling load (measured in BTU/hr or tons of cooling) and heating load (BTU/hr). These are the maximum rates at which your home gains heat in summer and loses heat in winter. The HVAC equipment you install should match these loads — not be sized by guessing based on square footage.

Think of it this way: two 2,000 sq ft homes can have completely different cooling loads based on window placement, insulation quality, ceiling height, and orientation. A south-facing home with large west-facing windows in Denver can have a cooling load 40–60% higher than an otherwise identical home with smaller, well-shaded windows. Square footage alone tells you almost nothing useful about cooling requirements.

Why “Rules of Thumb” Fail in Denver

The most common sizing shortcut is the “400 square feet per ton” rule. It says that a 2,000 sq ft home needs a 5-ton AC. This rule originated from average U.S. construction in the 1970s and has never been accurate for custom applications — and it’s particularly inaccurate in Denver for several reasons:

Denver’s Altitude Reduces Air Density

At 5,280 ft, air pressure is about 17% lower than at sea level. Air conditioning works by moving heat — and the medium that carries the heat is air. At lower air density, a given volume of air carries less heat per cubic foot. AC equipment rated in BTU/hr at sea level delivers less cooling at altitude because it’s moving less dense air across the coil.

Equipment manufacturers rate their units at sea level (standard conditions of 68°F, 50% RH, 29.92 in Hg). At Denver’s altitude, the same unit may deliver only 85–90% of its rated capacity. A contractor who doesn’t know this may install a “5-ton” unit that actually delivers 4.25–4.5 tons in Denver conditions.

Denver’s Dry Climate Changes the Load Profile

Denver’s semi-arid climate means low latent (moisture) loads. In humid cities, a significant portion of the cooling load is dehumidification — removing moisture from the air. In Denver, that load is minimal. This means the total cooling load in Denver is weighted more heavily toward sensible (temperature) cooling, which affects optimal equipment selection. Sizing for Denver’s climate profile produces different results than sizing for Atlanta or Houston.

Denver’s Solar Intensity at Altitude

UV and solar radiation are significantly more intense at 5,280 ft than at sea level. This increases solar heat gain through windows and roof surfaces. A home with south or west-facing windows in Denver gains substantially more solar heat than the same home at lower elevation — which Manual J accounts for and a square-footage rule does not.

What Data Goes Into a Manual J Calculation

A proper Manual J for a Denver home requires all of the following inputs:

  • Design conditions: Denver’s outdoor design temperature (typically 93°F for cooling) and humidity ratio — these are climate data, not guesses
  • Indoor design conditions: Target temperature and humidity (typically 75°F, 50% RH)
  • Altitude correction: A mandatory adjustment factor for Denver’s 5,280 ft elevation
  • Building envelope: Wall construction and insulation R-value, ceiling/roof construction and insulation R-value, floor type (slab, crawlspace, basement)
  • Windows: Size, orientation (N/S/E/W), glazing type (single/double/triple), shading (overhangs, trees, interior shades)
  • Infiltration rate: How leaky is the building envelope? (Measured by blower door test in tight construction, estimated for older homes)
  • Internal gains: Occupants (people generate heat), lighting, appliances
  • Ceiling heights: Volume matters more than floor area for load calculations
  • Duct location: Ducts in conditioned space vs. attic vs. crawlspace have different efficiency implications
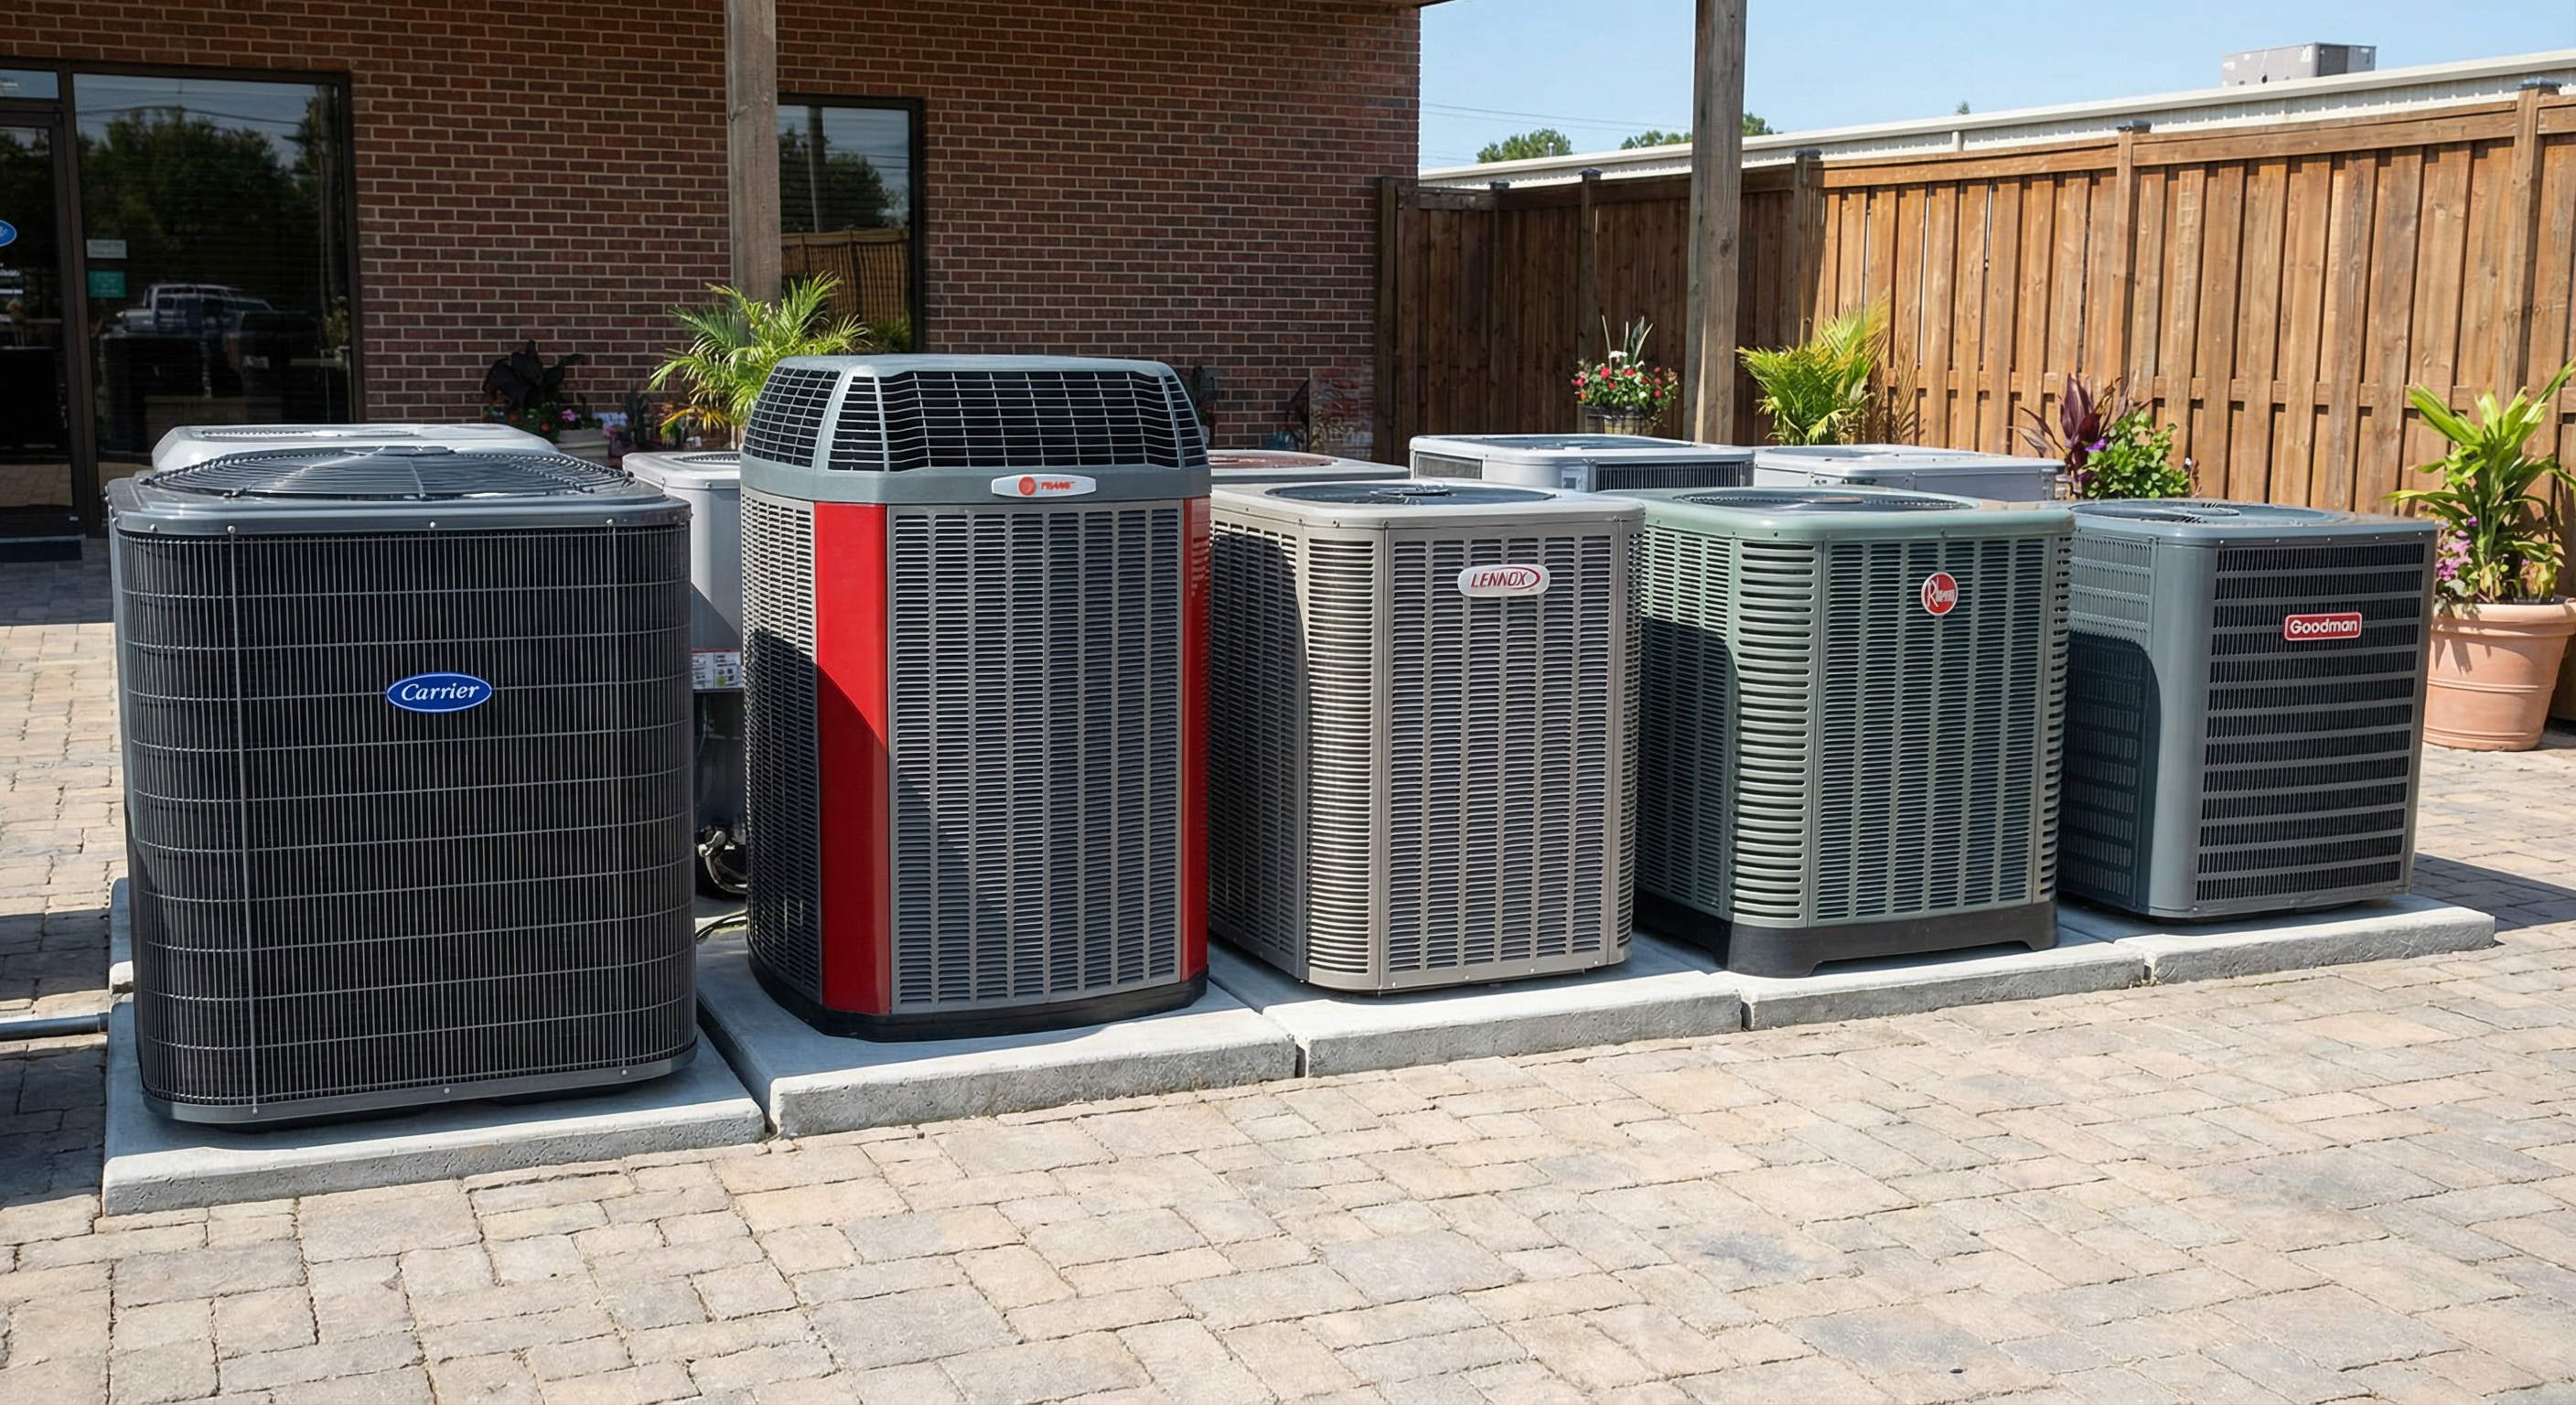
AC equipment comparison for properly sized Denver installation
Properly sizing AC equipment to the actual Manual J load — rather than matching previous equipment size — is how you get a system that performs optimally and lasts 15–20 years.

The Denver Altitude Adjustment Factor

The altitude correction factor is a mandatory adjustment in Manual J calculations for above-sea-level installations. ACCA’s Manual J methodology includes a table of altitude correction factors by elevation. For Denver’s 5,280 ft elevation, the correction factor is approximately 0.88–0.90.

What this means in practice: if the sea-level calculation produces a 36,000 BTU/hr (3-ton) cooling load, the actual equipment needed in Denver to meet that load is:

Calculated cooling load (sea-level equivalent)36,000 BTU/hr
Denver altitude correction factor (5,280 ft)÷ 0.88–0.90
Actual equipment capacity needed at altitude40,000–41,000 BTU/hr
Equipment selection3.5-ton unit

Without the altitude correction, a contractor might size this home at a 3-ton unit — which delivers only 31,680–32,400 BTU/hr in Denver conditions. The homeowner ends up with a system that runs continuously on hot days and never quite cools the house. This is a known problem in Denver that we see regularly on systems installed by contractors who don’t apply the correction.

Denver’s Altitude Sizing Penalty

10–15%

AC capacity reduction at Denver’s 5,280 ft elevation

A 3-ton AC unit rated at sea level delivers only 2.55–2.7 tons of effective cooling in Denver. This 10–15% capacity penalty must be accounted for in every installation. Contractors who use sea-level sizing charts are consistently undersizing equipment for Denver conditions.

Finding a Contractor Who Does It Right

The sad reality: most HVAC contractors in Denver — even experienced ones — don’t perform a full Manual J before sizing replacement equipment. They use a rule of thumb, match the old unit, or use simplified software that doesn’t fully account for altitude. Here’s how to identify a contractor who does it correctly:

  • Ask specifically: “Do you perform a Manual J load calculation?” — not “do you size the equipment” — because many will say yes to the latter even when they’re just matching old equipment
  • Ask: “Do you apply altitude correction for Denver’s elevation?” — a contractor who knows what this means understands the issue
  • Ask to see the calculation output — legitimate Manual J software (Wrightsoft, Elite Software) produces a printed report you can review
  • Be skeptical if the sizing takes less than 30 minutes — a real Manual J takes 1–2 hours of measurement, data entry, and calculation
  • Be skeptical if the contractor recommends the exact same tonnage as your current equipment without measuring anything
Professional HVAC contractor performing load calculation assessment in Denver
A contractor who performs a genuine Manual J assessment will measure windows, walls, ceiling heights, and gather construction data before recommending equipment size.

Real Job: Broomfield, June 2025

A Broomfield homeowner hired us after their new AC — installed the previous year by another company — ran constantly on hot days and never cooled the house below 78°F. The previous contractor had installed a 4-ton unit. When we ran a proper Manual J with altitude correction, the load calculation came back at 52,000 BTU/hr — requiring a 4.5-ton unit. The previous contractor had sized correctly for sea level and installed an undersized system for Denver. The homeowner had to replace the unit after just one season. A proper Manual J would have caught this for the cost of an hour of the contractor’s time.

Free Estimate

Frequently Asked Questions

Is a Manual J required by code in Colorado?

Yes. The International Mechanical Code (IMC), which Colorado has adopted, requires that HVAC equipment be sized based on load calculations per ACCA Manual J. The Colorado Energy Code also references Manual J for residential construction. In practice, enforcement varies — a permit for a replacement unit doesn’t always require submitted Manual J documentation in all jurisdictions. But code-compliant installation requires it, and any contractor who skips it is not performing a code-compliant installation.

What happens if AC is oversized?

An oversized AC short cycles — it cools the house quickly, shuts off, restarts within minutes, and never runs a full cycle. Short cycling prevents proper dehumidification (the coil needs to run for at least 15–20 minutes to effectively dehumidify), causes humidity spikes that make 75°F feel muggy, creates uncomfortable temperature swings, and wears starting components (capacitors, contactors) much faster. Compressors have a finite number of start cycles; short cycling consumes them much faster than normal operation.

How much does a Manual J load calculation cost?

At Blue Collar Heating & Air, we include Manual J in every new installation quote — no separate charge. Some contractors charge $150–$300 for a standalone load calculation. If a contractor quotes you a new system without doing any measurements or load calculation, that’s a red flag. A quick square-footage-based estimate takes 5 minutes; a proper Manual J takes 1–2 hours. You can tell the difference.

Does my existing AC size tell me what I need?

Not reliably. Your existing system may have been sized incorrectly when installed (common in Denver due to altitude issues), or your home may have been modified since then (added rooms, new windows, attic insulation upgrades). There’s also a meaningful chance your previous contractor sized using a rule of thumb. Always run a new Manual J when replacing equipment rather than assuming the existing size was correct.

How does Denver’s low humidity affect AC sizing?

Denver’s arid climate means the latent cooling load (moisture removal) is a small fraction of the total load compared to humid climates. In Houston or Atlanta, latent loads might be 30–40% of total cooling load. In Denver, they’re typically 10–15%. This matters for equipment selection because some equipment types — two-stage compressors, variable-speed systems — are particularly good at latent cooling. In Denver, you can often prioritize sensible (temperature) capacity over latent capacity, which changes the optimal equipment recommendation. A proper Manual J calculates both sensible and latent loads separately.

Schedule Online

ICC Certified • Manual J included on every install quote • Licensed & Insured

Call (303) 351-1667

AC Maintenance Checklist: What Denver Homeowners Should Do Every Month

Written by Lance Fredrickson — ICC Certified HVAC Specialist | EPA 608 Universal

20+ years serving the Denver metro • Blue Collar Heating & Air, Northglenn CO

HVAC technician completing AC maintenance checklist for Denver homeowner
A 15-minute monthly maintenance routine prevents the vast majority of AC breakdowns in Denver — especially critical during cottonwood season and wildfire smoke months.

The most common emergency AC calls we get in Denver are for problems that a 15-minute monthly inspection would have caught weeks earlier. A clogged filter, a blocked drain line, cottonwood packed into the condenser — these are not mysterious failures. They’re the result of skipping basic maintenance.

Denver’s climate is harder on AC systems than most cities. The dry air at 5,280 ft means dust circulates freely instead of settling. Cottonwood season in May–June dumps debris into outdoor units. Wildfire smoke in July–August loads filters with fine particulates. And intense UV radiation at altitude degrades components faster. Denver homeowners need to check their AC more frequently than national recommendations, not less.

⚡ Denver AC Maintenance at a Glance

  • Every month: Check/replace filter, check thermostat, inspect condensate drain, visual outdoor unit check
  • Every May: Clear cottonwood from outdoor unit coils (Denver-specific)
  • Every July/Aug: Replace filter more frequently during wildfire smoke events
  • Every spring: Schedule professional tune-up before cooling season
  • Time required: 15 minutes monthly, 3–4 hours for annual professional service

Monthly Tasks (15 Minutes)

Do these four things every single month during cooling season (May–September in Denver). Set a recurring calendar reminder — the 1st of each month works well.

Task 1: Check and Replace the Air Filter

Pull the filter from its slot (typically in the return air grill or inside the air handler). Hold it up to a light source. If you can barely see light through it, replace it. In Denver, 60-day intervals are the standard recommendation, but during cottonwood season (May–June) and wildfire smoke events (July–August), you may need to replace it every 30 days.

Filter recommendation for Denver: MERV 11–13. This is the sweet spot between good particulate capture (including PM2.5 from wildfire smoke) and adequate airflow. MERV 14+ adds too much restriction for most residential systems. Don’t use “ultra-allergen” filters rated MERV 16 without confirming your system can handle the higher static pressure.

Time: 5 minutes

Task 2: Check the Thermostat and System Operation

Set the thermostat 5°F below current room temperature and let the system run for 10–15 minutes. Confirm: (1) the outdoor unit starts within 2–3 minutes of the thermostat calling, (2) supply registers are blowing cool air (should be 55–65°F at the register), (3) the system shuts off when the setpoint is reached without short cycling.

If the outdoor unit doesn’t start, if air is warm, or if the system runs continuously without reaching setpoint, something needs attention. Document what you observe.

Time: 10 minutes

Task 3: Check the Condensate Drain Line

Your air handler has a drain pan below the evaporator coil that collects condensate. In dry Denver air, the condensate drain line can get algae buildup less frequently than in humid climates, but it still happens — especially in homes with high indoor humidity from cooking, plants, or humidifiers.

Monthly: look at the drain pan — it should be empty or have minimal water. If you see standing water, the drain line may be clogged. Pour 1/4 cup of distilled white vinegar down the drain line access port (a white PVC pipe near the air handler) monthly to prevent algae buildup.

Time: 2 minutes

Task 4: Visual Inspection of the Outdoor Unit

Walk around the outdoor condenser unit. Look for: debris accumulation against the coil fins, bent or damaged fins from hail (Denver averages 100+ hail events per year), vegetation growing within 18 inches of the unit, animal nests or insect activity, and any visible refrigerant line insulation deterioration (cracking or missing insulation on the large copper pipe).

At Denver’s altitude, UV degrades the foam insulation on refrigerant lines faster than at sea level. Missing insulation on the suction line reduces efficiency and can eventually lead to refrigerant line corrosion.

Time: 3 minutes

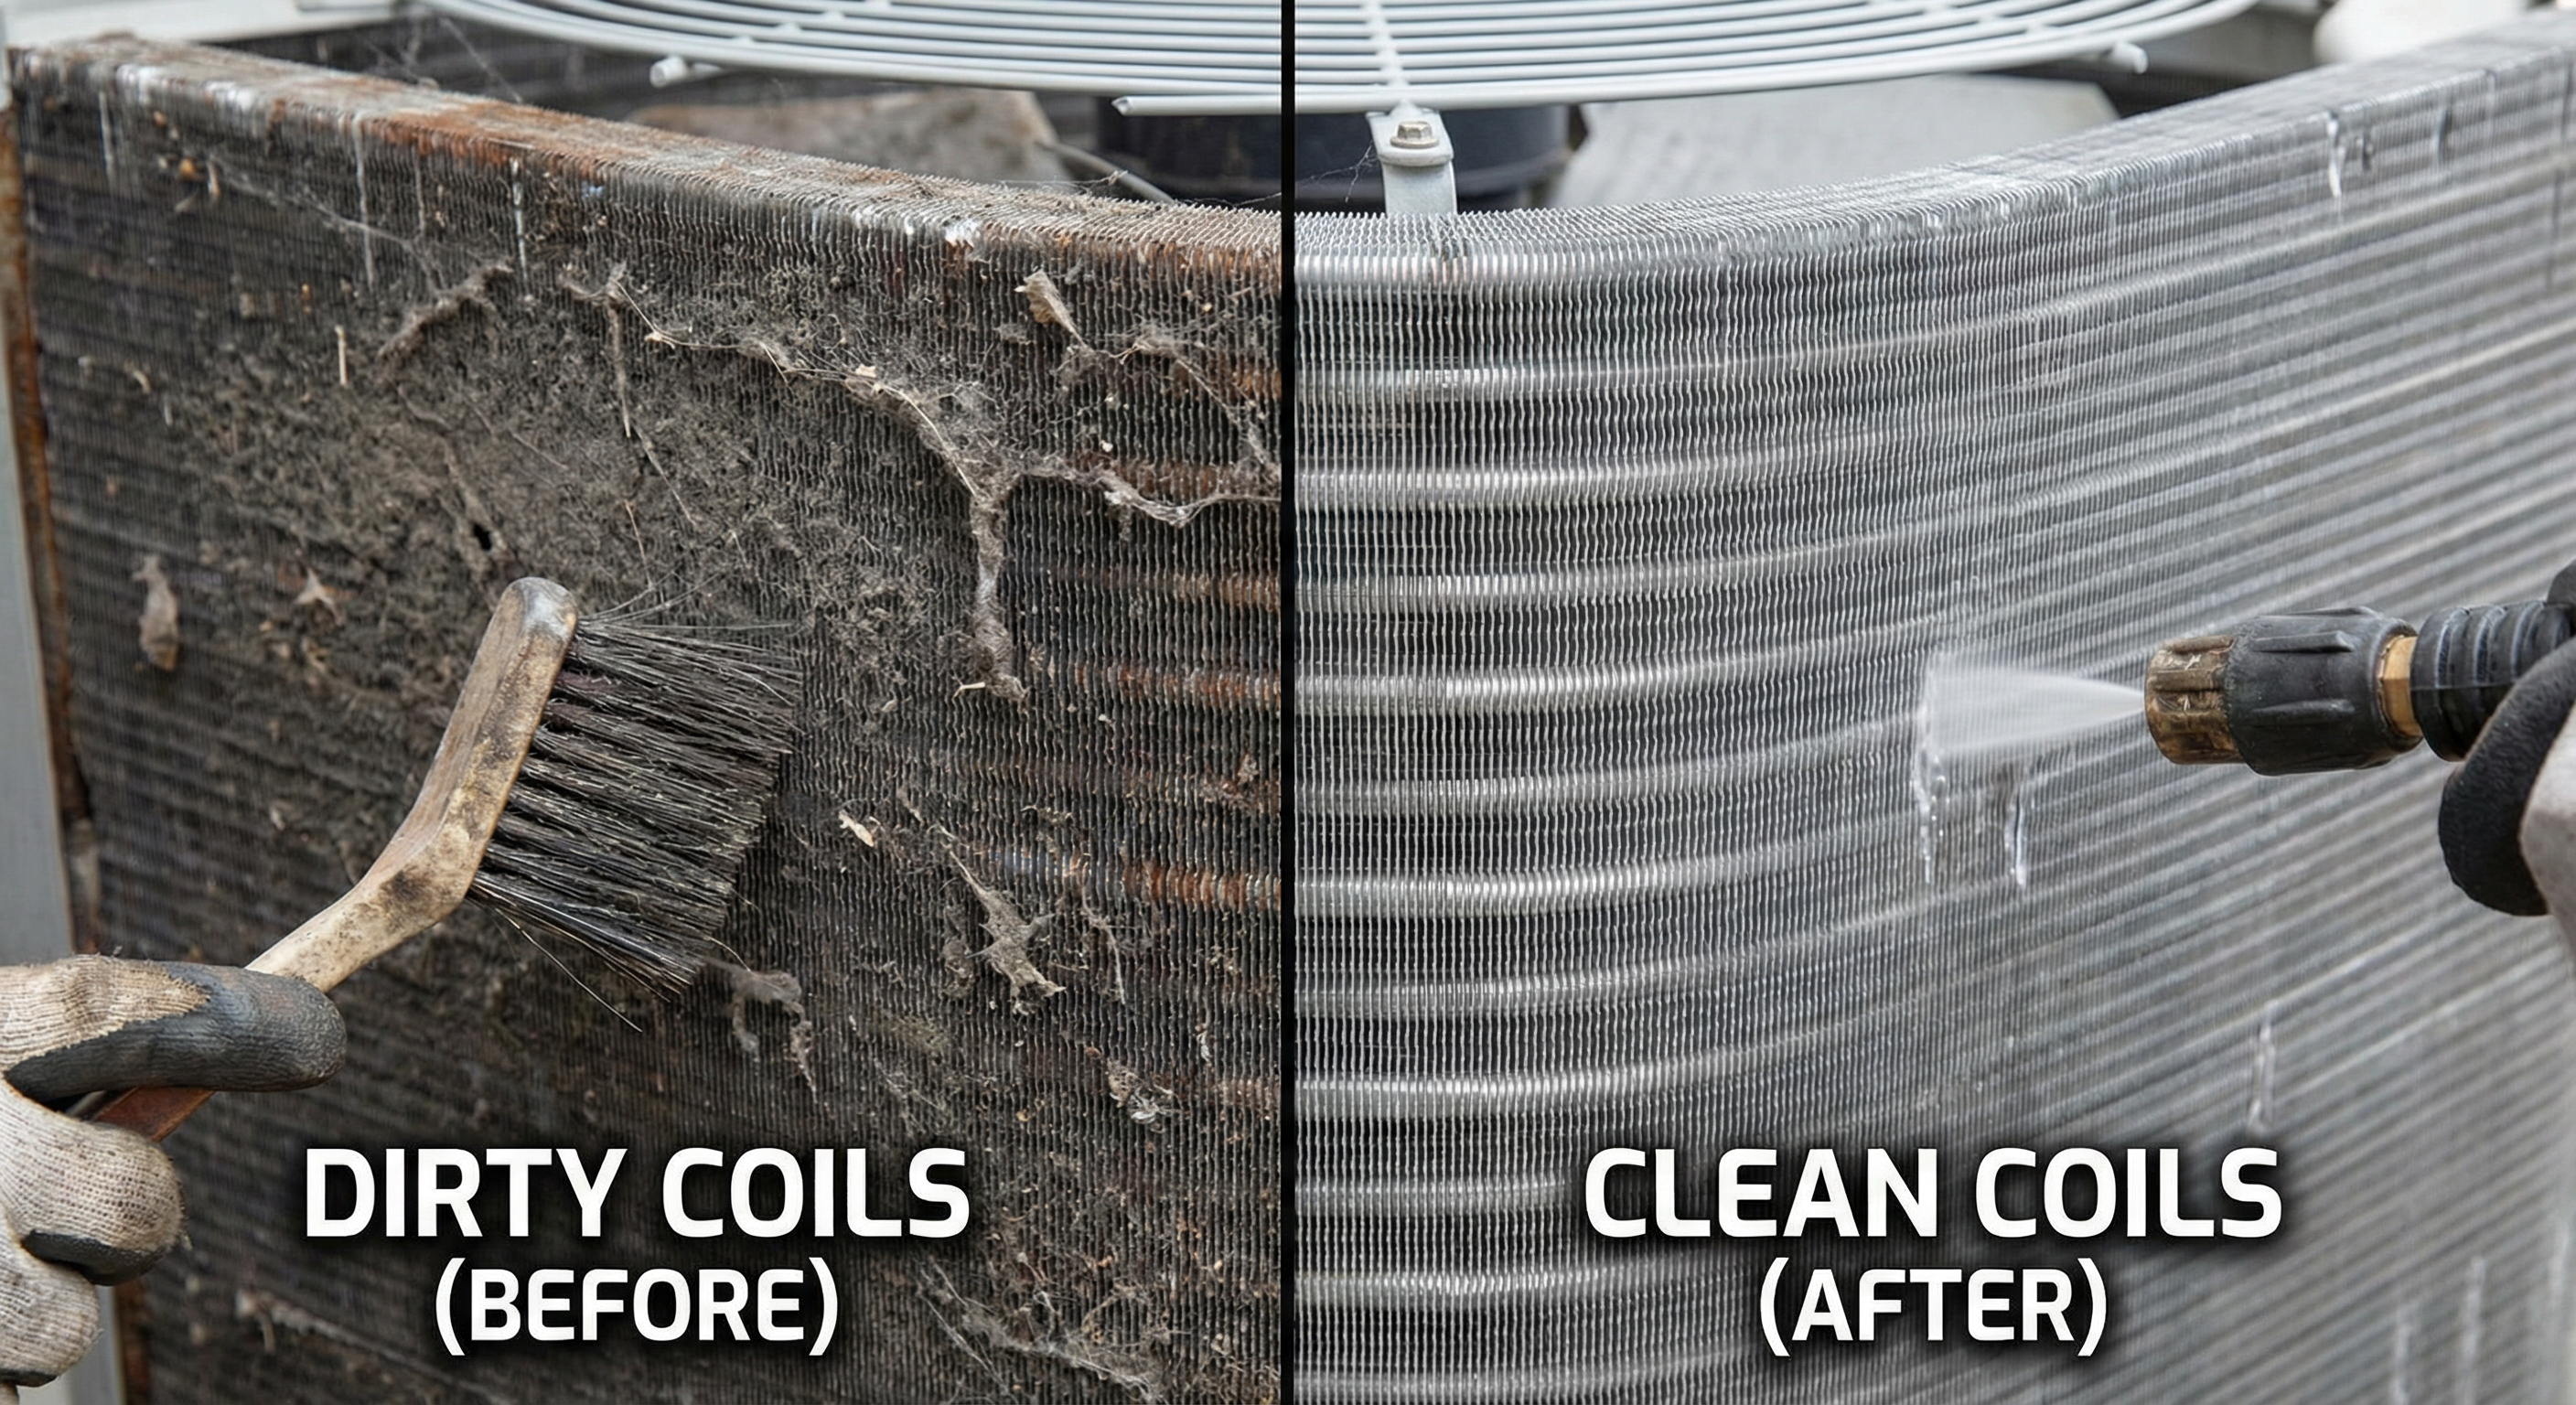
Before and after AC coil cleaning showing impact of Denver cottonwood and dust
Regular coil inspection and cleaning is essential in Denver — cottonwood and dust accumulation significantly reduces airflow and system efficiency.

Seasonal Tasks

Spring (April–May): Pre-Season Startup

  • Turn on the system for the first time — do this on a day with outdoor temps above 65°F
  • Replace the air filter with a fresh one before the season starts
  • Check all supply and return registers — open any that were closed over winter
  • Clear any debris that accumulated in/around the outdoor unit over winter
  • Check refrigerant line insulation for winter UV deterioration
  • Schedule annual professional tune-up (before the June rush)

Fall (September–October): Season Close

  • Check the filter one final time — smoke season particulates accumulate heavily by end of summer
  • Clear any leaves or debris from around the outdoor unit
  • You do NOT need to cover the outdoor unit — it’s designed to handle Colorado winters
  • Note any performance issues from the season for spring follow-up
  • Consider scheduling fall furnace tune-up at the same visit as AC close

Denver-Specific Items

May–June: Cottonwood Season

Cottonwood is the most Denver-specific AC maintenance issue there is. Every May, cottonwood trees release their seed cotton across the metro area — and it finds its way into every outdoor AC unit in the city. A light cottonwood year results in reduced efficiency; a heavy year can pack the coil fins solid and cause the system to shut down on high-pressure limit within days of season startup.

What to do: In late May or early June, turn off power at the outdoor disconnect box. Use a garden hose to rinse from the inside outward (spray from inside the unit through the coil fins to the outside). This pushes cottonwood and debris outward. Let dry, then restore power. Takes 15 minutes and prevents $125+ service call.

Denver Cottonwood Season

May–June

cottonwood debris fills outdoor AC units across Denver metro

In Northglenn, Thornton, and Westminster where cottonwood trees are common, we see dozens of service calls every May for systems that are running but barely cooling — the culprit is almost always a coil completely blocked by cottonwood. A 15-minute annual rinse prevents this entirely.

July–August: Wildfire Smoke Season

Denver’s wildfire smoke season typically peaks in July and August. During multi-day smoke events with AQI above 100, your HVAC filter loads up 2–4x faster than normal. Fine smoke particulates (PM2.5) are too small for standard MERV 8 filters but are captured by MERV 11–13. Check your filter at the beginning of every smoke event — if it was put in recently, it may still be fine. If it’s been in for 45+ days and you’ve had smoke, change it.

Also consider: during smoke events, keep the system in recirculation mode if possible, minimize fresh air intake, and run the fan on “always on” setting rather than “auto” for better filtration between cooling cycles.

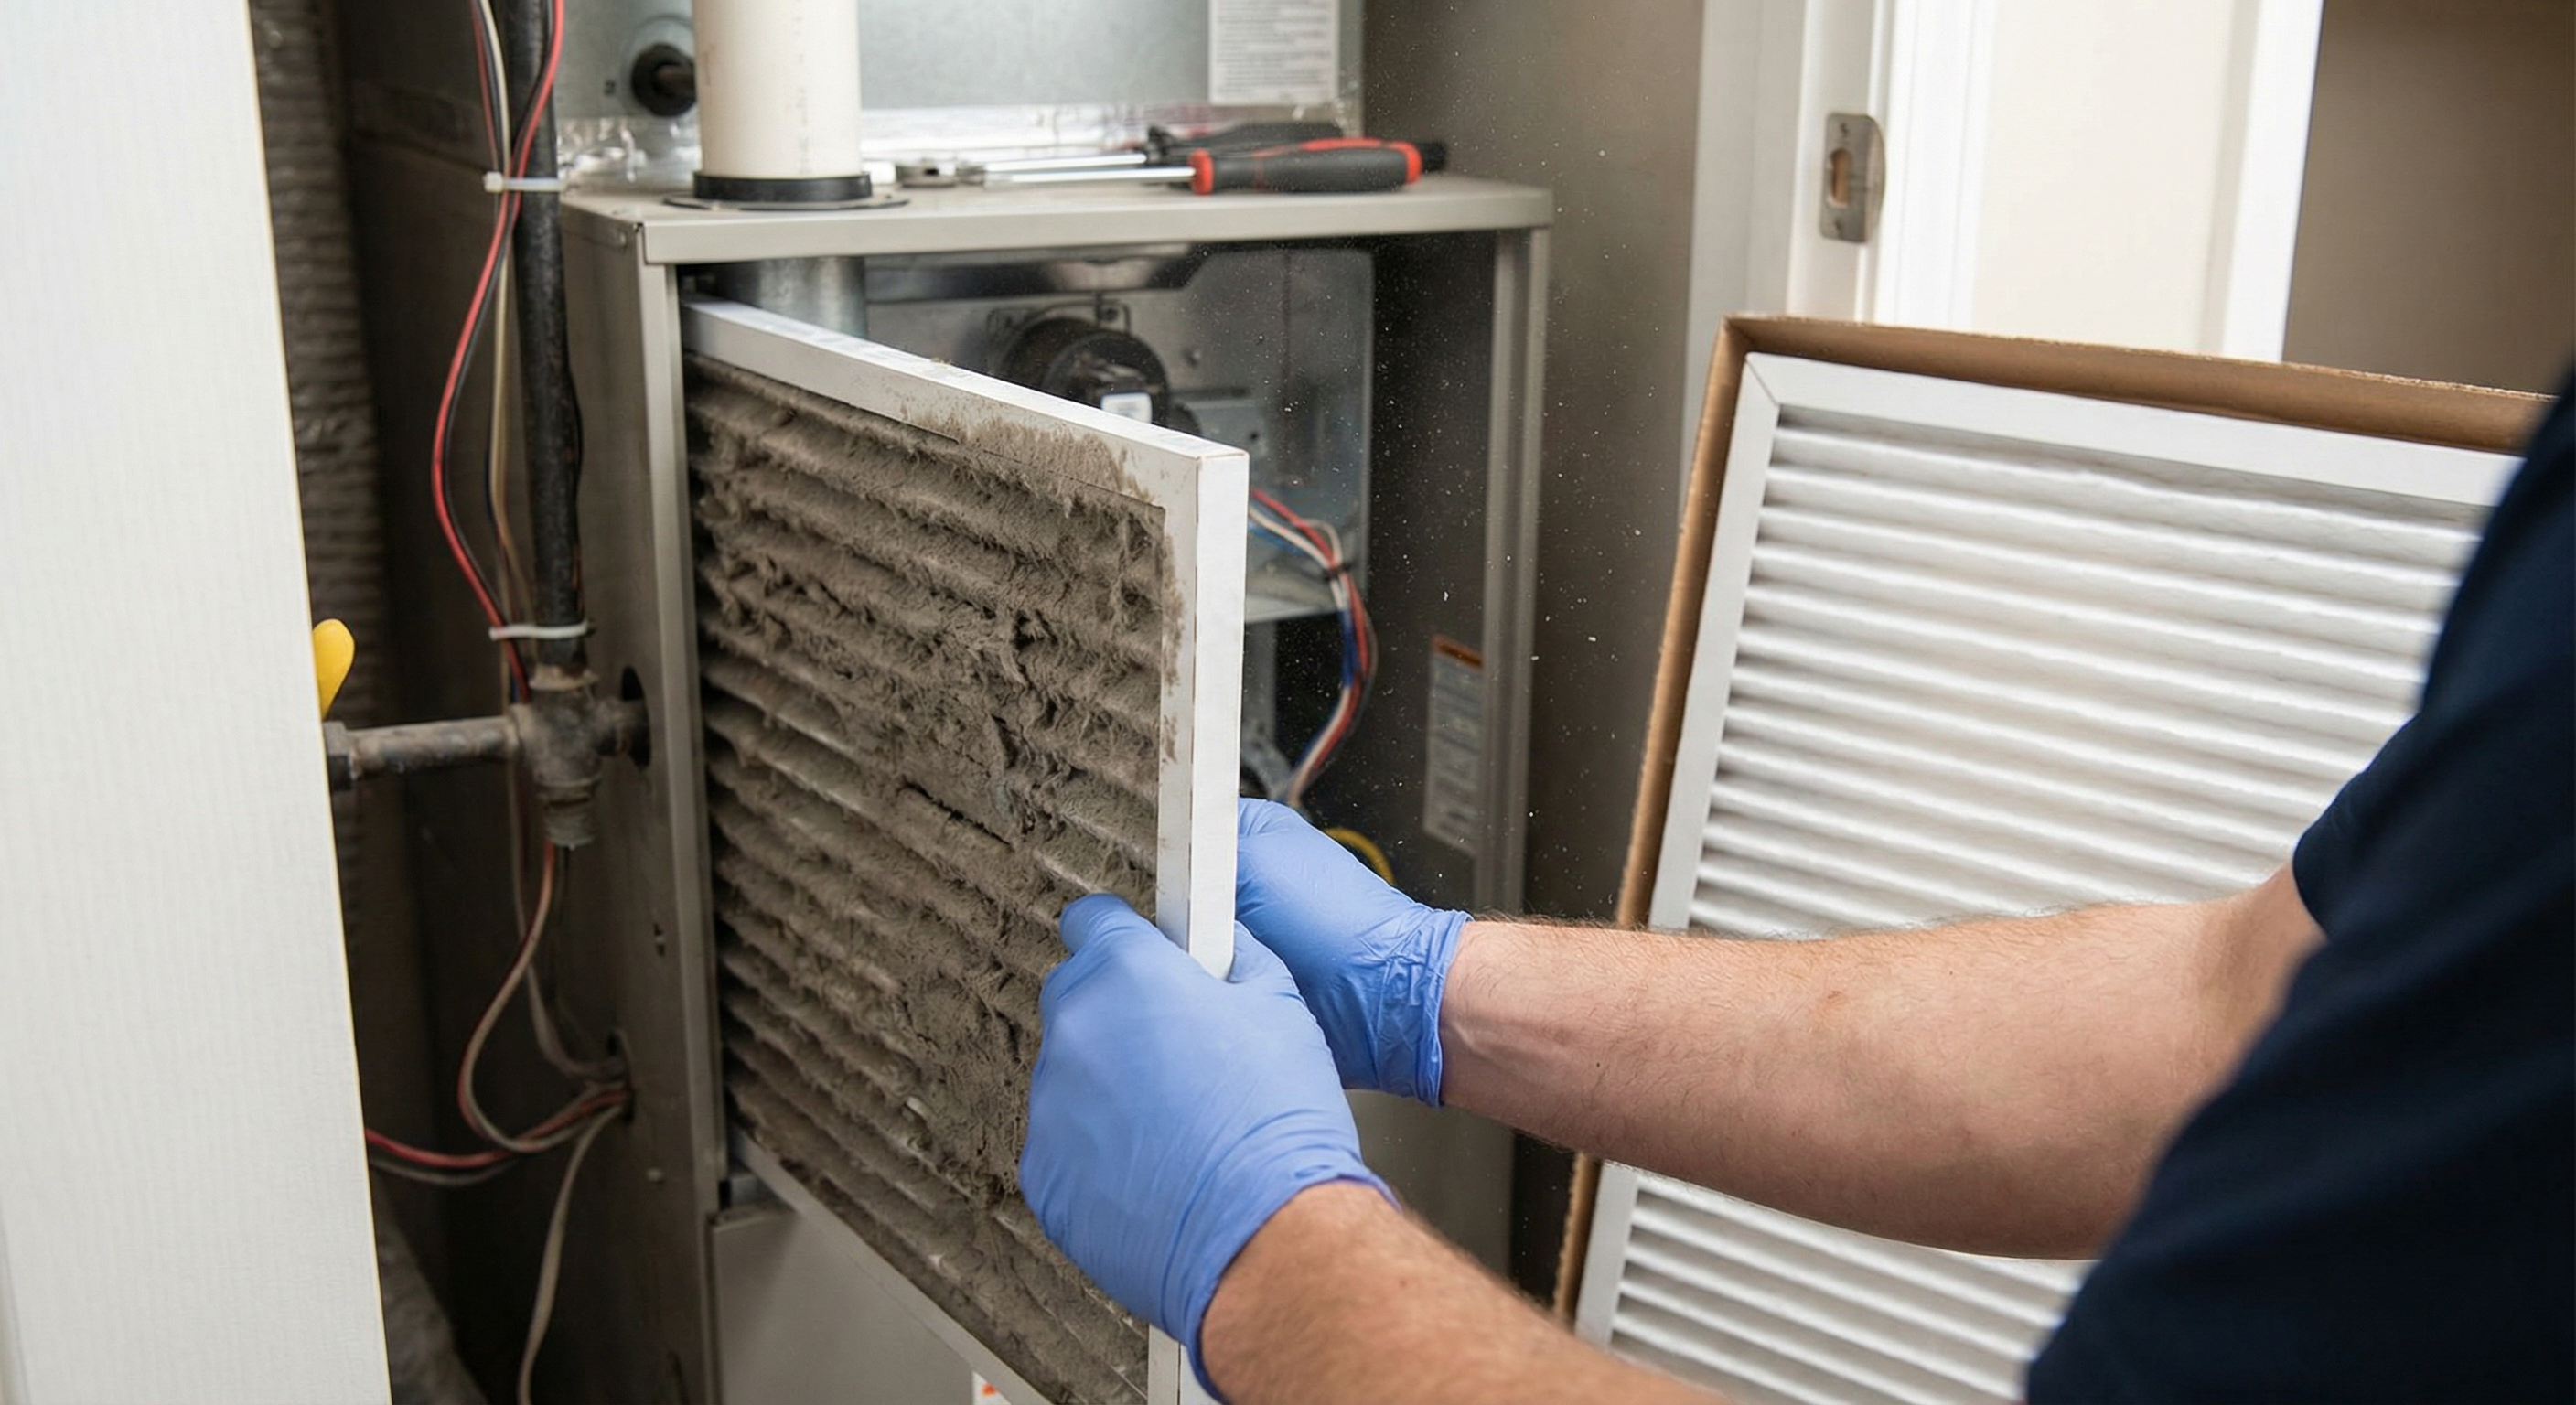
Severely clogged AC filter from Denver wildfire smoke season
A filter loaded with wildfire smoke particulates during Denver’s July–August smoke season — replace immediately when it looks like this, regardless of how recently it was installed.

Annual Professional Service: What It Includes

Your monthly tasks keep the system clean and alert you to problems. Annual professional service catches what you can’t see: refrigerant charge, electrical condition, motor health, coil cleanliness at a deeper level, and drain line integrity.

Here’s what a proper Denver AC tune-up includes:

  • Refrigerant pressure check — altitude-corrected for Denver’s 5,280 ft elevation
  • Evaporator coil cleaning with foam cleaner (not just visual inspection)
  • Condenser coil inspection and cleaning
  • Electrical component inspection: capacitor, contactor, wiring connections
  • Blower motor amperage check — predicts motor failure before it happens
  • Drain pan and drain line flush
  • Filter replacement (or inspection if recently replaced)
  • Thermostat calibration check
  • System performance test: supply temperature, temperature split across the coil
  • Refrigerant line insulation inspection

When to schedule: April–early May, before cooling season starts. By June, our schedule fills up. Booking early gets you the best time slots and means your system is confirmed ready before the first 90°F day.

Simple Maintenance Log

Keep a simple log — a note on your phone or a paper in a kitchen drawer works fine. Record these entries each month:

Date: ___________
Filter status: ☐ OK    ☐ Replaced (MERV ___)
System ran correctly: ☐ Yes    ☐ Issue: ___________
Drain pan: ☐ Clear    ☐ Standing water
Outdoor unit: ☐ Clear    ☐ Debris removed
Notes: ___________

This log is invaluable when you call a technician — “the system started making a buzzing sound about 3 weeks ago” is much more useful diagnostic information than “it’s been acting weird lately.” It also helps track filter life and identifies seasonal patterns.

Schedule Online

Frequently Asked Questions

How often should I change my AC filter in Denver?

Every 60 days as a base — but adjust for Denver’s conditions. During cottonwood season (May–June), check monthly. During wildfire smoke events (July–August), check every 2–3 weeks and replace if the filter is visibly gray. Homes with pets should go to 30-day intervals. Using a MERV 11–13 filter captures more — including smoke particulates — but loads faster than a MERV 8, so more frequent replacement is expected.

Do I really need professional AC service every year?

In Denver, yes — more than most cities. The combination of intense UV at altitude (degrading components faster), cottonwood season (loading coils), and wildfire smoke (loading filters and coating coil surfaces) means Denver systems experience more stress per season than sea-level systems. An annual tune-up catches refrigerant issues before they become emergency calls, identifies failing capacitors before they take out the motor, and cleans coil surfaces that a homeowner can’t access without equipment.

How long does monthly AC maintenance take?

About 15 minutes: 5 minutes for the filter check/replacement, 10 minutes for system test and outdoor unit visual. During cottonwood season (May), add 15–20 minutes for the outdoor unit rinse. The entire DIY annual routine — including the pre-season startup inspection in April — takes about 45 minutes. Compare this to a $400+ emergency call or $1,500+ compressor repair from a problem that could have been caught early.

Should I run the fan in “always on” or “auto” mode?

For Denver, “always on” during smoke events is a good idea — it continuously cycles air through the filter, improving air quality even when the cooling cycle isn’t running. In normal conditions, “auto” is fine and more energy-efficient. One caution with “always on”: if you have a gas furnace, check that the fan runs on the evaporator section only — not heating mode. Some thermostats labeled “fan on” can inadvertently engage the heating circuit.

What’s the best MERV rating for Denver AC filters?

MERV 11–13 is the sweet spot for most Denver homes. MERV 11 captures pollen, mold spores, and most dust. MERV 13 also captures PM2.5 smoke particles, bacteria, and fine dust. Both work within the static pressure limits of most residential systems. MERV 14–16 provides better filtration but significantly increases static pressure — only appropriate if your system was specifically designed for it. Never use MERV 16 “ultra-allergen” filters in standard residential systems without confirming your HVAC can handle the restriction.

Schedule Online

$89 flat diagnostic fee • Credited toward repair • Licensed & Insured
Call (303) 351-1667

Why Does My AC Ice Up at Night? (Denver HVAC Expert Explains)

Written by Lance Fredrickson — ICC Certified HVAC Specialist | EPA 608 Universal

20+ years serving the Denver metro • Blue Collar Heating & Air, Northglenn CO

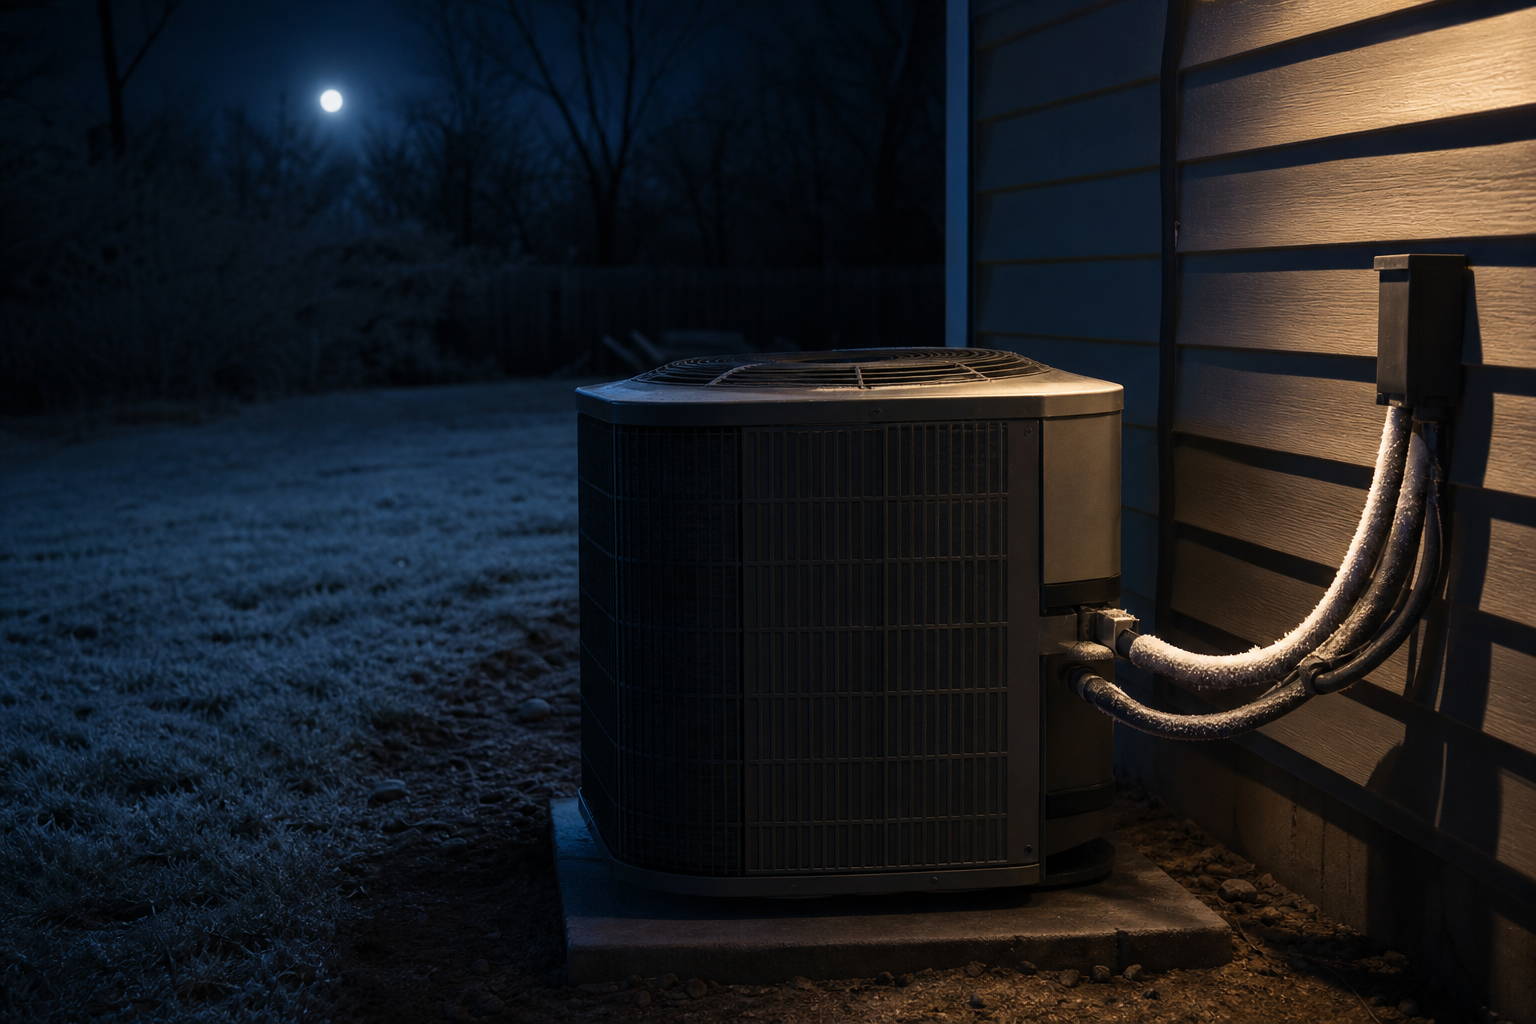
AC system component failure causing freezing issues in Denver home
A frozen evaporator coil blocks airflow and stresses the compressor. Denver’s cool summer nights make overnight icing more common than anywhere else in the country.

You wake up in the morning, the house is warm, and you check the AC to find ice coating the refrigerant lines or the indoor air handler. What’s happening, and why does it always seem to happen at night?

There are three primary causes of AC icing: low refrigerant, dirty evaporator coil, and restricted airflow. But Denver has a fourth compounding factor that makes overnight icing particularly common here — our summer nights regularly drop to 55–65°F, and running an AC when outdoor temperatures are that low creates conditions perfect for coil freezing, even in systems that are otherwise healthy.

⚡ Quick Answer: Why Is My AC Icing Up?

Low refrigerant (most common cause)Urgent — Leak
Dirty evaporator coil (common in Denver)Service Needed
Clogged/dirty air filterDIY Fix First
Closed or blocked supply registersCheck Vents
Running AC when outdoor temp <60°FDenver Specific
Blower fan failureCall Us — $400–$700

Why Ice Forms on an AC System

The evaporator coil — located inside the air handler in your basement, closet, or attic — is where refrigerant absorbs heat from your indoor air. Under normal conditions, the coil surface stays at about 35–50°F. That’s cold enough to condense moisture from the air, which drips into the drain pan. It’s not cold enough to freeze that moisture — the steady flow of warm air across the coil keeps surface temperatures above freezing.

When something disrupts the heat exchange — too little refrigerant, too little airflow, or too dirty a coil surface — the coil temperature drops below 32°F. The moisture that condenses on it freezes instead of dripping. Ice accumulates, blocks more airflow, makes the coil even colder, and the problem escalates rapidly. Within hours, a coil can be fully encased in ice, completely blocking airflow.

Do Not Run a Frozen AC. A frozen coil blocks airflow to the compressor. The compressor — the most expensive part of your system at $1,500–$2,500 — can overheat and fail if you run it while the coil is frozen. Turn the system to “fan only” (not OFF) to defrost the coil before running it again. This typically takes 2–4 hours.

Denver Cool Nights: Why Overnight Icing Is More Common Here

Denver’s summer climate has a characteristic that’s unusual for a hot-weather city: dramatic day-to-night temperature swings. July and August days reach 90–95°F, but nights drop to 55–65°F regularly. This large diurnal temperature range is a product of Denver’s elevation and semi-arid climate.

Here’s the problem: most AC systems have a minimum operating temperature of about 60–65°F for the outdoor air. When outdoor temperatures drop below this threshold, the refrigerant in the outdoor condenser doesn’t release heat as efficiently. Refrigerant pressures drop, the evaporator coil gets colder than normal, and ice formation is likely — even in a system with perfect refrigerant charge and clean coils.

Denver homeowners who run their AC overnight when nighttime lows hit 55°F are inadvertently creating perfect ice conditions. The symptoms are classic: they go to bed comfortable, the AC runs all night, and they wake up at 7am to a warm house with a frozen air handler because the AC iced up at 2am when it was 58°F outside.

Denver Summer Night Temperature Range

55–65°F

typical overnight low temperatures in Denver, June–August

At 5,280 ft elevation, Denver’s summer nights are dramatically cooler than daytime highs. Running an AC when outdoor temperatures drop below 60°F causes refrigerant pressures to fall outside normal operating range, making coil freezing likely — even in perfectly maintained systems.

Low Refrigerant: The Most Common Cause

Low refrigerant causes icing by creating a pressure drop in the refrigerant circuit. When refrigerant charge is low, the evaporator coil operates at below-normal pressure — and lower pressure means lower temperature. The coil drops below 32°F and moisture freezes on contact.

The key diagnostic tell: a system that ices up even when outdoor temperatures are well above 65°F is almost certainly low on refrigerant (or has a coil/airflow issue). A system that only ices up on cool nights (when outdoor temps are below 60°F) may simply be a Denver climate issue rather than a refrigerant problem.

If your AC is low on refrigerant, remember: refrigerant doesn’t deplete — it leaks. Adding refrigerant without finding and repairing the leak is temporary and increasingly expensive with current R-410A prices of $80–$120/lb.

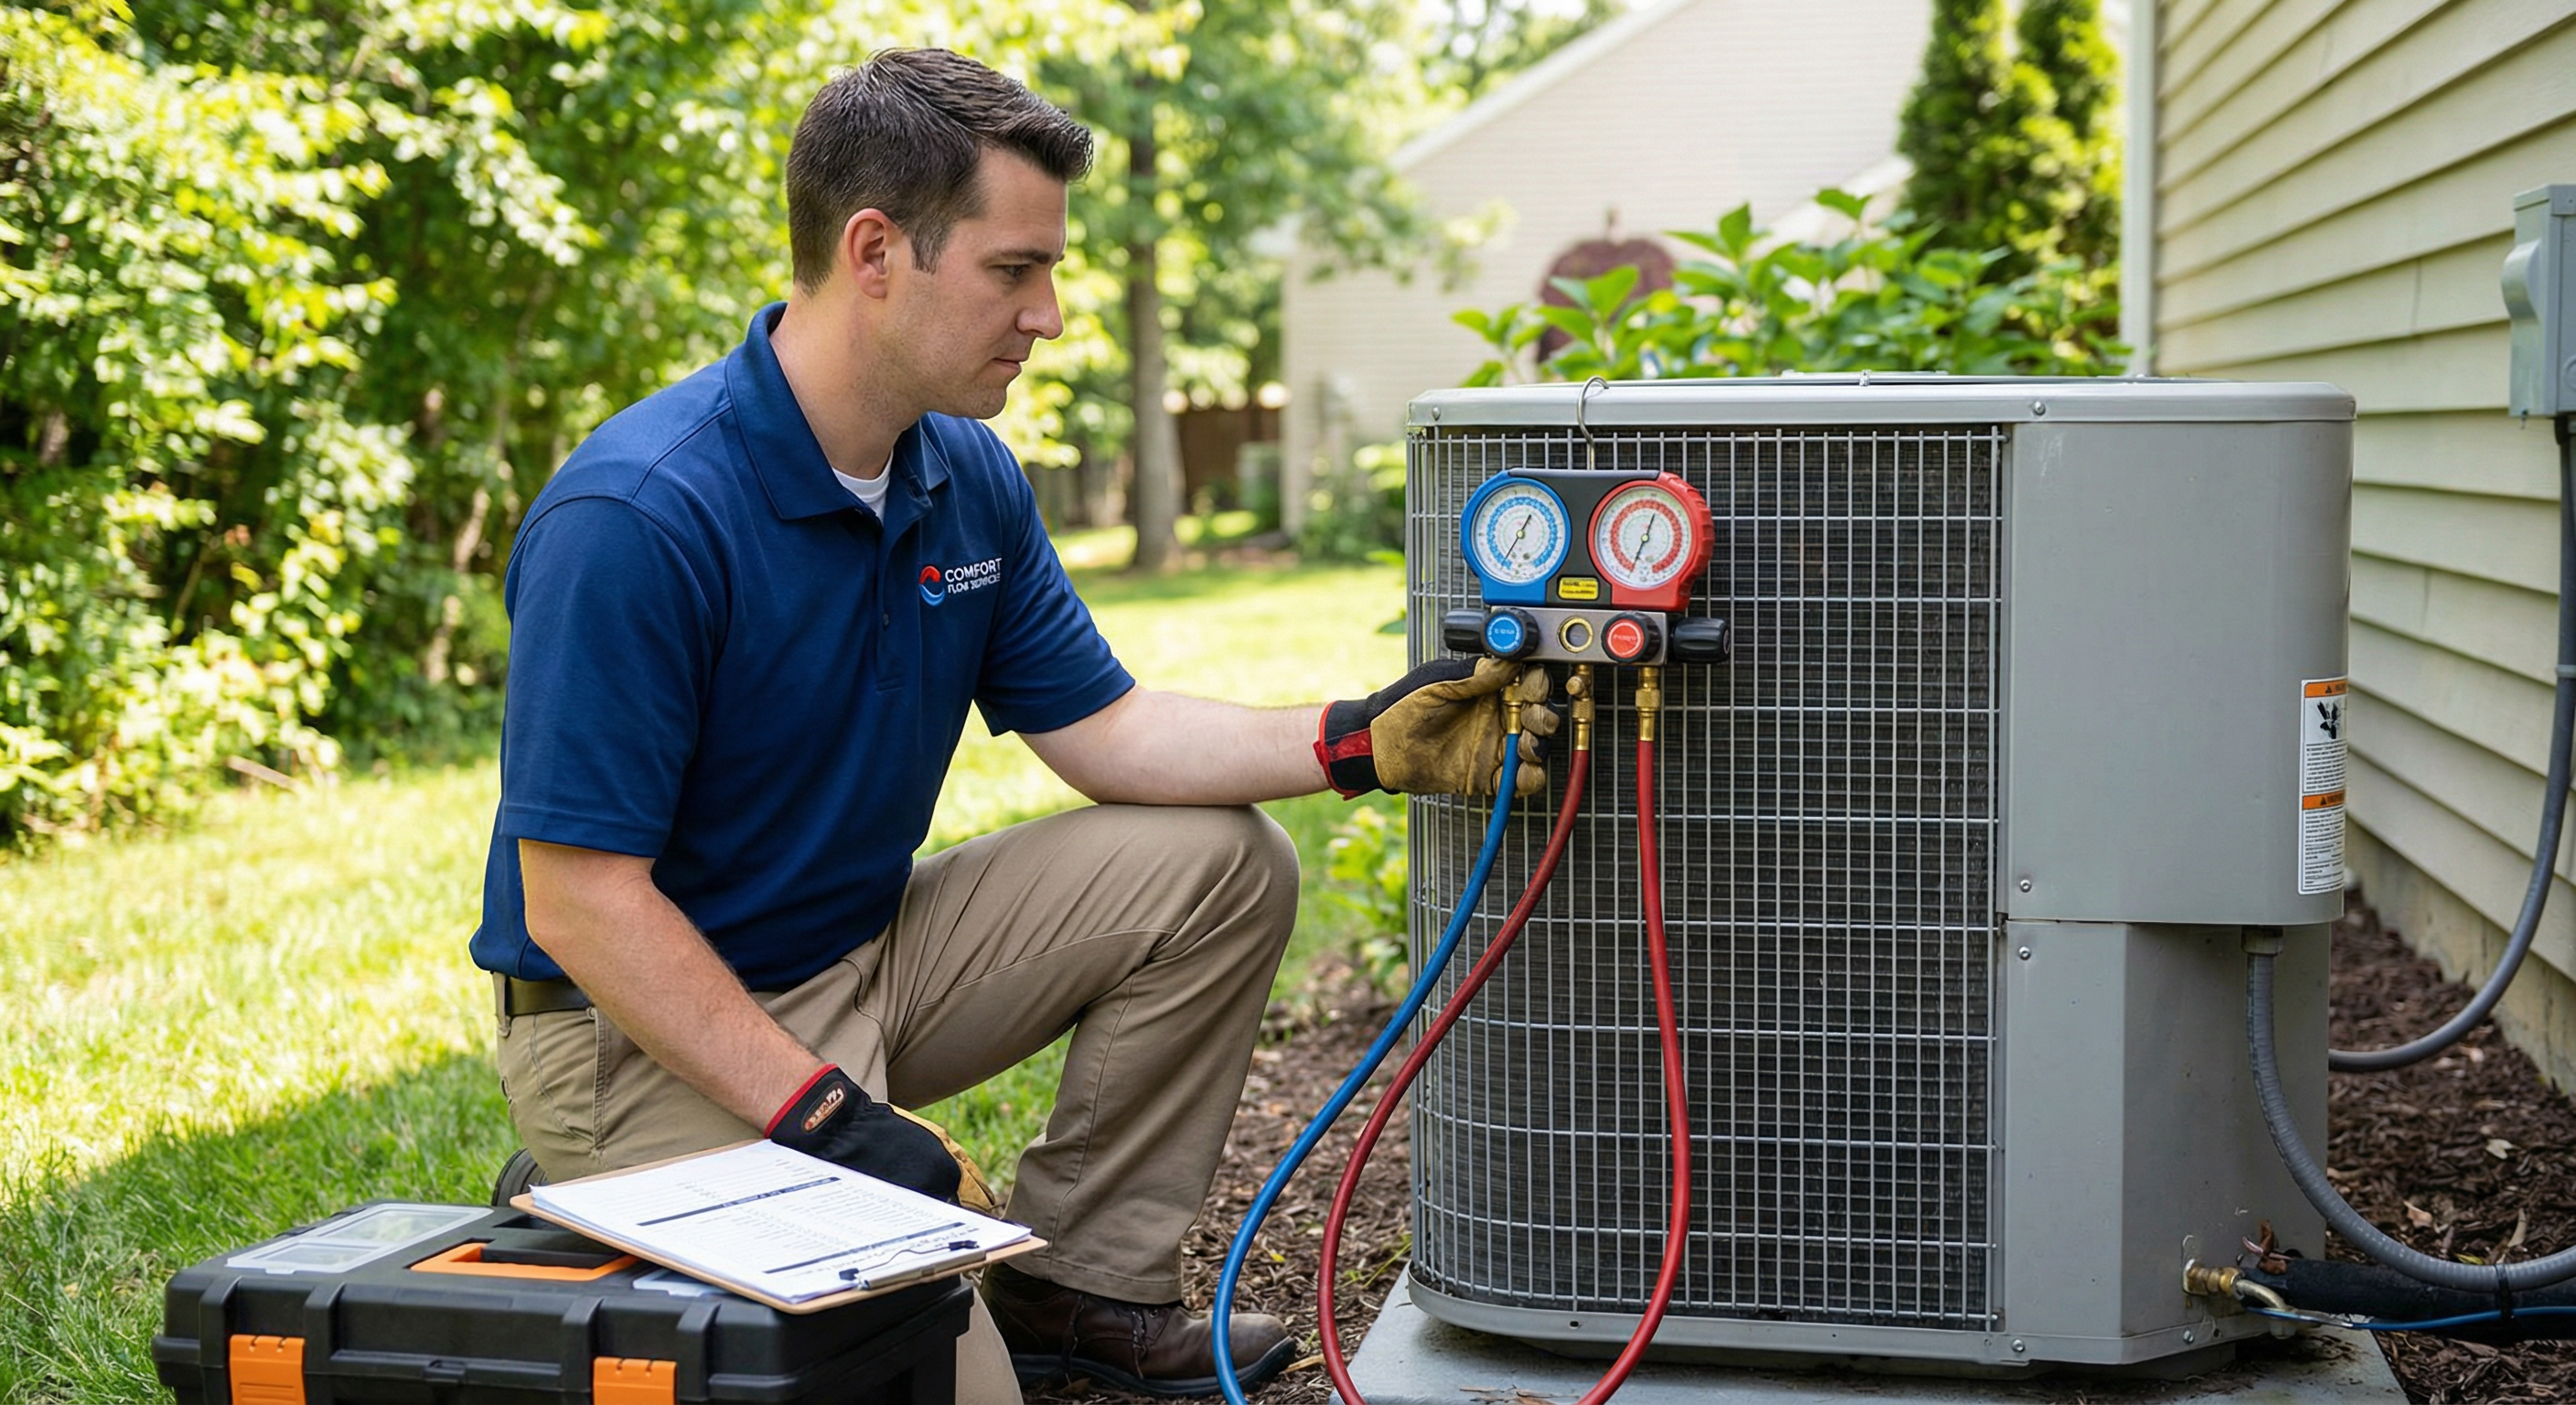
Refrigerant pressure check on AC system showing low charge that causes icing
Low refrigerant charge is the most common cause of overnight AC icing — it causes evaporator coil temperatures to drop below freezing even during normal operation.

Dirty Evaporator Coil

The evaporator coil surface needs to be clean for efficient heat transfer. As dust, pet dander, mold spores, and particulates accumulate on the coil fins, they act as insulation — reducing the coil’s ability to absorb heat from passing air. This causes the coil surface temperature to drop below what it should be, eventually reaching below-freezing territory.

Denver’s dry climate means that dust in the air doesn’t settle with moisture — it circulates freely and accumulates on the evaporator coil faster than in humid climates. Wildfire smoke adds an additional layer of fine particulate coating that’s particularly problematic because the particles are extremely small and pack densely on coil surfaces.

A dirty evaporator coil also causes higher humidity in the space (because the reduced coil contact area means less dehumidification), reduced cooling capacity, and higher electricity bills as the system runs longer cycles. Evaporator coil cleaning is part of an annual AC tune-up; never skip this service in Denver.

Airflow Restriction

The third cause of coil icing is restricted airflow — not enough warm indoor air moving across the coil to keep its surface above freezing. Common causes:

  • Clogged air filter: The #1 DIY-preventable cause. A filter so clogged that airflow is severely restricted will cause coil icing within days. Change your filter. In Denver, every 60 days is the standard recommendation — more frequently during wildfire smoke season
  • Closed supply or return registers: Many homeowners close registers in unused rooms to “save energy.” This actually increases static pressure and reduces system airflow, causing coil problems. Keep all registers open
  • Undersized return duct: Some Denver homes, particularly older construction, have return ducts too small for the installed system. This is a chronic airflow restriction that gradually degrades system performance
  • Blocked return air path: Furniture placed over floor return registers, or doors closed to rooms with supply registers, restricts air return
  • Failed blower motor: If the indoor blower motor is failing or has seized, airflow drops dramatically and coil freezing follows quickly
Before and after comparison of AC evaporator coil cleaning in Denver
A dirty evaporator coil (left) vs. a cleaned coil (right) — the contamination layer acts as insulation, dropping coil temperatures below freezing and causing overnight ice buildup.

What to Do Right Now If Your AC Is Frozen

  • Step 1: Turn the thermostat to FAN ONLY (not OFF, not COOL) — this runs the blower to defrost the coil with warm indoor air without running the refrigerant circuit
  • Step 2: Check and replace your air filter immediately — if it’s visibly gray and clogged, this may be the primary cause
  • Step 3: Open any closed supply or return registers throughout the house
  • Step 4: Place towels around the indoor unit base — when ice melts, it can overflow the drain pan and cause water damage
  • Step 5: Wait 2–4 hours for the coil to fully defrost before switching back to COOL
  • Step 6: After defrost, if it ices up again within hours (especially in daytime with outdoor temps above 70°F), call us — refrigerant or coil service is needed
Denver-specific tip: If your AC only ices up overnight when temperatures drop below 60°F, try setting the thermostat to 68°F or warmer at bedtime, or use the fan-only mode at night. Denver’s cool nights often mean the AC doesn’t need to run at all overnight — your home will stay comfortable with just circulating air while temps are 58°F outside.

Schedule Online

Real Job: Thornton, August 2025

A Thornton homeowner called at 8am saying their AC “broke overnight.” When I arrived, the evaporator coil was completely encased in ice — you could see frost all the way down the refrigerant lines to the outdoor unit. After defrost, diagnosis revealed the primary filter hadn’t been changed in over a year (it was visibly blocked solid) and the secondary cause was a refrigerant charge that was about 15% low from a slow coil leak. Filter replacement plus refrigerant top-off after leak repair. Total: $485. The homeowner had never changed the filter — classic Denver problem, especially during wildfire smoke season when filters load up fast.

Frequently Asked Questions

Why does my AC ice up at night but not during the day?

In Denver, this is almost always related to overnight temperature drops. When outdoor temperatures fall below 60–65°F, refrigerant operating pressures drop outside normal range, causing the evaporator coil to run colder than it should. Combine this with Denver’s 55–65°F overnight summer lows and you have perfect ice conditions. If the problem only occurs overnight, try raising your thermostat setpoint before bed and monitoring. If it ices up during the day too, you have a refrigerant or coil/airflow issue that needs a technician.

Is it OK to let the ice melt on its own?

Yes, but put towels around the base of the indoor unit first. When a fully frozen coil melts, it can generate several gallons of water that can overflow the drain pan and cause water damage to your floor or ceiling (in attic installs). Turn to FAN ONLY to actively defrost — this is faster and safer than waiting for passive melting with the system off.

Can I run the AC after the ice melts?

Yes, after the coil is fully defrosted (2–4 hours on fan only). But if it ices up again within a few hours of resuming cooling operation during daytime with outdoor temps above 65°F, the root cause hasn’t been addressed. At that point, call a technician — running a system that repeatedly ices up damages the compressor over time as it’s forced to work against restricted airflow.

How much does it cost to fix a frozen AC in Denver?

It depends on the cause. A clogged filter is free to fix yourself. Evaporator coil cleaning during a tune-up is $150–$300. Refrigerant leak repair and recharge runs $400–$800 depending on leak location and refrigerant needed. Blower motor replacement: $400–$700. Our $89 flat diagnostic fee covers determining which cause applies to your system — and it’s credited toward the repair.

Does Denver’s altitude make AC icing more likely?

Yes, in two ways. First, Denver’s cool summer nights (55–65°F) regularly bring outdoor temperatures below the AC’s minimum operating range, creating natural icing conditions even in healthy systems. Second, altitude reduces atmospheric pressure, which affects refrigerant operating pressures — a system that runs at the edge of spec at sea level may exhibit icing symptoms more readily at Denver’s 5,280 ft elevation. This is why Denver-experienced technicians use altitude-corrected pressure specs when diagnosing and servicing systems.

Schedule Online

$89 flat diagnostic fee • Credited toward repair • Licensed & Insured
Call (303) 351-1667

How to Childproof Your Outdoor AC Unit (Denver Safety Guide)

Written by Lance Fredrickson — ICC Certified HVAC Specialist | EPA 608 Universal

20+ years serving the Denver metro • Blue Collar Heating & Air, Northglenn CO

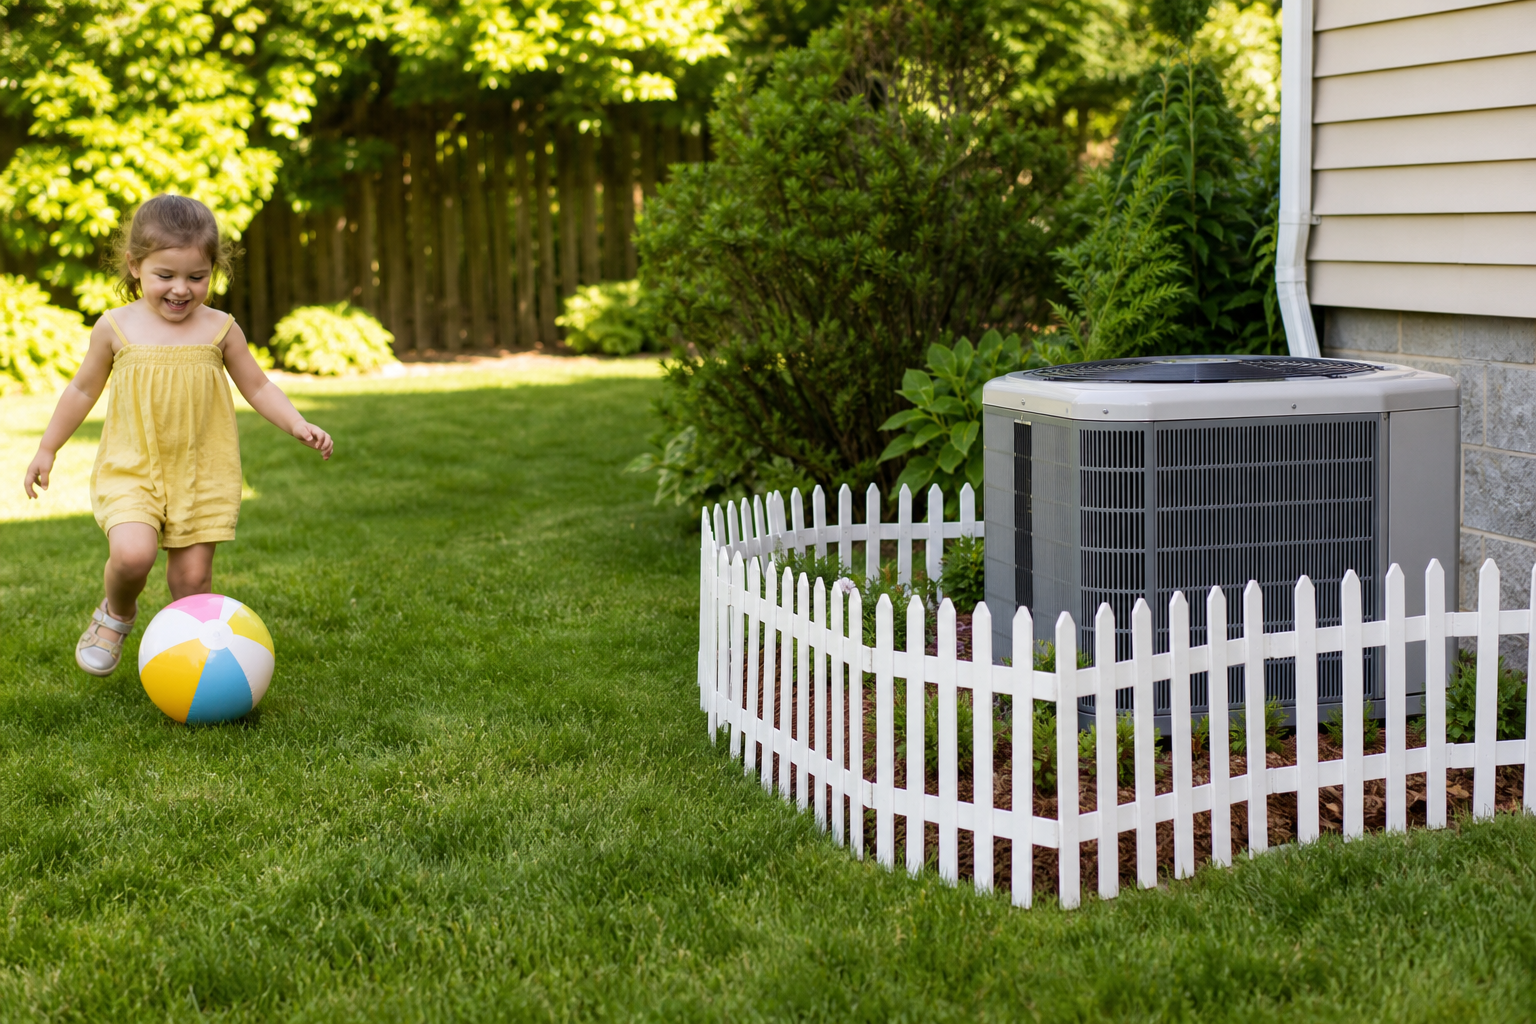
Outdoor AC condenser unit installed in Denver backyard requiring childproofing
Outdoor AC condenser units have multiple hazards — sharp aluminum fins, spinning fan blades, and 240V electrical components. Proper barriers protect both kids and the unit.

Your outdoor AC condenser unit sits in the yard looking like a large metal box. To a curious child, it’s an interesting object to touch, climb on, or poke things into. To a dog, it’s a hydrant. Neither interaction ends well for your child, your pet, or your AC system.

The risks are real: spinning fan blades running at 850–1,100 RPM through a top grate opening wide enough for small fingers, razor-sharp aluminum coil fins that cut like a box cutter, and 240V electrical components. I’ve seen kids with serious cuts from AC fins and dogs whose repeated urination dissolved coil fins and cost their owners $1,200 in repairs.

⚡ Quick Answer: Childproofing Your AC Unit

  • Minimum clearance from fence to unit: 18–24 inches on all sides
  • Best fence type: Aluminum picket or vinyl lattice — airflow-permeable
  • Avoid: Solid wood privacy fences, thick shrubs within 18 inches, solid panels
  • Pet damage prevention: Physical barrier + enzyme deterrent spray
  • Denver hail guard: Doubles as physical barrier from above
  • Gate lock: Use padlock or child-proof latch on any enclosure gate

The Real Risks Around Outdoor AC Units

Let’s be specific about what can actually hurt a child or damage your unit:

Fan Blades

The outdoor condenser unit has a fan on top that pulls air upward through the coil. Most residential units have a top grate with openings of 1–3 inches — wide enough for small fingers to reach through. The fan typically runs at 850–1,100 RPM. Contact with a spinning blade at that speed causes serious lacerations. Children are at risk when standing on the unit, reaching through the top grate, or if the top grate guard has been removed or damaged.

Coil Fins

The aluminum fins on the sides of the condenser coil are thin, tightly spaced, and extremely sharp. An adult brushing their forearm against them will cut themselves — a child running their fingers along the side of the unit can suffer deep lacerations. These fins are not guarded in most installations.

Electrical Components

The outdoor disconnect box (the gray box mounted on the wall near the unit) carries 240V. The wiring and components inside the unit itself also run on 240V. While these are enclosed in standard operation, they’re accessible to children who might try to open covers. Make sure the disconnect box has a secure cover and that you explain to children that the box is not to be touched.

Heat Exhaust

The top of the outdoor unit expels hot air — at peak summer operation, this exhaust can reach 120–140°F. A child leaning over the top of the unit during operation can receive burns from this hot air stream.

Safe Clearance Requirements

Before installing any barrier or enclosure, you need to understand the clearance requirements for your specific unit. These aren’t just manufacturer suggestions — they’re the difference between a protected AC system and one that overheats and fails.

  • Sides: Minimum 18 inches clearance from any fence or solid obstruction — 24 inches preferred for airflow
  • Top: Minimum 36 inches of clear space above the unit — never put a deck or overhang within 36 inches of the top
  • Air intake side: Some units have a specific “intake” side — check your manual, but generally 24+ inches on all sides is safe
  • Front (service access): Leave at least 36 inches on the side where the service access panel is located
Critical: The outdoor condenser pulls large volumes of air through the coil fins and exhausts it upward. Any restriction to this airflow causes the refrigerant pressure to rise, the compressor to overheat, and eventually fail. The most expensive childproofing mistake is a barrier that looks fine but slowly strangles your AC system.

Fencing Options and Costs

Aluminum Picket Fence (Best Option)

An aluminum picket fence is the gold standard for AC unit enclosures. The gaps between pickets allow airflow while providing a visual and physical barrier. Pickets are typically 1–2 inches wide with 2–4 inch gaps — excellent for airflow, good for keeping small children and pets away from the unit. Cost: $300–$600 installed for a 3-4 sided enclosure. Add a latching gate on one side for maintenance access.

Vinyl Lattice Panels

Vinyl lattice panels provide about 60–70% open area — adequate for airflow while being opaque enough to deter curiosity. They’re attractive, low maintenance, and reasonably priced. Ensure the lattice openings are small enough that children can’t fit fingers through. Cost: $150–$350 DIY with basic posts and panels from a home improvement store.

AC Fence Guard Products

Purpose-built AC unit enclosures are available online and at HVAC supply stores. These typically consist of powder-coated steel or aluminum panels specifically designed with proper airflow spacing. They snap together around the unit with no tools required. Cost: $80–$200 for the enclosure kit.

HVAC technician inspecting outdoor AC unit for safety and clearance
Proper clearance around the outdoor unit is essential — any barrier must maintain 18–24 inches of space on all sides for adequate airflow.

What NOT to Do: Barriers That Damage Your AC

Well-intentioned childproofing can accidentally harm your AC system. Here are the mistakes we see most often in Denver:

  • Solid wood privacy fence right against the unit: Solid panels block airflow and cause the system to run hotter. Even a 6-inch gap is insufficient — keep all solid barriers at least 18 inches away
  • Dense shrubs planted close to the unit: Arborvitae, boxwoods, and similar dense shrubs planted within 12 inches block airflow significantly. Keep all vegetation at least 18 inches from the unit sides
  • Decorative lattice with small openings covered in vines: Lattice that starts with good airflow gets completely blocked when vines fill the openings by mid-summer
  • Covering the unit in winter with a solid cover: Only cover the top (not the sides) in winter, and never run the AC with a cover in place
  • Building a deck that hangs over the unit: This restricts hot air exhaust from the top of the unit and causes heat buildup

Pet Urine Damage: A Serious (and Common) Problem

Dog urine is highly acidic and contains ammonia compounds that aggressively corrode aluminum. An outdoor AC condenser coil is made of aluminum fins over copper tubing — repeated dog urination on the unit degrades the aluminum fins until they crumble, reducing airflow and cooling capacity. In advanced cases, urine can accelerate corrosion to the point where the copper tubing itself is affected, causing refrigerant leaks.

I’ve diagnosed multiple Denver systems where the homeowner had no idea why their coil efficiency had dropped — until I pointed out the brown, corroded fins on one side of the unit and asked about dogs. This damage is not covered under most manufacturer warranties.

  • Install a physical barrier (fence or purpose-built enclosure) that keeps dogs at least 3 feet from the unit
  • Apply commercial enzyme deterrent spray around the unit perimeter — available at pet stores
  • Rinse the unit with fresh water periodically if you have dogs that have access to the area
  • If urine damage has already occurred, coil cleaning with an alkaline foam cleaner can neutralize remaining uric acid

Denver Hail Guard: Safety and Child Protection in One

Denver averages more hail events than almost any major U.S. city. A hail guard — a heavy-gauge steel or polycarbonate cover installed over the top grate of the outdoor unit — protects the fan and coil from hail damage while simultaneously covering the top opening where children might reach through or lean over.

Denver Hail: A Two-in-One Safety Solution

$350

typical hail guard installation cost in Denver

A properly installed hail guard protects your outdoor unit from golf ball-sized hail (which can destroy fan blades and coil fins in minutes) while also covering the top opening that poses risk to curious children. It’s one of the smartest investments a Denver homeowner can make.

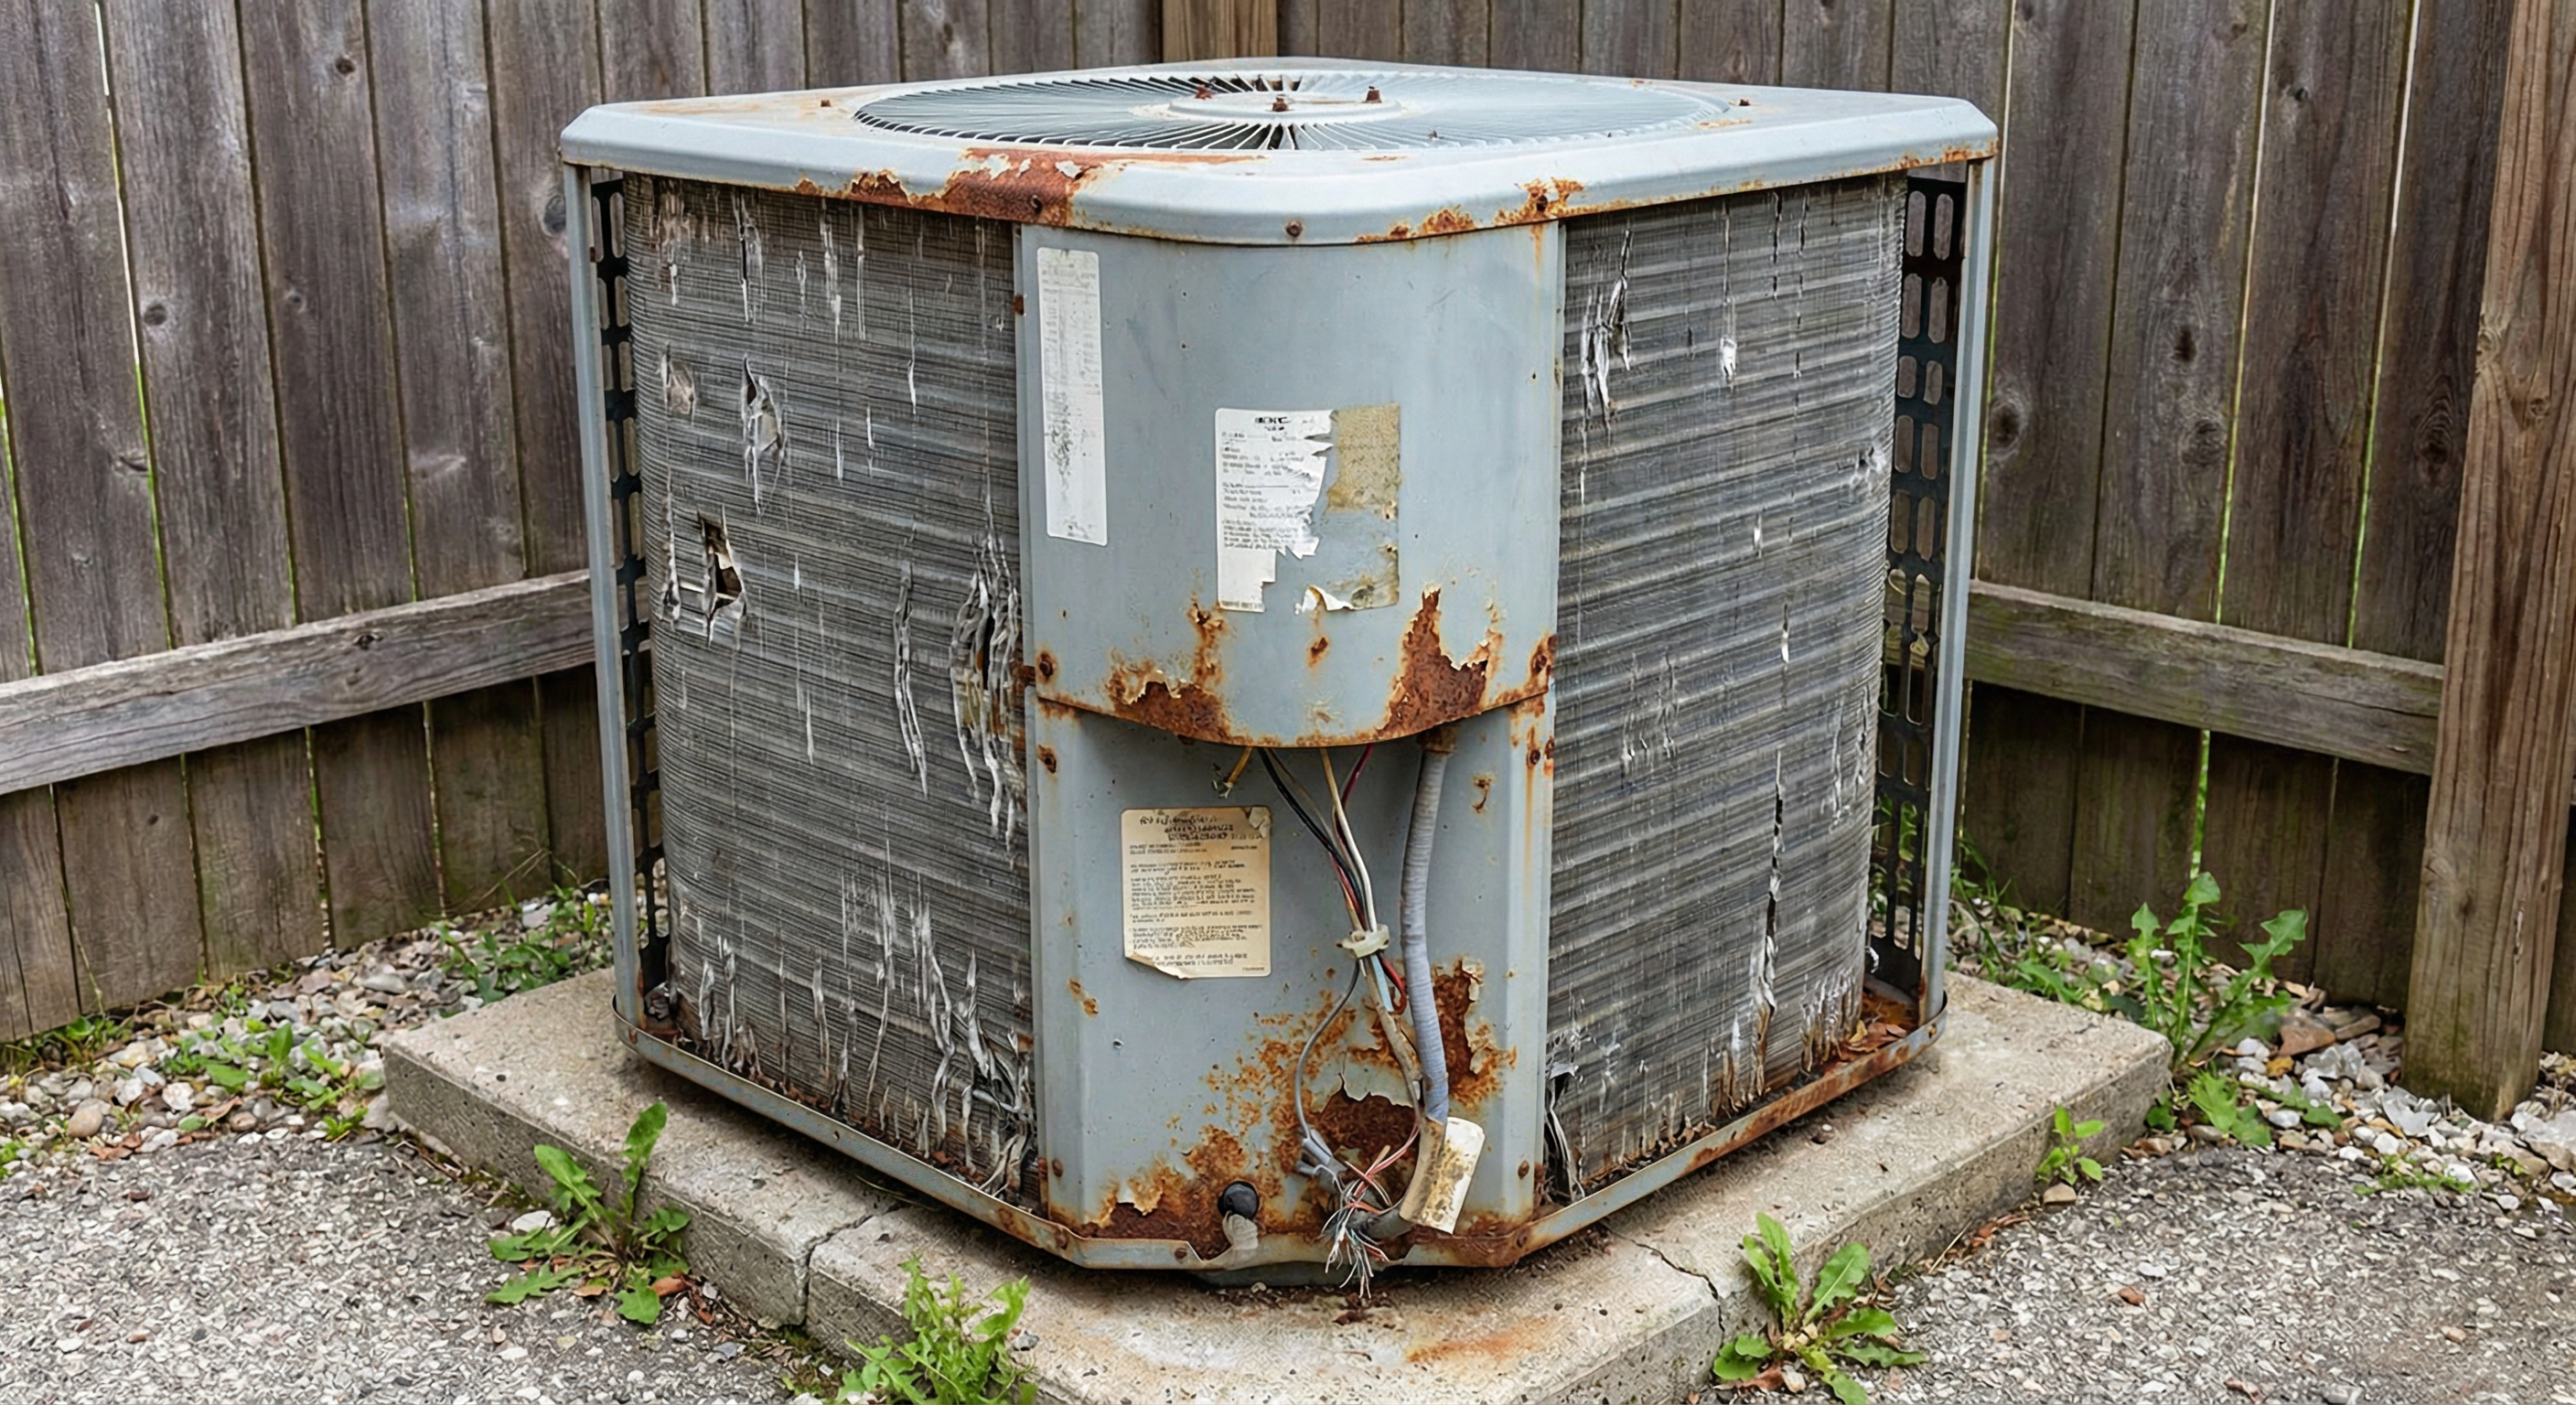
Old worn outdoor AC unit showing damage from lack of protection in Denver
An unprotected outdoor unit in Denver shows accelerated wear from hail, UV, and pet damage — all preventable with proper barriers and guards.

Schedule Online

Frequently Asked Questions

How close can a fence be to an AC unit?

The minimum safe distance is 18 inches on the sides, though 24 inches is better for airflow. The top must be completely clear for at least 36 inches above the unit. A fence that’s too close — even if the fence has gaps — restricts the volume of air the unit can draw, raising operating temperatures and reducing efficiency and lifespan. Always check your specific unit’s installation manual for the manufacturer’s minimum clearances.

Is it OK to build a wood fence around an AC unit?

Only if it’s an open-slat design that allows adequate airflow and is positioned at least 18–24 inches from the unit on all sides. A solid wood privacy fence directly adjacent to an outdoor unit is a common and damaging mistake. The wood restricts airflow, traps heat, and accelerates the unit’s decline. If you use wood, use a slatted design with significant gaps — similar to a typical deck railing.

Can my dog’s urine really damage my AC unit?

Yes, significantly. Dog urine is acidic and contains urea and ammonia compounds that corrode aluminum. The condenser coil fins are aluminum — repeated exposure deteriorates them over 2–4 years from minor corrosion to significant structural damage. A badly corroded coil loses heat-transfer efficiency and eventually develops holes that cause refrigerant leaks. The repair (coil cleaning or full coil replacement at $800–$1,500) far exceeds the cost of a $150 fence that would have prevented the access entirely.

What happens if a child touches the AC coil fins?

The aluminum fins are extremely sharp — think of a hundred thin metal blades stacked 1mm apart. Running a finger along the coil can cause immediate deep cuts similar to a box cutter injury. If a child has touched the coil fins, treat immediately with standard wound care and monitor for depth of lacerations. This is why physical barriers that prevent contact with the unit’s sides are important, not just barriers that prevent children from getting near the top fan opening.

Does a hail guard restrict airflow?

A properly designed hail guard has minimal impact on airflow — typically less than 3–5% restriction due to the guard’s open structure. Low-quality solid covers can restrict significantly more. Look for guards designed specifically for your unit make and model, made from heavy-gauge steel mesh or louvered designs. Avoid solid polycarbonate covers that don’t have adequate ventilation openings. We install manufacturer-approved hail guards that don’t affect system performance.

Schedule Online

$89 flat diagnostic fee • Credited toward repair • Licensed & Insured


Call (303) 351-1667

Signs Your AC Is Low on Refrigerant (Denver Expert Explains)

Written by Lance Fredrickson — ICC Certified HVAC Specialist | EPA 608 Universal

20+ years serving the Denver metro • Blue Collar Heating & Air, Northglenn CO

Thermometer showing temperature inconsistency in Denver home due to low AC refrigerant
Temperature inconsistency room-to-room is one of the clearest signs your AC is low on refrigerant due to a leak.

If your AC is low on refrigerant, it means one thing: you have a leak. Refrigerant is not like gasoline or motor oil — it doesn’t get consumed. A properly sealed system keeps the same refrigerant charge for the life of the unit. Low refrigerant always means refrigerant is escaping somewhere.

In Denver, this is a more urgent problem than in many other cities. At 5,280 ft, intense UV radiation degrades the rubber insulation and flex connections on refrigerant lines faster than at sea level. We see more refrigerant line failures in 7–12 year old Denver systems than any other single component. This guide walks you through every symptom, what Denver’s altitude does to pressure readings, and what a proper repair actually costs.

⚡ Quick Answer: Low Refrigerant Signs

AC runs but blows warm or barely cool airSign #1
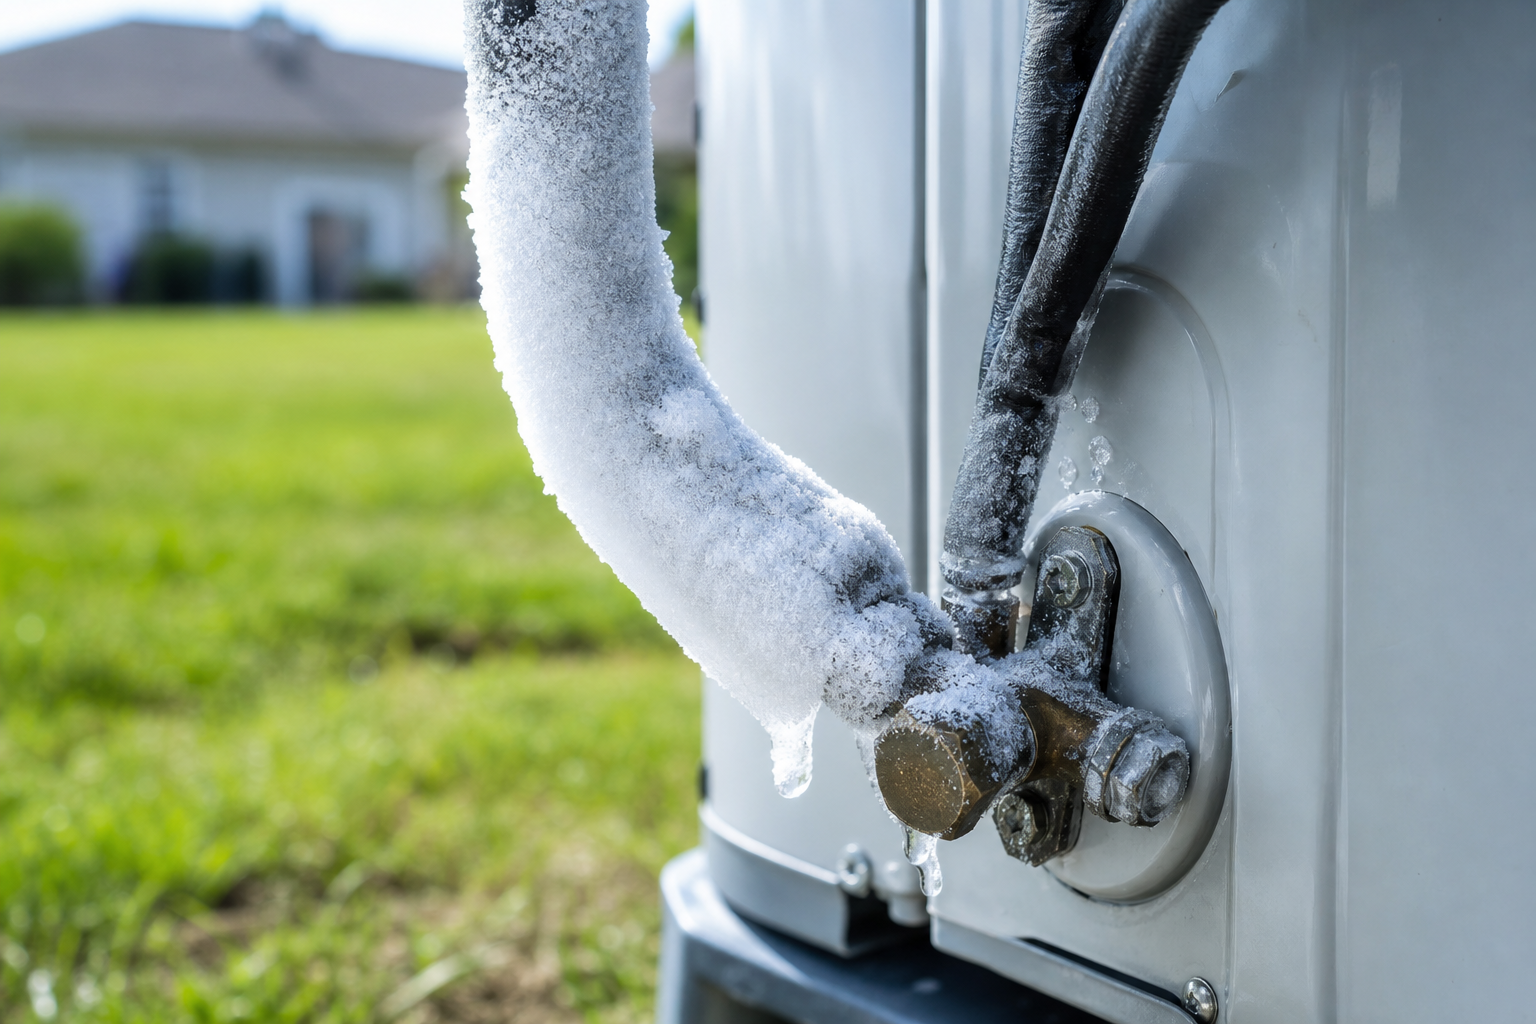
Ice forming on refrigerant lines or evaporator coilSign #2
Hissing or bubbling sound from lines or unitSign #3
Higher electricity bills — system runs longerSign #4
Rooms furthest from air handler don’t coolSign #5
Refrigerant oil stain at line connectionsSign #6
System cycles on/off more than usualSign #7

Refrigerant Doesn’t “Run Out” — It Leaks

This is the most important thing to understand before calling anyone about low refrigerant. AC systems do not consume refrigerant. It circulates in a closed loop — compressor, condenser coil, expansion valve, evaporator coil, back to compressor — without ever being depleted by normal operation.

If a technician tells you that you “just need a top-off” without finding the leak, you’re paying for temporary relief that will fail again within months. Any reputable technician will find and repair the leak before recharging. This is both an EPA requirement and basic good practice.

Red Flag: If a technician wants to add refrigerant without performing leak detection, find someone else. You’ll be paying for refrigerant that will just escape again — and R-410A now costs $80–$120 per pound due to the phase-out transition.

The 7 Signs Your AC Is Low on Refrigerant

Sign 1: AC Runs But Blows Warm or Barely Cool Air

This is the most obvious symptom. Refrigerant is the heat-transfer medium — without adequate charge, the evaporator coil can’t absorb enough heat from your indoor air. The system runs, the air moves, but it comes out 75°F instead of 55–58°F. You’ll notice the house never quite reaches the thermostat setpoint even when the AC runs continuously.

Sign 2: Ice on the Refrigerant Lines or Evaporator Coil

Counterintuitively, low refrigerant causes freezing. When refrigerant pressure drops too low, the evaporator coil temperature drops below freezing. Moisture in the air condenses on the coil and freezes. You may see ice on the large copper line running into the air handler, or the evaporator coil itself becomes a block of ice. This is a major problem — ice buildup reduces airflow and can damage the compressor.

Sign 3: Hissing or Bubbling Sounds

Refrigerant escaping under pressure sounds like a hiss. If liquid refrigerant is mixing with air at the leak point, it creates a bubbling sound. Listen near the refrigerant lines, the evaporator coil area, and the outdoor unit. Any hissing from these areas is an active leak — turn off the system and call us.

Sign 4: Higher Electricity Bills

A low-refrigerant system works much harder than a properly charged one. The compressor runs longer cycles trying to achieve setpoint temperatures it can no longer reach. In Denver’s hot summers, this can add $50–$150 to monthly electricity bills depending on how low the charge has dropped. If your bills are notably higher than last summer with similar usage, refrigerant loss is one of several possible causes to investigate.

Sign 5: Rooms Furthest From the Air Handler Don’t Cool

When refrigerant charge drops, the system loses cooling capacity first at the supply registers furthest from the air handler. Nearby rooms may still feel relatively comfortable while bedrooms or rooms at the end of long duct runs feel warm and stuffy. This uneven cooling is a classic sign of declining refrigerant charge.

Sign 6: Oily Residue or Stain at Line Connections

Refrigerant carries a small amount of compressor oil with it as it circulates. When refrigerant leaks, it leaves an oily stain at the leak point. Check the flare fittings where refrigerant lines connect to the indoor and outdoor units. Any oily, dark staining at these connection points is a strong indicator of a slow leak.

Sign 7: Short Cycling — System Turns On and Off More Frequently

Low refrigerant can cause the system to “short cycle” — start up, run briefly, then shut off before completing a full cooling cycle. This happens because the low refrigerant charge causes the evaporator coil to freeze rapidly, triggering a high-pressure or low-pressure safety cutoff. The system shuts off, the ice melts slightly, and the cycle repeats. Short cycling is hard on the compressor and accelerates wear significantly.

HVAC technician checking AC refrigerant pressure levels in Denver
Refrigerant pressure readings require altitude correction at Denver’s 5,280 ft elevation — standard sea-level charts give inaccurate targets.

How Denver’s Altitude Affects Refrigerant Pressure Readings

This is a detail that catches out-of-state technicians and less experienced Denver techs. Refrigerant pressure readings are affected by atmospheric pressure, and atmospheric pressure at 5,280 ft is about 17% lower than at sea level.

What this means practically: the pressure charts printed in service manuals and on equipment data plates are calibrated for sea level. At Denver’s altitude, normal operating pressures are lower than sea-level specs. A technician reading 68 psi low-side pressure on an R-410A system in Denver might be alarmed — at sea level, that would indicate a problem. At 5,280 ft, it could be completely normal.

This is why experienced Denver HVAC technicians use altitude-corrected pressure charts and understand the local operating norms. We’ve seen systems “recharged” by inexperienced techs who misread pressures — the system ends up overcharged, which can damage the compressor just as severely as undercharge.

Denver Altitude Effect on AC Systems

5,280 ft

Denver elevation — 17% lower atmospheric pressure than sea level

Standard refrigerant pressure charts must be corrected for altitude. Misreading pressures without altitude correction is one of the most common errors we see from less experienced Denver technicians. Always confirm your tech understands local altitude corrections.

The Leak Detection Process

A proper refrigerant leak detection involves multiple methods to locate the exact leak point:

  • Electronic leak detector: A calibrated sensor swept around all connection points, coils, and line sets detects refrigerant vapor
  • UV dye detection: Fluorescent dye injected into the system glows under UV light at the leak point — effective for slow leaks that don’t register on electronic detectors
  • Nitrogen pressure test: Nitrogen is introduced to pressurize the system, and the tech uses soap solution or an electronic detector to find leaks — used when refrigerant has already been fully evacuated
  • Visual inspection: Oil staining at fittings, damaged line insulation, corrosion at coil joints

Common Denver leak locations: flare fittings at indoor and outdoor unit connections (vibration loosens these over time), the evaporator coil (corrosion from formaldehyde off-gassing from indoor materials), and the suction line — the larger insulated copper pipe — where UV degradation at Denver’s altitude damages the insulation jacket and can cause pin-hole leaks in the copper itself.

R-410A Phase-Out: What Denver Homeowners Need to Know

R-410A — the refrigerant in virtually all residential AC systems installed between 2010 and 2024 — is being phased out under the AIM Act. Production and import limits began in 2024, and R-410A prices have increased dramatically: from roughly $10–$15/lb in 2022 to $80–$120/lb in 2026.

The replacement refrigerant, R-454B (sold as Puron Advance by Carrier and similar brands), is not interchangeable with R-410A. A system designed for R-410A cannot simply be “switched” to R-454B. This means:

  • If your R-410A system has a small leak, repairing it now is significantly cheaper than replacing the unit
  • If your system is 12+ years old and has a major refrigerant leak (coil replacement needed), the economics of replacement vs. repair shift — recharging an aging R-410A system at current refrigerant prices may not make sense
  • New AC systems installed from 2025 forward use R-454B and are designed for the new refrigerant
Refrigerant recharge service being performed on Denver AC unit
Refrigerant recharge costs have increased significantly due to R-410A phase-out restrictions — another reason to find and fix the leak rather than just topping off.

Recharge vs. Repair: What It Actually Costs in Denver

Leak detection (electronic + UV)$150–$250
R-410A refrigerant recharge (per pound)$80–$120/lb
Minor refrigerant line leak repair + recharge$400–$700
Evaporator coil replacement (R-410A)$1,000–$1,800
Condenser coil replacement (R-410A)$800–$1,500
Full system replacement (R-454B, new install)$5,000–$9,500

The repair-vs-replace decision depends on system age, leak location, and refrigerant cost. A 5-year-old system with a minor line leak is an easy repair-and-recharge call. A 14-year-old system with a failed evaporator coil requiring $1,500 in parts plus $400 in R-410A refrigerant — that’s a $2,000 repair on an old, inefficient system. In that scenario, replacement often makes more financial sense, especially with current rebates on high-efficiency R-454B equipment.

Schedule Online

Real Job: Westminster, July 2025

A Westminster homeowner had their system “recharged” by a different company twice in two summers — $320 each time — without anyone finding the leak. When they called us, we found a slow leak at the evaporator coil drain pan joint using UV dye — less than $500 to repair and recharge properly. The prior technicians had been selling refrigerant without doing detection. The homeowner paid for leak detection, coil repair, and a full recharge — and hasn’t had an issue since.

Frequently Asked Questions

Can I add refrigerant myself?

No. Handling refrigerants requires an EPA 608 certification. Refrigerant is not sold to uncertified individuals. Even if you could access it, adding refrigerant without finding the leak means you’re paying for refrigerant that will escape again. And incorrectly charging a system — especially without altitude correction at Denver’s elevation — can cause compressor damage that costs thousands to repair.

How long does an AC refrigerant recharge last?

If the leak is properly repaired, the recharge should last the life of the system — indefinitely. If a company just adds refrigerant without repairing the leak, you’ll be calling again within 1–2 seasons as the new refrigerant escapes through the same leak. Always confirm that leak detection and repair are included in any recharge service.

Is R-410A refrigerant still available in 2026?

Yes, R-410A is still available for servicing existing equipment — it’s not banned, just production-limited. However, prices have risen significantly (from ~$12/lb to $80–$120/lb) due to AIM Act restrictions. R-410A will continue to be available for service use for years to come, but at increasing cost as supply diminishes. New equipment uses R-454B; existing R-410A systems can still be serviced.

How much refrigerant does a typical AC system hold?

Most residential systems hold 6–15 lbs of R-410A depending on system size and line set length. A 3-ton system typically holds about 9–12 lbs. If a system has leaked down to 50% charge, you’re looking at 4–6 lbs of refrigerant needed for recharge — at current prices of $80–$120/lb, that’s $320–$720 in refrigerant alone, before labor and leak repair. This is why finding the leak is critical; you don’t want to pay for this twice.

Does Denver’s altitude make refrigerant leaks more common?

Yes, for two reasons. First, Denver’s UV radiation is significantly more intense at altitude — roughly 25% more UV than at sea level. UV degrades the rubber insulation and polymer components on refrigerant lines faster, leading to more frequent line-set degradation. Second, the UV also accelerates corrosion on copper components. We see Denver systems develop refrigerant leaks 2–3 years earlier on average than comparable systems in lower-elevation markets.

Schedule Online

$89 flat diagnostic fee • Credited toward repair • Licensed & Insured
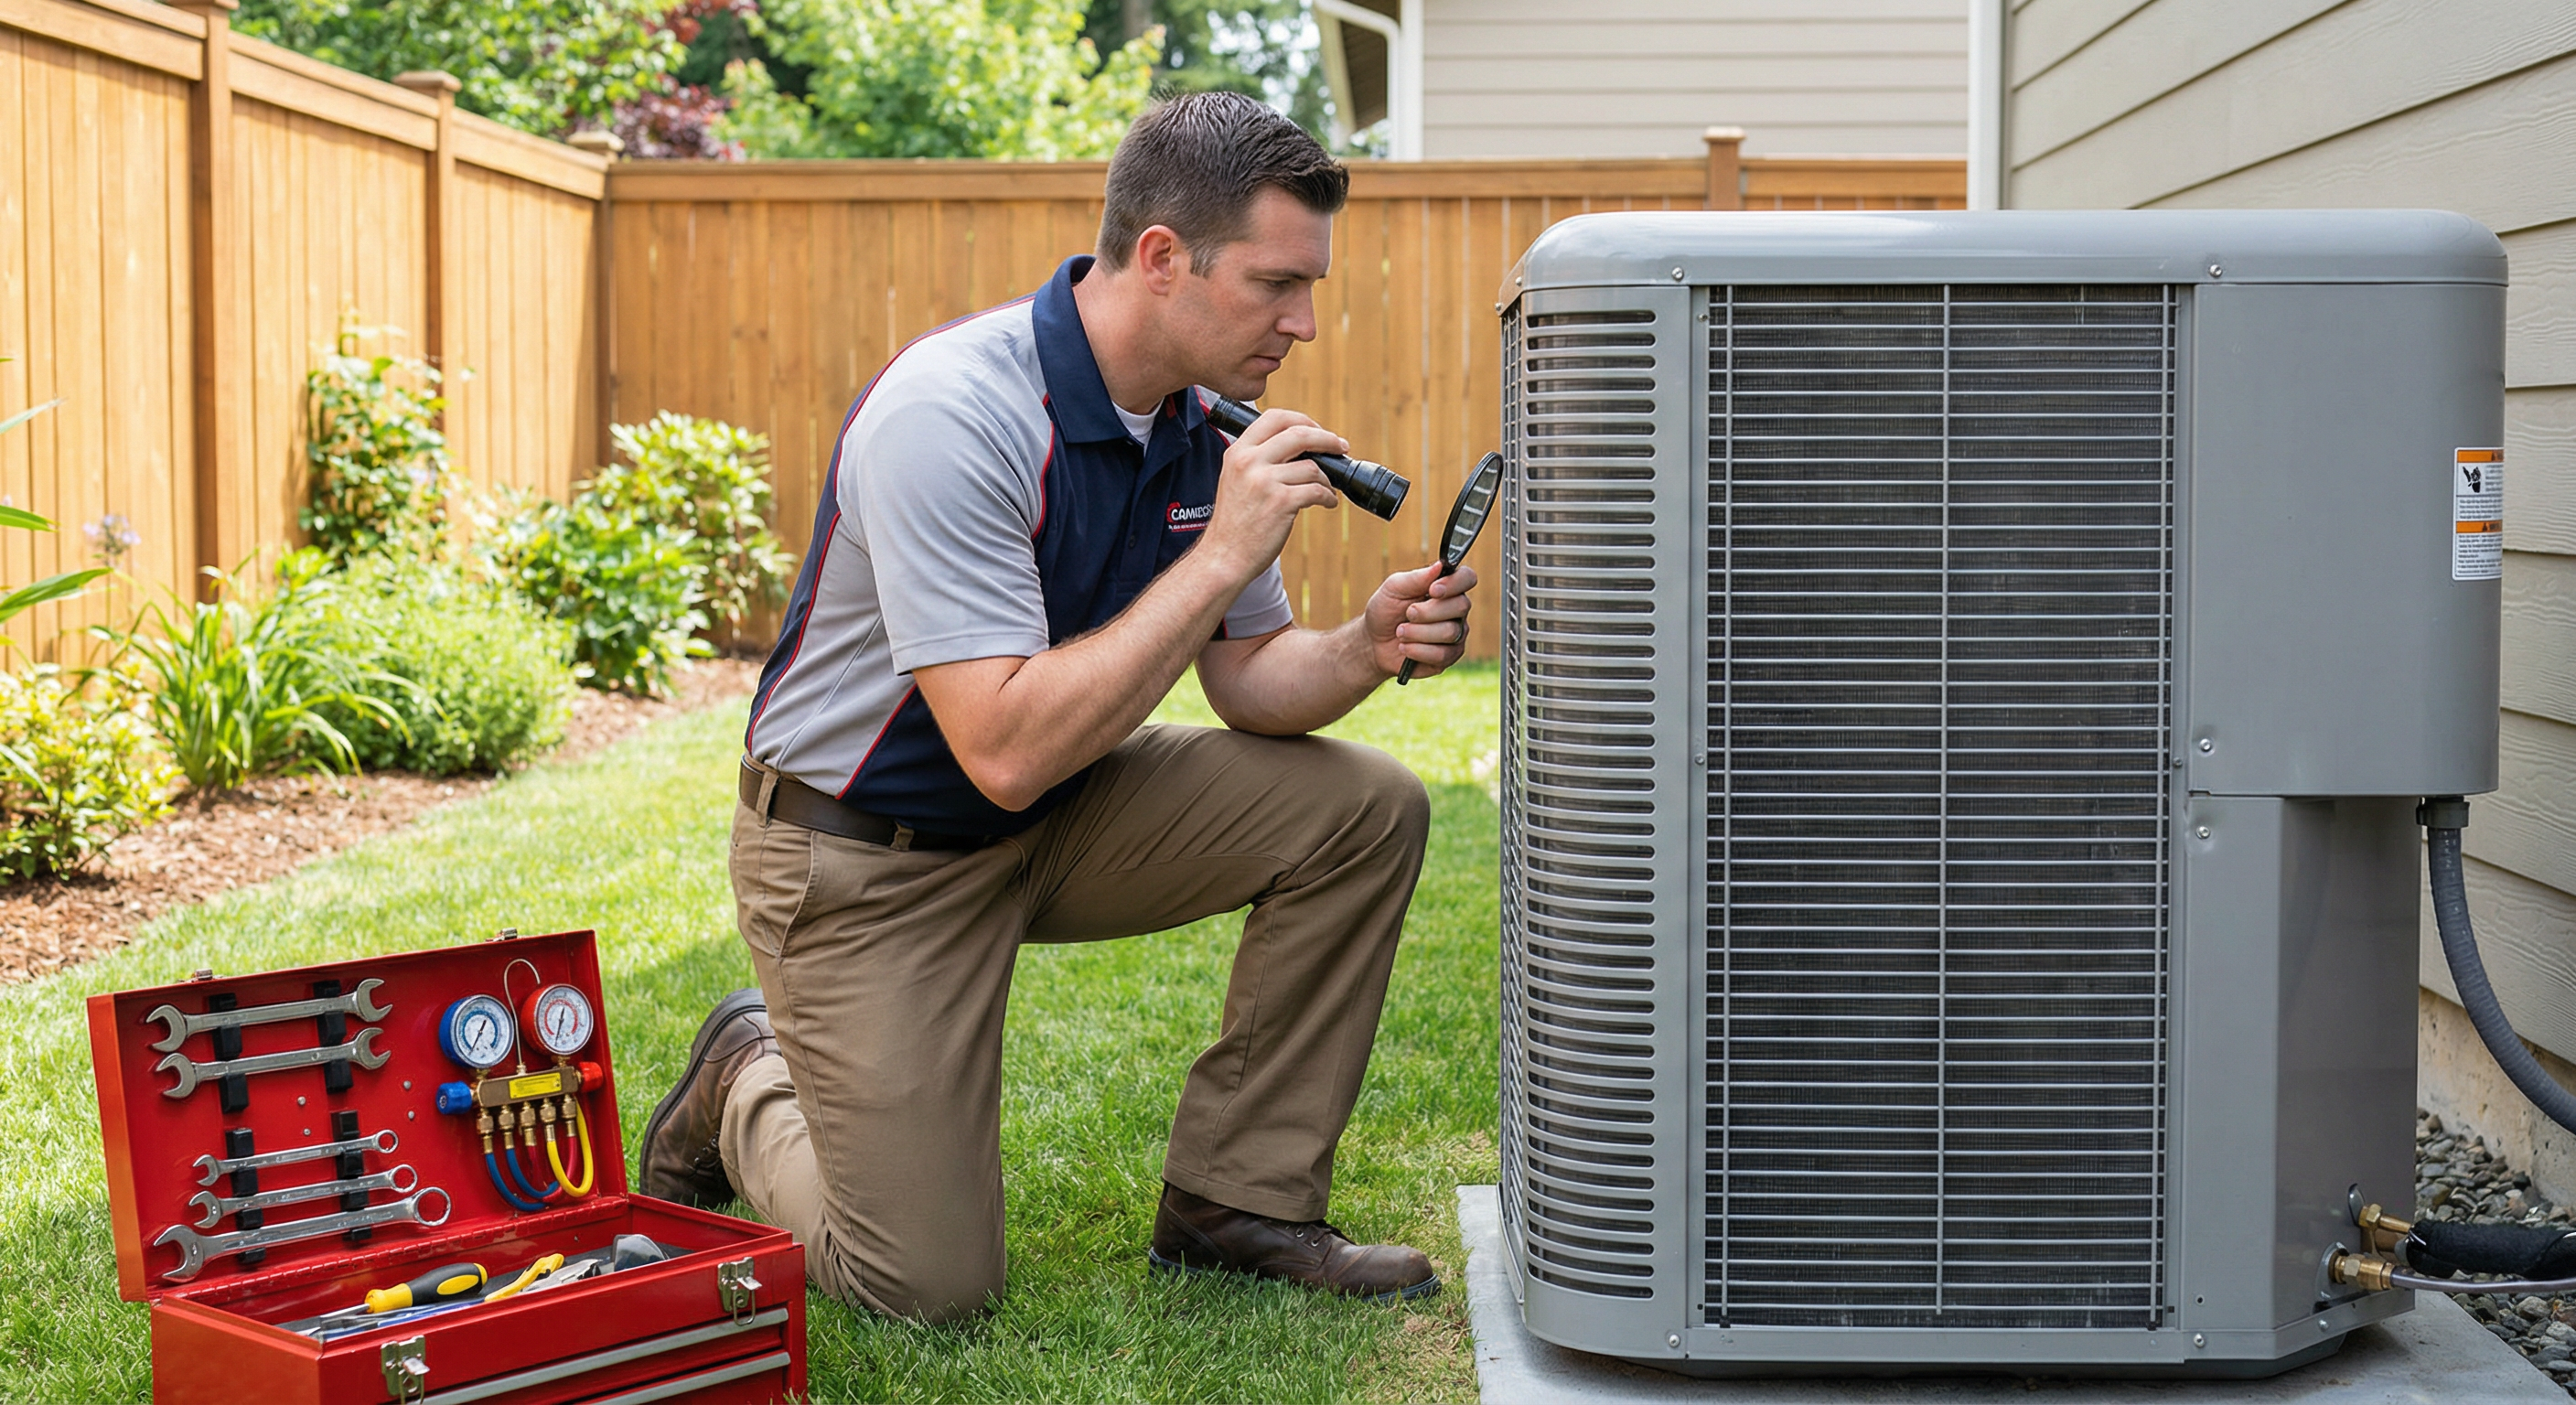


Call (303) 351-1667

How Much Does Duct Cleaning Cost in Denver? (2026 Pricing Guide)


Written by Lance Fredrickson — ICC Certified HVAC Specialist | EPA 608 Universal

20+ years serving the Denver metro • Blue Collar Heating & Air, Northglenn CO

HVAC technician with maintenance checklist for duct cleaning service in Denver
A legitimate duct cleaning job includes inspection, brushing, and high-powered vacuum extraction — not just a quick vacuum at the register.

You’ve probably seen the ads: “Whole-house duct cleaning — $49!” Those prices aren’t real. They’re bait-and-switch tactics that lead to upsells or work that doesn’t actually clean your ducts. Legitimate duct cleaning in Denver costs $300–$600 for most homes, and there’s a good reason for that range.

Denver’s dry climate, high altitude, and increasing wildfire smoke seasons make duct cleaning more meaningful here than in humid coastal cities. Dust doesn’t settle and clump with moisture the way it does at sea level — it circulates. And every summer, smoke from mountain wildfires deposits fine particles into duct systems that standard filters don’t catch.

⚡ Quick Answer: Denver Duct Cleaning Cost (2026)

Average home (1,500–2,500 sq ft, 10–15 vents)$300–$500
Larger home (2,500–4,000 sq ft, 15–25 vents)$450–$700
Add dryer vent cleaning$75–$125
Add sanitizing / antimicrobial treatment$50–$100
Add coil cleaning (evaporator + condenser)$150–$300
Bait-and-switch “too good to be true” prices$49–$99 ⚠

Average Duct Cleaning Cost in Denver (2026)

Most Denver homes fall in the $300–$600 range for a complete, professional duct cleaning. The exact price depends on home size, number of vents, duct material, accessibility, and the level of contamination. Here’s how a reputable Denver company prices the job:

  • Base rate per vent: $20–$35 per supply/return register
  • Minimum trip charge: Most companies charge a minimum of $200–$250 just to show up with proper equipment
  • Equipment: Commercial-grade truck-mounted or portable negative-air vacuum required for a real job
  • Time: A proper job takes 3–5 hours for an average home; less time is a red flag

Denver’s housing stock is relevant here. Many homes built in the 1970s–1990s in Northglenn, Thornton, and Westminster have galvanized steel duct systems with years of accumulated construction dust, pet dander, and in recent years, wildfire smoke particulates. These systems benefit significantly from cleaning.

HVAC annual maintenance service being performed in Denver home
Annual HVAC maintenance paired with duct cleaning gives Denver homeowners the cleanest possible system going into cooling season.

What Affects Duct Cleaning Price

Several factors will push your quote toward the low or high end of the range:

Number of Vents and Registers

This is the primary pricing driver for most contractors. A 1,500 sq ft ranch with 10 supply vents and 2 returns costs less than a 3,000 sq ft two-story with 22 supply vents and 4 returns. Count your registers before calling for quotes — it’ll help you compare apples to apples.

Duct Material and Condition

Sheet metal ducts are cleanable and durable. Flexible duct (flex duct) is trickier — aggressive brushing can tear the inner liner. If your home has older insulated flex duct in deteriorating condition, a technician may recommend replacement rather than cleaning. Deteriorating flex duct in Denver’s dry climate crumbles faster than in humid climates.

Level of Contamination

A home with pets, recent renovation work, or visible mold growth will take longer to clean and may require additional treatments. Post-construction duct cleaning (after a remodel) often runs 20–30% higher than routine cleaning due to drywall dust and debris volume.

System Access

Ducts in crawl spaces or difficult attic configurations take more labor time. Denver has a high percentage of homes with crawl space installations — these typically add $50–$150 to the cleaning cost.

What a Legitimate Duct Cleaning Includes

A proper duct cleaning is a multi-step process. Here’s what you should expect from a reputable Denver contractor:

  • Pre-job inspection with camera or visual check of main trunk lines
  • Sealing all registers before creating negative pressure (ensures debris pulls toward the vacuum, not into the room)
  • Truck-mounted or high-powered portable vacuum connected at the main trunk
  • Rotary brush or compressed air whip to agitate debris from duct walls
  • All supply and return registers removed, cleaned, and reinstalled
  • Blower compartment and air handler interior cleaned
  • Post-job inspection to confirm cleanliness
  • Written summary of findings (mold, damage, disconnected sections)
What a Real Job Does NOT Include: Just vacuuming at the registers with a shop vac. This is what $49 “duct cleaning” companies do — they vacuum the visible opening of each register, which removes about 5% of the actual duct debris. Without negative air pressure pulling from the trunk, you’re paying for theater, not cleaning.

The Denver Wildfire Smoke Factor

This is the factor that makes duct cleaning more valuable in Denver than in most U.S. cities. From late June through September, Front Range homes regularly experience wildfire smoke events — sometimes for days at a time — with air quality that drops to Unhealthy or Very Unhealthy levels.

During these events, your HVAC system is pulling outside air in (fresh air intakes, building infiltration) and recirculating indoor air. Even with a good filter, ultrafine smoke particles (PM2.5 and smaller) pass through most standard 1-inch filters and coat the interior surfaces of your ductwork.

Over several fire seasons, this accumulation is significant. The particles carry volatile organic compounds, heavy metals from burned structures, and persistent odors. Homeowners who’ve lived through 3–5 Denver fire seasons with no duct cleaning often notice a persistent “smoky” smell when the system runs — that’s years of smoke residue baking off duct surfaces.

Denver Wildfire Season Impact on Air Quality

30+

poor air quality days per year in Denver metro

At 5,280 ft elevation, Denver sits closer to wildfire smoke plumes than lower-elevation cities. Smoke that rides over the Rockies often settles along the Front Range, sending PM2.5 levels above 150 µg/m³. Your duct system absorbs this smoke over years.

Professional HVAC technician inspecting ductwork for contamination
A technician inspects ductwork for smoke residue, mold, and debris accumulation before cleaning begins.

How Often Should Denver Homeowners Clean Their Ducts?

The EPA and NADCA (National Air Duct Cleaners Association) both say clean ducts “as needed” rather than on a fixed schedule. That’s not very helpful. Here’s what I recommend for Denver specifically:

  • Every 3–5 years for most Denver homes — shorter than the national average due to dry dust circulation and wildfire smoke
  • Every 2–3 years if you have pets, allergies, or asthma in the household
  • After any major renovation — drywall dust is extremely damaging to duct systems and should be addressed immediately
  • After purchasing an older home — especially 1970s–1990s construction in Northglenn, Thornton, or Westminster where the ducts may never have been cleaned
  • After a significant wildfire smoke event where you smelled smoke indoors for days
  • If you see visible mold growth at registers or notice musty odors when the system runs
Simple test: Remove a supply register and look inside with a flashlight. If you see a visible layer of gray or brown dust coating the duct walls, it’s time. If the metal looks relatively clean and shiny, you can wait another year or two.

Red Flags and Scam Pricing to Watch For

The duct cleaning industry has a significant fraud problem. Denver homeowners have been hit hard by bait-and-switch tactics. Here’s how to protect yourself:

The $49–$99 “Special”

This is the most common scam. A company advertises whole-house duct cleaning for $49–$99. When they arrive, they either do a cursory vacuum of the registers (not real cleaning) or they use the low price as a door-opener and then scare you into a $800–$1,500 upsell for “mold treatment,” “sanitizing,” or “additional services.” Real duct cleaning cannot be done for $99 — the equipment alone costs thousands of dollars per day to operate.

No Camera Inspection

A reputable company should show you what’s in your ducts before and after cleaning. If they’re not willing to do this, they may not be doing thorough work.

Pressure for Immediate Mold Treatment

Some companies show homeowners photos of “mold” in their ducts (often normal dust) and pressure them into expensive antimicrobial treatments. Real mold in ductwork is possible but not as common as scammers suggest. If a company claims you have mold, ask for a lab test before agreeing to treatment.

No Written Estimate

Get everything in writing before work starts: scope of work, number of vents, what’s included, price. Any company unwilling to put the price in writing before starting is a red flag.

Schedule Online

Real Customer: Northglenn, 2025

A Northglenn homeowner called us after a “$79 duct cleaning” company came and went in 45 minutes. She paid $79, then got pressured into $650 of “mold treatment” and left feeling worse than when they arrived. We came out, did a camera inspection, found no mold — just normal dust accumulation — and performed a legitimate cleaning for $385 that took 4.5 hours. Moral: if the job takes less than 3 hours, it wasn’t done right.

Frequently Asked Questions

Is duct cleaning worth it in Denver?

Yes, more so than in most cities. Denver’s dry climate means dust circulates freely rather than settling with moisture. Wildfire smoke seasons deposit fine particulates into ductwork year after year. And the high altitude (5,280 ft) means your HVAC system works harder, recirculating air more frequently. If your ducts haven’t been cleaned in 5+ years, a professional cleaning will improve air quality, reduce dust levels, and may slightly improve system efficiency by reducing restriction at clogged registers.

How long does duct cleaning take?

A legitimate duct cleaning for an average Denver home (1,500–2,500 sq ft) takes 3–5 hours. Larger homes or heavily contaminated systems can take 6–8 hours. If a company quotes you 1–2 hours, they’re either doing a very small home or they’re not doing the work properly. Proper negative-air vacuuming requires time at each register and main trunk line.

Does duct cleaning help with wildfire smoke smell?

Yes. If you’ve experienced multiple wildfire smoke seasons and notice a persistent smoky or musty smell when the furnace or AC runs, smoke residue in the ductwork is a likely culprit. A thorough cleaning combined with antimicrobial treatment addresses the contamination. Replacing the filter afterward is equally important — smoke-saturated filters continue releasing odors. Consider upgrading to a MERV 11–13 filter for better smoke filtration going forward.

Should I get my ducts cleaned before or after HVAC service?

After, ideally. HVAC maintenance work (coil cleaning, blower cleaning) dislodges debris that can fall into the duct system. Scheduling duct cleaning after your annual HVAC tune-up ensures you’re starting completely fresh. That said, if your ducts are heavily contaminated, cleaning them beforehand reduces the debris the system recirculates during and after maintenance work.

What’s the difference between duct cleaning and duct sealing?

They’re different services that address different problems. Duct cleaning removes accumulated debris, dust, and contaminants from inside the ducts. Duct sealing (Aeroseal or mastic) addresses air leaks at joints and connections where conditioned air escapes before reaching the room. Denver homes over 20 years old often benefit from both — dirty ducts and leaky joints frequently occur together. Duct sealing costs $1,000–$3,000 depending on method and duct length.

Will duct cleaning help my allergies?

Potentially, yes — especially in Denver. If your ductwork contains accumulated pet dander, pollen, wildfire smoke particulates, or mold spores, cleaning removes the source. However, duct cleaning is not a silver bullet. The HVAC filter is the primary line of defense for ongoing air quality. After cleaning, upgrade to a MERV 11–13 filter and change it every 60 days (more frequently during wildfire season or high-pollen cottonwood months in May–June).

Schedule Online

$89 flat diagnostic fee • Credited toward repair • Licensed & Insured
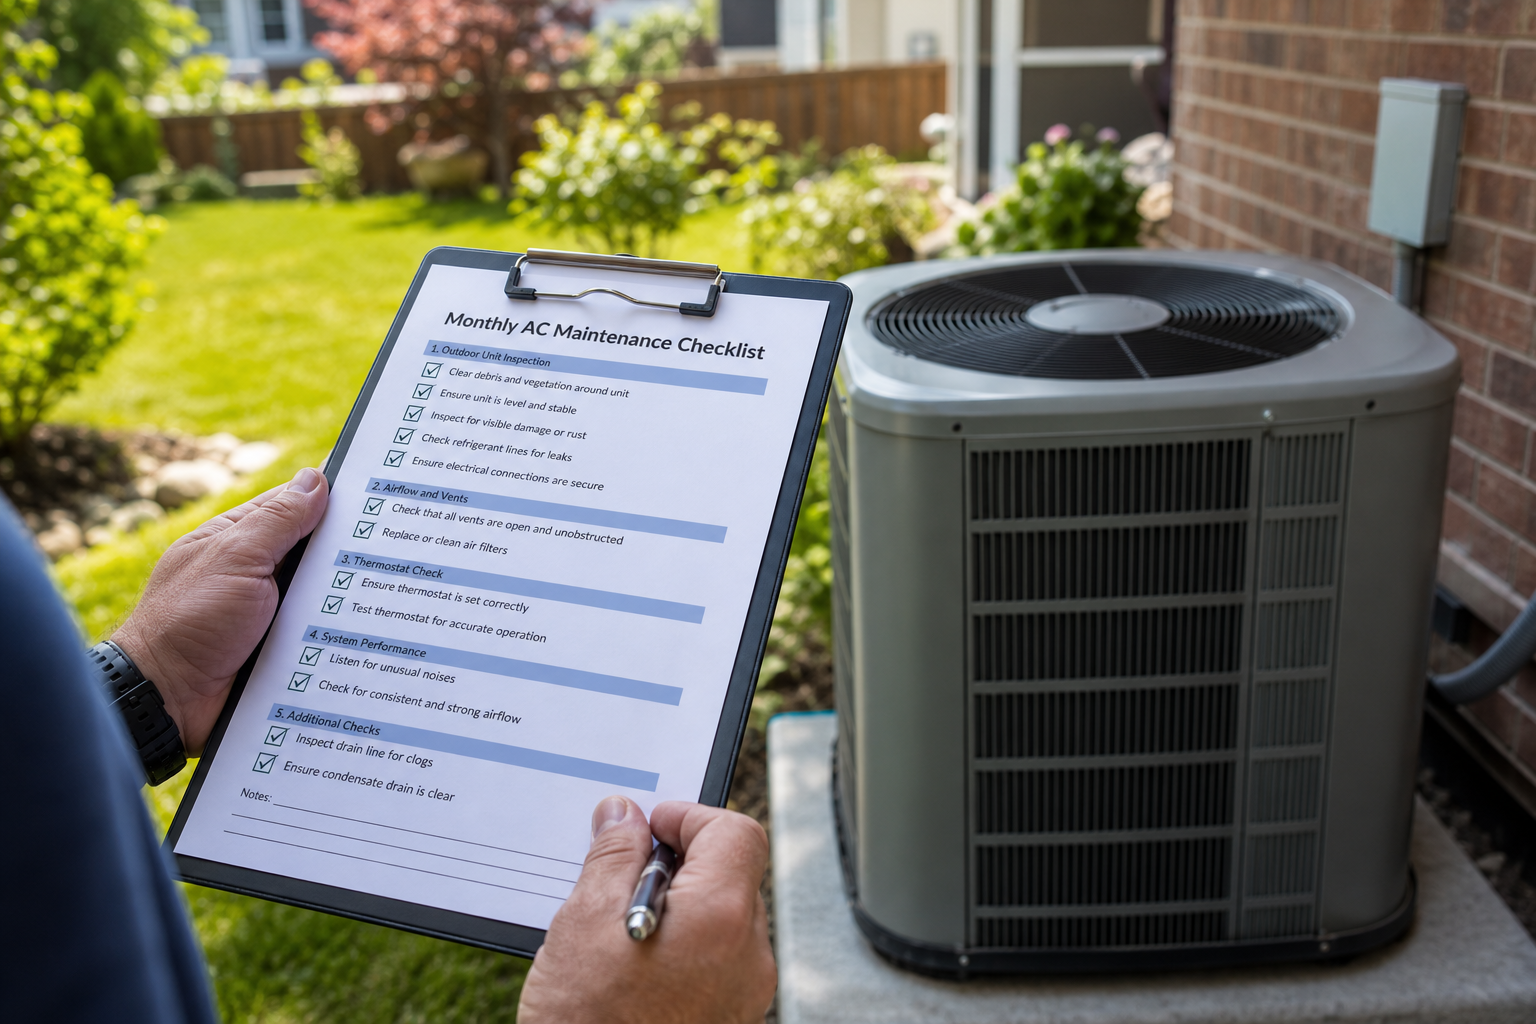


Call (303) 351-1667

What Is Included in an AC Warranty? (Denver Homeowner Guide)

Written by Lance Fredrickson — ICC Certified HVAC Specialist | EPA 608 Universal

20+ years serving the Denver metro • Blue Collar Heating & Air, Northglenn CO

AC warranty documentation for Denver homeowner
Understanding your AC warranty before you need it prevents expensive surprises at the worst possible time.

Your new AC system just got installed. The contractor hands you paperwork, says something about a “10-year parts warranty,” and leaves. Three years later, the compressor fails. You expect the warranty to cover it. Then you find out you were supposed to register the warranty within 60 days of installation — which nobody told you — and without registration it’s only a 5-year warranty.

This scenario happens constantly in Denver. AC warranties are genuinely confusing, full of conditions, and contain Denver-specific exclusions that most homeowners have no idea about until they try to make a claim. Here’s the complete picture.

⚡ Quick Answer: AC Warranty Basics

  • Parts warranty: Manufacturer covers replacement parts for failed components — typically 5–12 years depending on brand and registration
  • Labor warranty: Installer covers labor to diagnose and replace failed parts — typically 1–2 years; manufacturer labor warranty rare
  • Registration is critical: Most extended warranties (10-year parts) require registration within 60–90 days of install — without it, you get the base 5-year warranty
  • Not covered: Hail damage, normal maintenance items (filters, belts), improper installation, unauthorized modifications
  • Denver hail: Manufacturer parts warranties typically exclude external physical damage — your homeowner’s insurance covers hail damage, not the HVAC warranty
  • To keep warranty valid: Annual professional maintenance, licensed contractor for all repairs, no DIY refrigerant work

The 3 Types of AC Warranties (And What Each Covers)

1. Manufacturer Parts Warranty

This is what most people mean when they say “the AC has a 10-year warranty.” The manufacturer (Carrier, Trane, Lennox, etc.) agrees to supply replacement parts for covered components if they fail within the warranty period. This does not include labor costs — just the parts themselves.

What’s typically covered: compressor, heat exchanger, coils, motors, capacitors, control boards, and most other internal components that fail due to manufacturing defects.

What’s typically not covered: consumable items (filters, belts, UV bulbs), cosmetic damage, damage from external causes (hail, flooding, fire), damage from improper installation, and damage from using non-certified refrigerant.

Registration requirement: This is the critical detail. Most manufacturers offer a base 5-year parts warranty unregistered. Register within 60–90 days of installation and you get the full 10-year (or in some cases 12-year) warranty. If you moved into a home with an existing AC and it wasn’t registered, you may only have the base warranty — or no warranty at all if it’s expired.

2. Contractor Labor Warranty

When parts fail under warranty, someone still has to diagnose the problem, order the part, and install it. That labor cost is your responsibility unless your contractor provides a labor warranty. This is the warranty that varies most between contractors.

We provide a 2-year labor warranty on all new installations. If a covered part fails within 2 years of installation, we’ll diagnose and install the replacement part at no labor charge. Beyond 2 years, you pay the diagnostic fee and labor; the manufacturer covers the part.

Some contractors provide only 1-year labor warranties. Others — especially volume installers — may provide no labor warranty at all (technically legal). Always ask for the labor warranty in writing before signing.

3. Extended Warranty / Service Agreement

Extended warranties (also called service agreements or maintenance plans) go beyond the manufacturer and contractor warranties to cover labor costs for longer periods — often 5–10 years. These are either sold by the manufacturer, the contractor, or a third-party warranty company.

The value of extended warranties varies significantly. For a system with a 10-year parts warranty already, the extended warranty is covering primarily labor costs after year 2 (when the contractor labor warranty expires). Given that most AC component failures happen in years 8–15, a 5–7 year extended warranty may not overlap with the highest-risk period.

Premium quality AC system with manufacturer warranty documentation
Premium brand AC systems often come with better warranty terms — but only if properly registered and maintained.

What Voids Your AC Warranty

This is the section most homeowners never read until they’re trying to make a claim. These are the most common warranty-voiding actions:

1. Failure to Register

As discussed: if you don’t register within 60–90 days of installation, you lose the extended warranty period. We register every new system we install as part of our installation process — but if you bought a home with an existing system, check the registration status.

2. Non-Permitted Installation

Most manufacturer warranties require the system to be installed by a licensed HVAC contractor with a permit pulled. An unpermitted installation can void the entire parts warranty. Ask your contractor for the permit number before and after installation.

3. DIY Refrigerant Work

Attempting to add refrigerant without an EPA 608 certification, or topping off refrigerant without finding and repairing the leak, can void your warranty. Refrigerant work must be performed by a certified technician. Running a system with incorrect refrigerant charge causes compressor damage that manufacturers will attribute to improper maintenance.

4. Incorrect Refrigerant Type

Using the wrong refrigerant type — mixing R-410A into an R-32 system, or adding refrigerant to a system without knowing its type — voids the warranty immediately and damages the compressor. Only a licensed technician should charge refrigerant.

5. Failure to Maintain (in some contracts)

Some extended warranty contracts require documented annual professional maintenance. If you file a warranty claim and the manufacturer discovers the system has never been serviced, they may deny the claim citing maintenance failure as the root cause. Keep your maintenance records.

6. Physical Damage

Manufacturer parts warranties universally exclude damage from external causes — hail, flooding, fire, accidents, and similar events. If a hailstorm bends your condenser coil fins and the compressor subsequently fails, the manufacturer will inspect for physical damage and may deny the compressor claim if they find evidence of coil damage.

Critical: Document any hail or storm damage to your AC unit with photos immediately after the event, even if the system is still running. If the manufacturer later denies a warranty claim citing physical damage, having timestamped photos showing the state of the unit before and after the storm helps establish the claim timeline with your homeowner’s insurance.

Denver-Specific Warranty Issues: UV and Hail

Denver’s climate creates two warranty challenges that homeowners in other markets don’t face to the same degree:

UV Degradation at 5,280 Feet

Denver’s altitude means UV radiation is approximately 25% more intense than at sea level. UV breaks down refrigerant line insulation, plastic cabinet components, fan blade tips, and — most critically — capacitors. Capacitors are the most UV-sensitive electrical component in your AC system. At Denver’s altitude, capacitor lifespans are often 7–10 years instead of the 10–15 years typical in lower-UV environments.

Denver UV & Warranty Reality

25%

Higher UV intensity at Denver’s altitude vs. sea level

UV degradation of AC components is a normal wear process — it’s not covered by manufacturer warranty. Denver homeowners should expect to replace capacitors and inspect refrigerant line insulation more frequently than homeowners in lower-UV cities. This is maintenance, not a warranty item.

Hail Damage and the Warranty Gap

This is the most important Denver-specific warranty issue. Denver averages 100+ hail days per year. Hail physically damages AC units — bent fins, damaged fan blades, damaged refrigerant line connections. None of this is covered by the manufacturer’s parts warranty, which excludes external physical damage.

The right coverage for hail damage is homeowner’s insurance, not the HVAC warranty. This creates an important responsibility split for Denver homeowners:

  • Manufacturing defects → Manufacturer parts warranty
  • Hail and physical damage → Homeowner’s insurance
  • Labor on warranty repairs → Contractor labor warranty (for first 1–2 years)
  • Normal wear and consumables → Your maintenance budget

Extended Warranty: Is It Worth It?

The honest answer: it depends on who’s selling it and what it actually covers. Here’s the analysis for Denver homeowners:

A new AC system with a 10-year parts warranty (properly registered) and a 2-year labor warranty means your financial exposure for component failures in years 3–10 is limited to diagnostic and labor costs — usually $89–$400 per repair. The parts are covered.

An extended warranty that covers labor for years 3–10 has real value if: (1) you have a higher-end system with more expensive components, (2) you’re planning to stay in the home for the full warranty period, or (3) you want financial predictability.

Be cautious about third-party extended warranties from companies you don’t recognize. Third-party warranties have failed to honor claims more frequently than manufacturer or contractor-backed warranties. If you buy an extended warranty, choose one backed by the manufacturer or your installing contractor.

The best “extended warranty” for Denver homeowners is often a multi-year maintenance agreement with your HVAC contractor. For $149–$250 per year, you get annual professional maintenance (which catches developing problems before they become warranty claims) plus often a labor discount on any repairs needed. Maintenance prevents more failures than any warranty covers.

AC Manufacturer Warranty Comparison (2026)

AC brands with different warranty terms available in Denver
Different AC manufacturers offer different warranty terms — registration requirements and coverage details vary significantly.
Brand Base Parts Warranty Registered Parts Warranty Compressor
Carrier 5 years 10 years 10 years (registered)
Lennox 5 years 10 years 10 years (registered)
Trane 5 years 12 years 12 years (registered)
Rheem 5 years 10 years 10 years (registered)
Goodman 5 years 10 years Lifetime (registered)
Daikin 5 years 12 years 12 years (registered)

Note: Warranty terms are subject to change. Always verify current warranty terms with your contractor at time of purchase. All brands require registration within 60–90 days for the extended warranty to apply.

Real Case: Westminster Homeowner, March 2025

A Westminster homeowner’s 8-year-old Carrier compressor failed during an unexpected March warm snap. They expected the 10-year warranty to cover a compressor replacement worth $1,800. When we pulled the unit history, the original contractor had never registered the warranty — the homeowner had only a 5-year base warranty, not the 10-year registered warranty. At 8 years, the warranty had expired. Total out-of-pocket: $1,800. Had the unit been registered at install, the compressor would have been a covered part. We now provide warranty registration confirmation in writing to every installation customer the same day as installation.

Schedule Online

Frequently Asked Questions

How long is a typical AC warranty?

Most major AC brands offer 10-year parts warranties when registered within 60–90 days of installation. Without registration, the base warranty is typically 5 years. Trane and Daikin offer 12-year registered warranties. Goodman offers a lifetime compressor warranty with registration. The contractor labor warranty — which covers labor costs for warranty repairs — is separate and varies: we provide 2 years. Always verify the specific warranty terms for your brand and model at time of purchase.

Does hail damage void my AC warranty in Denver?

Hail damage itself doesn’t void your warranty — but it’s not covered by it either. Manufacturer parts warranties exclude damage from external physical causes including hail. Your homeowner’s insurance covers hail damage to AC equipment. The concern is secondary: if significant hail damage to your condenser coil (bent fins, reduced airflow) causes compressor overheating and eventual failure, the manufacturer may deny the compressor warranty claim by attributing the failure to the physical damage. Document hail events immediately with photos.

What happens if I don’t register my AC warranty?

Without registration within the manufacturer’s deadline (typically 60–90 days), you get only the base warranty — usually 5 years instead of 10. At year 6, 7, or 8 when major components like the compressor are most likely to fail, you’d have no parts coverage. The extended warranty is often worth $1,000–$3,000 in covered components over the warranty period. Registration is free and takes 5 minutes. We do it for every customer on installation day.

Does annual maintenance affect my AC warranty?

It can, in two ways. First, some extended warranty contracts and certain manufacturers explicitly require documented annual professional maintenance to maintain coverage. Second, even where not required, a manufacturer can deny a warranty claim by citing “failure due to lack of maintenance” if they find evidence of a severely dirty coil, seized blower, or other obvious neglect issues. Annual maintenance keeps your system healthy and your warranty defensible.

Is an extended warranty worth buying for a Denver AC system?

For most Denver homeowners with a 10-year parts warranty, an extended warranty primarily covers labor costs in years 3–10. Given our diagnostic fee of $89 and typical repair labor of $100–$250, you’d need multiple repairs during that window to break even. A contractor-backed maintenance agreement ($149–$250/year) often provides better value — it prevents failures through annual maintenance while including labor discounts on any repairs. If you choose an extended warranty, buy it from the manufacturer or your installing contractor, not a third party.

Does Denver’s altitude affect my AC warranty?

Altitude doesn’t directly affect warranty terms, but it does affect component wear rates in ways relevant to warranty planning. Denver’s higher UV radiation (about 25% more intense than sea level) accelerates capacitor degradation — capacitors typically last 7–10 years in Denver vs. 10–15 years in lower-UV areas. Capacitors are a covered warranty item. More importantly, if your AC was improperly charged for altitude (common with out-of-state contractors unfamiliar with Denver), the resulting compressor stress could lead to premature failure that manufacturers may attribute to improper installation rather than defect.

Schedule Online

Licensed & Insured • ICC Certified • EPA 608 Universal


Call (303) 351-1667

How Long Does AC Installation Take? (Denver HVAC Timeline)

Written by Lance Fredrickson — ICC Certified HVAC Specialist | EPA 608 Universal

20+ years serving the Denver metro • Blue Collar Heating & Air, Northglenn CO

AC installation crew setting up outdoor condenser unit in Denver
A standard AC replacement installation in Denver takes 4–8 hours for an experienced crew.

You’ve agreed on a price, picked your equipment, and now you’re wondering: how disruptive is install day going to be? Will you need to take a full day off work? Will you be without AC overnight? Is the crew going to be in and out of your house all day?

These are completely reasonable questions, and the answers depend on what type of installation you’re getting. Here’s the honest breakdown of what to expect for every AC installation scenario in Denver.

⚡ Quick Answer: Denver AC Installation Timeline

  • Straight swap (same location, same configuration): 4–6 hours
  • New installation with existing ductwork: 6–8 hours
  • New installation with new ductwork: 1–2 days
  • Mini split installation (1 zone): 4–6 hours
  • Electrical panel upgrade required: Add 2–4 hours or a second day
  • Permit inspection required: Usually within 3–10 business days after install
  • You can use the AC immediately after installation — no waiting period required

What Affects AC Installation Time

The range between a 4-hour and a 2-day installation is significant. These are the factors that determine where your project falls:

Factor 1: Replacement vs. New Installation

Replacing an existing AC is significantly faster than a first-time installation. With a replacement (swap), the pad, disconnect, line set, and often the ductwork connections are already in place. The crew removes the old unit, installs the new one, connects everything, pressurizes and charges the system, and commissions it. That’s the 4–6 hour scenario.

A first-time installation (new home, or adding AC to a previously uncooled home) requires running a new refrigerant line set, installing the concrete pad, pulling wire from the electrical panel, installing a new disconnect box, and connecting to the duct system — often double the time.

Factor 2: Equipment Access

Indoor unit access matters. An air handler in a main-floor closet is easy to reach. An attic air handler in a Denver home with a pull-down stair and 140°F July heat involves multiple trips up a ladder with equipment in brutal conditions — add an hour or two to the timeline. Basement air handlers are usually the easiest.

Factor 3: Electrical Upgrades

Older Denver homes (pre-1990s) sometimes have electrical panels without an available 240V circuit for a new AC system. If you need a breaker added or the panel is already at capacity, an electrician may need to install a sub-panel or upgrade service — this typically requires a separate appointment or adds a full day to the timeline.

Factor 4: Line Set Replacement

Copper refrigerant line sets can last 20+ years, but if yours shows corrosion, UV damage to the insulation, or was sized for an older refrigerant type (R-22 vs. modern R-410A or R-32), replacement is required. Running new copper line set through walls or across the home adds 1–2 hours to the installation.

Denver Install Considerations

4–8h

Typical standard AC installation time in Denver

Denver’s altitude requires that technicians use altitude-corrected refrigerant charging procedures — atmospheric pressure at 5,280 feet affects refrigerant measurements. A properly certified Denver HVAC contractor will account for altitude in the charging process. This is one reason why choosing an experienced local contractor matters for correct system performance.

Step-by-Step: What Happens on Install Day

Here’s exactly what we do during a standard AC replacement installation in Denver:

7:30–8:00 AM

Arrival, Protection, and Prep

Crew arrives, does a walkthrough with homeowner, lays drop cloths and floor protection, and sets up staging area near the outdoor unit. Confirm access to electrical panel and attic/closet for indoor unit.

8:00–9:00 AM

Old System Recovery and Removal

EPA-certified technician recovers refrigerant from the old system into recovery tank (required by law — refrigerant cannot be vented to atmosphere). Disconnect electrical at the outdoor unit. Remove old outdoor unit and set aside for disposal. If replacing indoor coil or air handler: remove and set aside indoor components.

9:00–11:00 AM

New Equipment Installation

Set new outdoor unit on existing pad or new pad. Reconnect electrical connections at the new disconnect box. Install new indoor coil or air handler. Connect refrigerant line set (clean and inspect connections, replace if needed). Connect condensate drain line.

11:00 AM–12:00 PM

Pressure Test and Evacuation

Pressurize the refrigerant system with nitrogen to check for leaks. Evacuate the line set with a vacuum pump to remove moisture and air — a proper evacuation takes 45–90 minutes minimum. This step is skipped by corner-cutting contractors and is the leading cause of early compressor failure. We do not skip it.

12:00–1:00 PM

Charging, Commissioning, and Testing

Charge the system with the correct refrigerant type and quantity (altitude-corrected for Denver’s 5,280 feet). Power up the system and verify operation: measure supply and return air temperatures, verify thermostat operation, check all electrical connections under load, confirm condensate drain is flowing.

1:00–1:30 PM

Cleanup and Walkthrough

Remove all materials, haul away the old equipment (included in our installation price), and do a walkthrough with the homeowner covering: how to operate the new system, what the thermostat warranty covers, when to expect the permit inspection, and when to schedule the first maintenance visit.

HVAC crew performing professional AC installation in Denver home
A proper installation includes a full system pressure test, evacuation, and altitude-corrected refrigerant charge — don’t accept shortcuts.

Denver Permit Requirements for AC Installation

This is where Denver homeowners sometimes get surprised. Colorado requires a mechanical permit for AC installations — both replacements and new installs. The permit requirement serves an important purpose: it ensures the installation is inspected by a licensed city inspector who verifies the work meets code.

Here’s what the permit process looks like in Denver and surrounding municipalities:

  • Permit pulled by contractor: We pull the mechanical permit before installation day. This is included in our installation price.
  • Installation proceeds: We install the system and perform our own quality checks.
  • Inspection scheduled: After installation, we request an inspection from the city. This typically occurs 3–10 business days after install, depending on the municipality and season.
  • You can use the system before inspection: You don’t need to wait for the inspection to start using your AC. The inspection is a quality verification, not a condition of use.
  • Inspection result: The inspector verifies permit compliance — proper line set, correct electrical, adequate clearances, correct equipment type for the location.
Beware contractors who don’t pull permits. An unpermitted installation means no inspection, no code compliance verification, and potential homeowner’s insurance issues if the system is involved in a claim. Some contractors offer to skip permits to reduce their paperwork — this protects them, not you. Always ask for confirmation the permit will be pulled.

What to Do on Install Day

  • Ensure the electrical panel is accessible (clear space around the panel box)
  • Clear a path from the front door to the indoor unit location — drop cloths help but avoid obstacles
  • Move pets to another area of the home or another location — crew will be going in and out repeatedly
  • Keep children away from the work areas, especially the outdoor unit area
  • Have your old equipment model and serial number available (for warranty transfer paperwork if applicable)
  • Be available for a 15-minute walkthrough at the end to learn your new system’s operation
  • Ensure the attic access is clear if that’s where your indoor unit lives
Blue Collar Heating and Air installation team arriving at Denver home
Our installation crew arrives with all equipment and materials — no surprises, no extra trips to the supply house mid-job.

Questions to Ask Your HVAC Contractor Before Installation

Ask every contractor these questions before signing anything:

  1. “Will you pull a mechanical permit?” Answer should be: Yes, always. Walk away from anyone who says permits aren’t needed.
  2. “Will you perform a proper evacuation?” Proper evacuation takes 45–90 minutes with a micron gauge confirmation. If the answer is “we just sweep the lines,” that’s a red flag.
  3. “How do you account for Denver’s altitude in the refrigerant charge?” A knowledgeable contractor will reference altitude-corrected target superheat and subcooling values.
  4. “What does equipment disposal include?” Old equipment removal should be included — clarify this upfront.
  5. “What warranty is included on labor?” Manufacturer warranties cover parts; ask specifically about the contractor’s labor warranty (we provide a 2-year labor warranty on all installations).
  6. “What does the quote include — and exclude?” Make sure you understand what’s not in the price: electrical upgrades, new line set, concrete pad, etc.

Real Installation: Brighton Home, June 2025

A Brighton homeowner replaced a 16-year-old Carrier with a new Carrier Infinity two-stage system. The installation was straightforward — existing pad, existing line set in good condition, main-floor utility closet for the air handler. We arrived at 7:30 AM. The old refrigerant was recovered, old equipment removed, new outdoor unit set, new air handler installed, system evacuated and charged (altitude-corrected charge for Brighton’s ~5,000-foot elevation), thermostat programmed, and walkthrough completed by 1:15 PM. Homeowner was cooling their home by 1:30 PM. Total install time: 5 hours 45 minutes for two technicians.

Schedule Free Estimate

Frequently Asked Questions

How long does it take to replace an AC unit?

A standard AC replacement (same location, existing ductwork in place) in Denver takes 4–6 hours for an experienced two-person crew. This includes refrigerant recovery from the old unit, equipment removal, new unit installation, proper evacuation, altitude-corrected refrigerant charge, and commissioning. More complex jobs (new line set, electrical work, attic access) take 6–8 hours.

Can I use my AC the same day it’s installed?

Yes, immediately. Once we complete the installation, commission the system, and verify everything is operating correctly, you can begin using it right away. You don’t need to wait for a permit inspection — inspections are scheduled after installation and don’t require the system to be off.

Does AC installation require a permit in Denver?

Yes. Denver and all surrounding Colorado municipalities require a mechanical permit for AC installations — both replacements and new installs. A reputable contractor will pull the permit as part of the installation package. After installation, a city inspector visits (typically within 3–10 business days) to verify the work meets code. You can use the system while awaiting inspection.

What can delay an AC installation?

Common delays: unexpected electrical issues (older panel needs a new circuit or sub-panel), corroded refrigerant line set that needs replacement, attic access problems in Denver’s extreme summer heat requiring extra time for safety breaks, or discovered ductwork issues that need addressing before the new system connects. We identify most potential issues during the pre-installation assessment visit and communicate them before install day.

Does Denver’s altitude affect how long the installation takes?

Slightly. The refrigerant charging process at Denver’s 5,280-foot altitude requires altitude-corrected target values — a knowledgeable technician will spend extra time confirming proper superheat and subcooling against altitude-adjusted charts rather than standard sea-level specs. This adds maybe 20–30 minutes to the commissioning process but is essential for correct system performance. Rushing this step is a common cause of premature compressor failure.

Schedule Online

2-year labor warranty • Licensed & Insured • ICC Certified
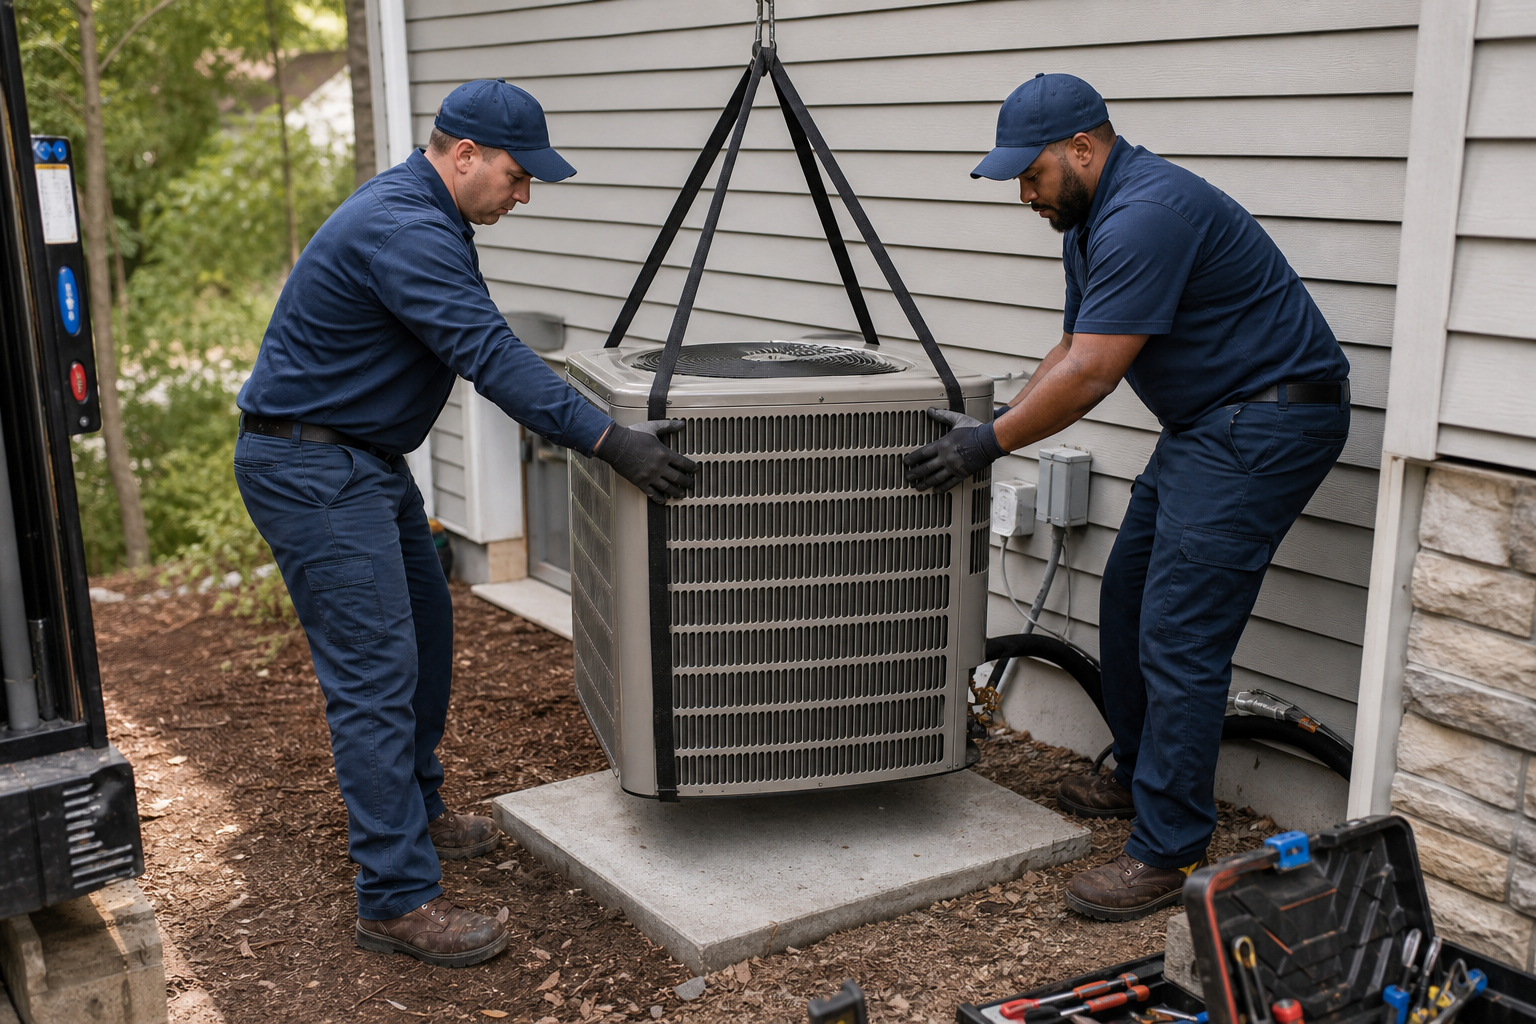


Call (303) 351-1667

Family-Owned, Community-Trusted

Verified On

Not ready to call? We'll reach out to you.

Fill out the form and we'll get back to you as soon as possible during business hours. Free quote, no obligation.

Family Owned Licensed & Insured Same-Day Service

    Call Now Schedule